
How to ensure bookings are up to date in Clearing?
Learn how to refresh bookings effortlessly within Clearing with our comprehensive knowledge article. Streamline your reservation management and ensure data accuracy today!
May 6, 2024
Corey
%20(1).png)
Refreshing bookings is a crucial aspect of property management, ensuring that all reservations and availability data are up-to-date and accurate. However, navigating through various booking refresh options within Clearing can be daunting without proper guidance. In this knowledge article, we will walk you through three different scenarios: refreshing a specific booking, refreshing bookings of a specific listing, and refreshing bookings across all listings.
By mastering the refresh booking feature in Clearing, property managers can maintain the integrity of their reservation data with ease and efficiency. This empowers them to stay organized, prevent double bookings, and provide better service to guests and homeowners alike.
How to refresh bookings within Clearing?
1. Refreshing a Specific Booking
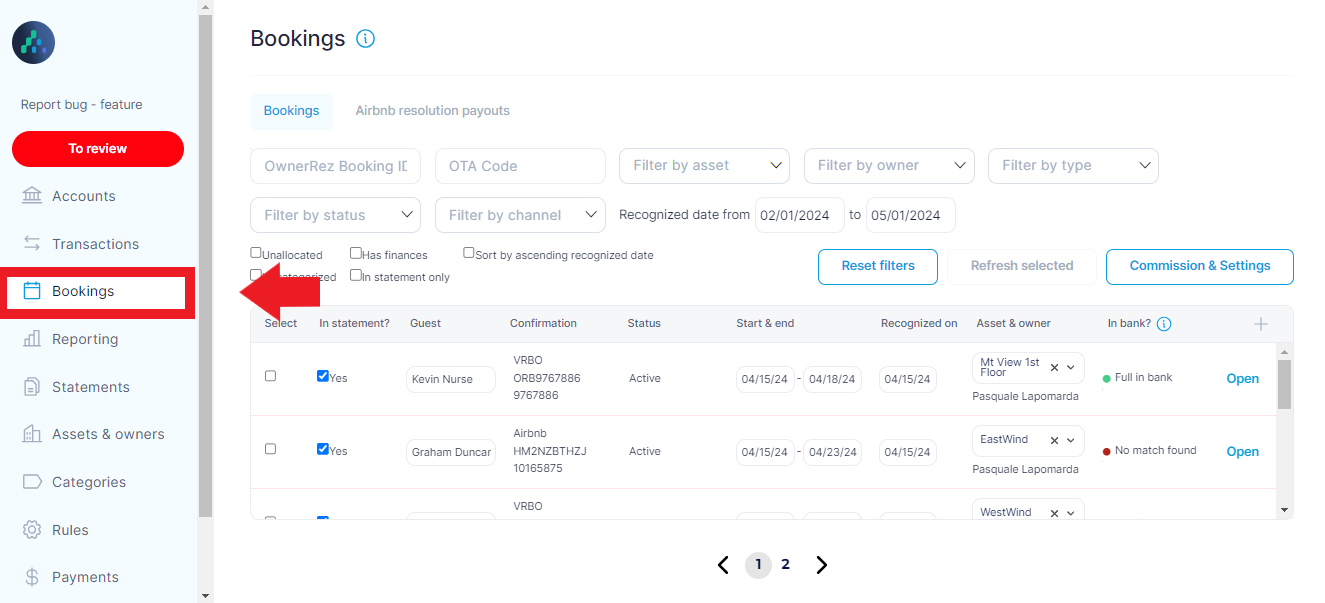
Step 1.1: Access the Bookings Section in Clearing
Log into your Clearing account and navigate to the "Bookings" section in the side menu.
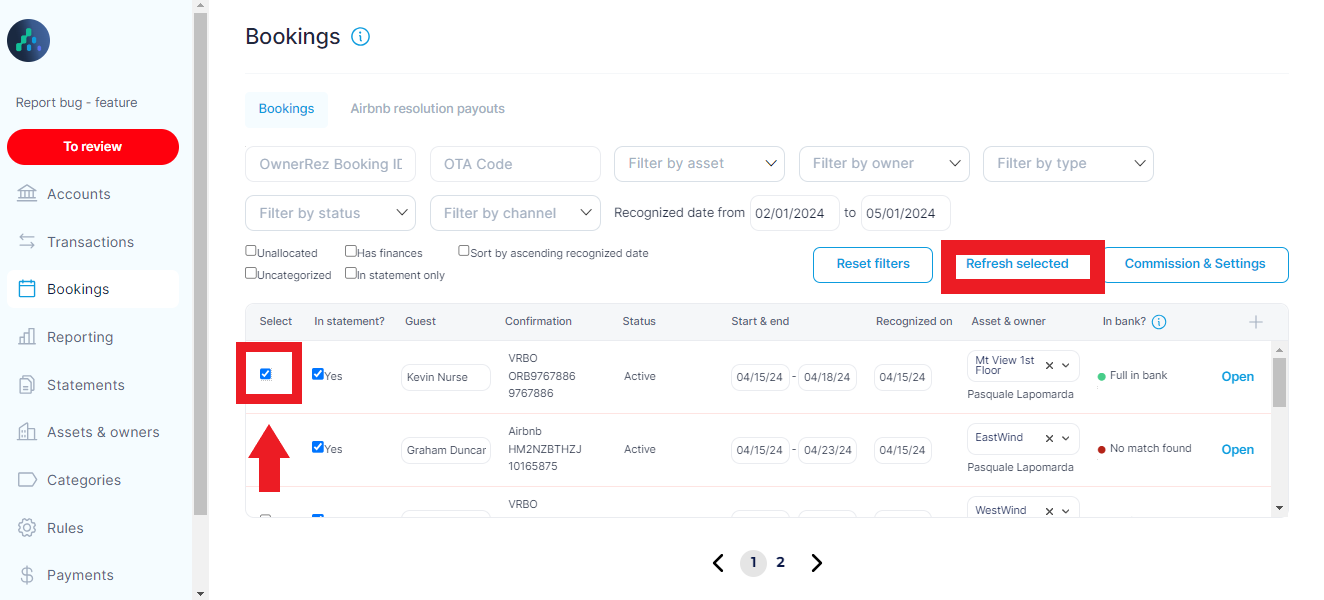
Step 1.2: Initiate refreshing
Select the specific booking that needs to be refreshed. Click on the "Refresh Selected" button to update the booking information.
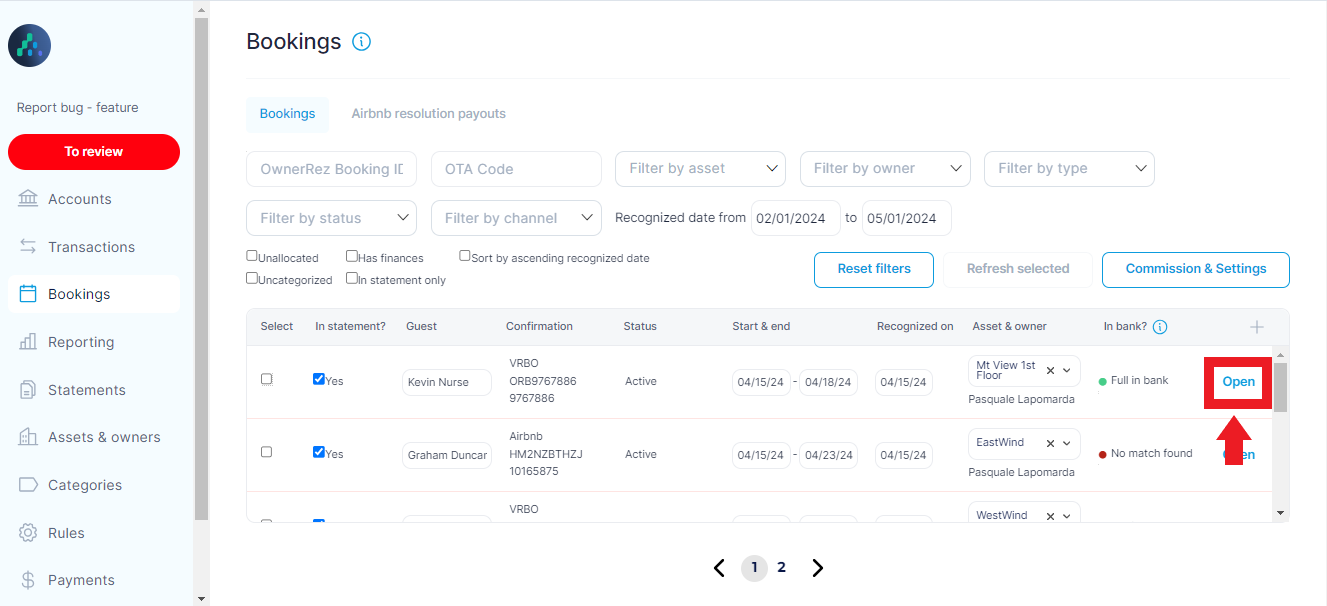
Alternatively, you can open the booking details of a specific booking by choosing “Open” option inline with each booking.
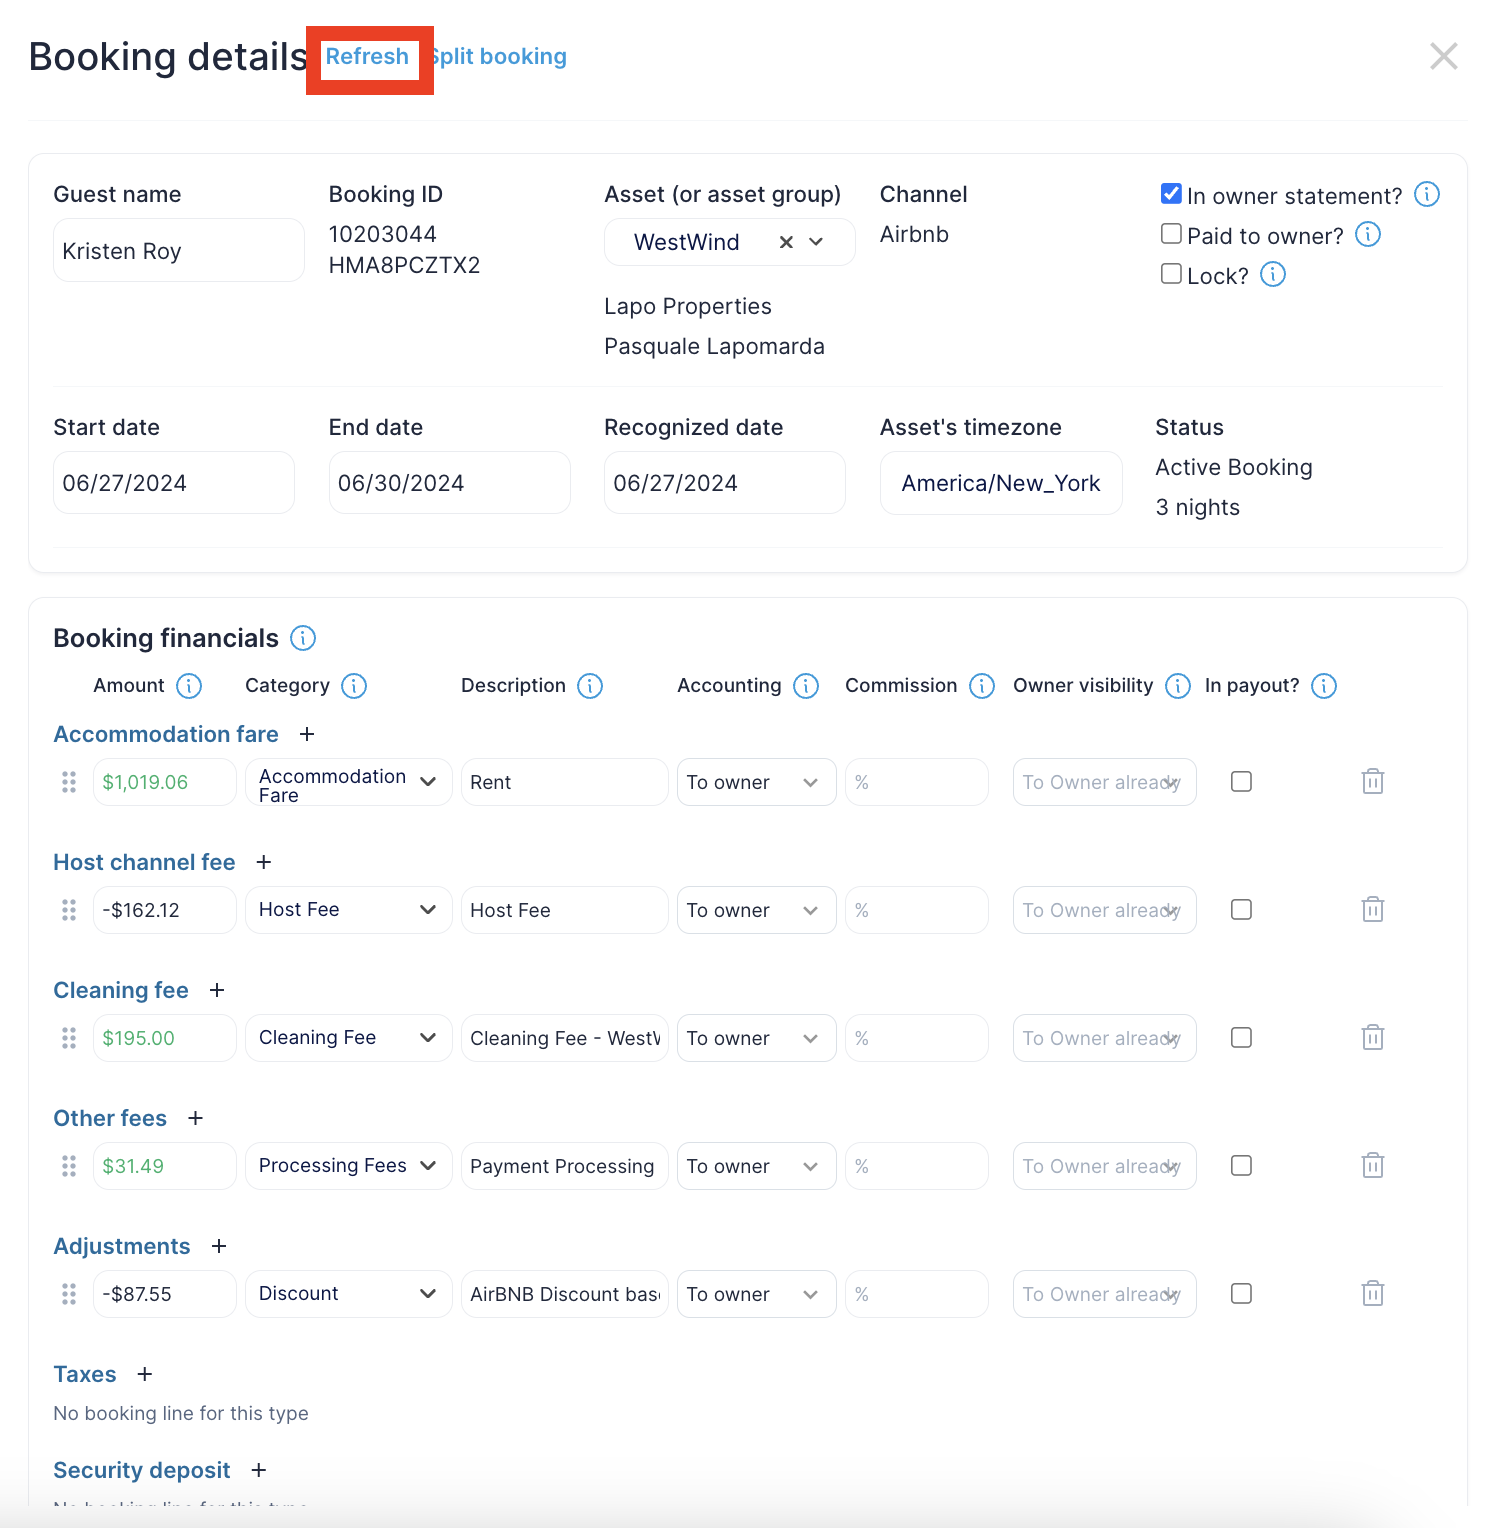
Here click on the "Refresh" option located at the top of the page to refresh the selected booking.
2. Refreshing Bookings of a Specific Listing
Step 2.1: Access the Assets & Owners Section in Clearing
Log into your Clearing account and go to the "Assets & Owners” section in the side menu.
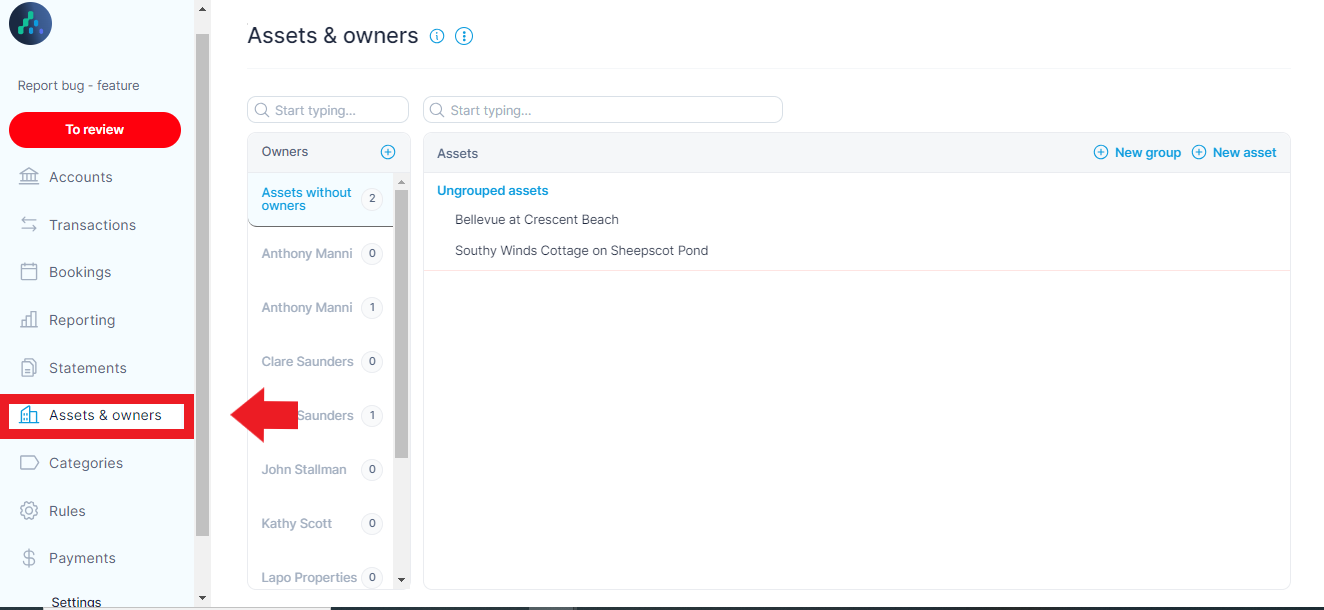
Step 2.2: Initiate refreshing
Select the specific listing for which you want to refresh bookings.
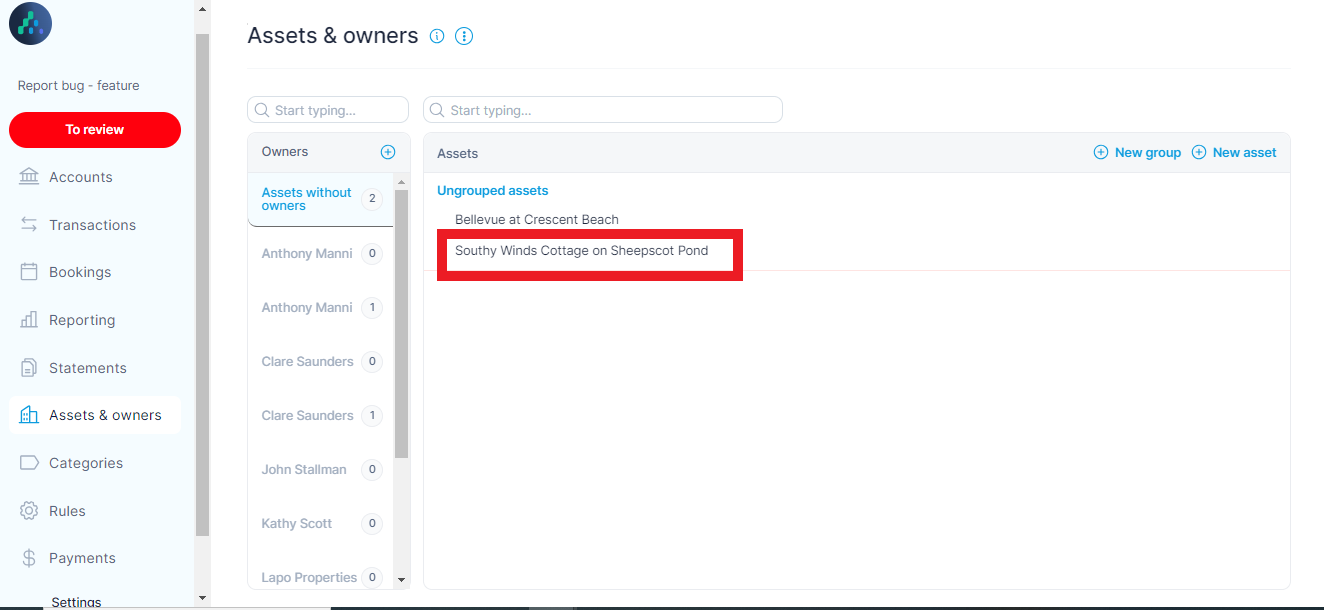
Scroll down to the refresh bookings section of the listing details. Click on the "Refresh Asset Bookings" button. Choose the desired timeframe for refreshing bookings, either for the last 60 days or up until January 1st.

3. Refreshing Bookings Across All Listings
Step 3.1: Access the Integrations Section in Clearing
Log into your Clearing account using your credentials and click “settings” in the bottom left of the platform and then select “Integrations”.

Step 3.2: Initiate refreshing
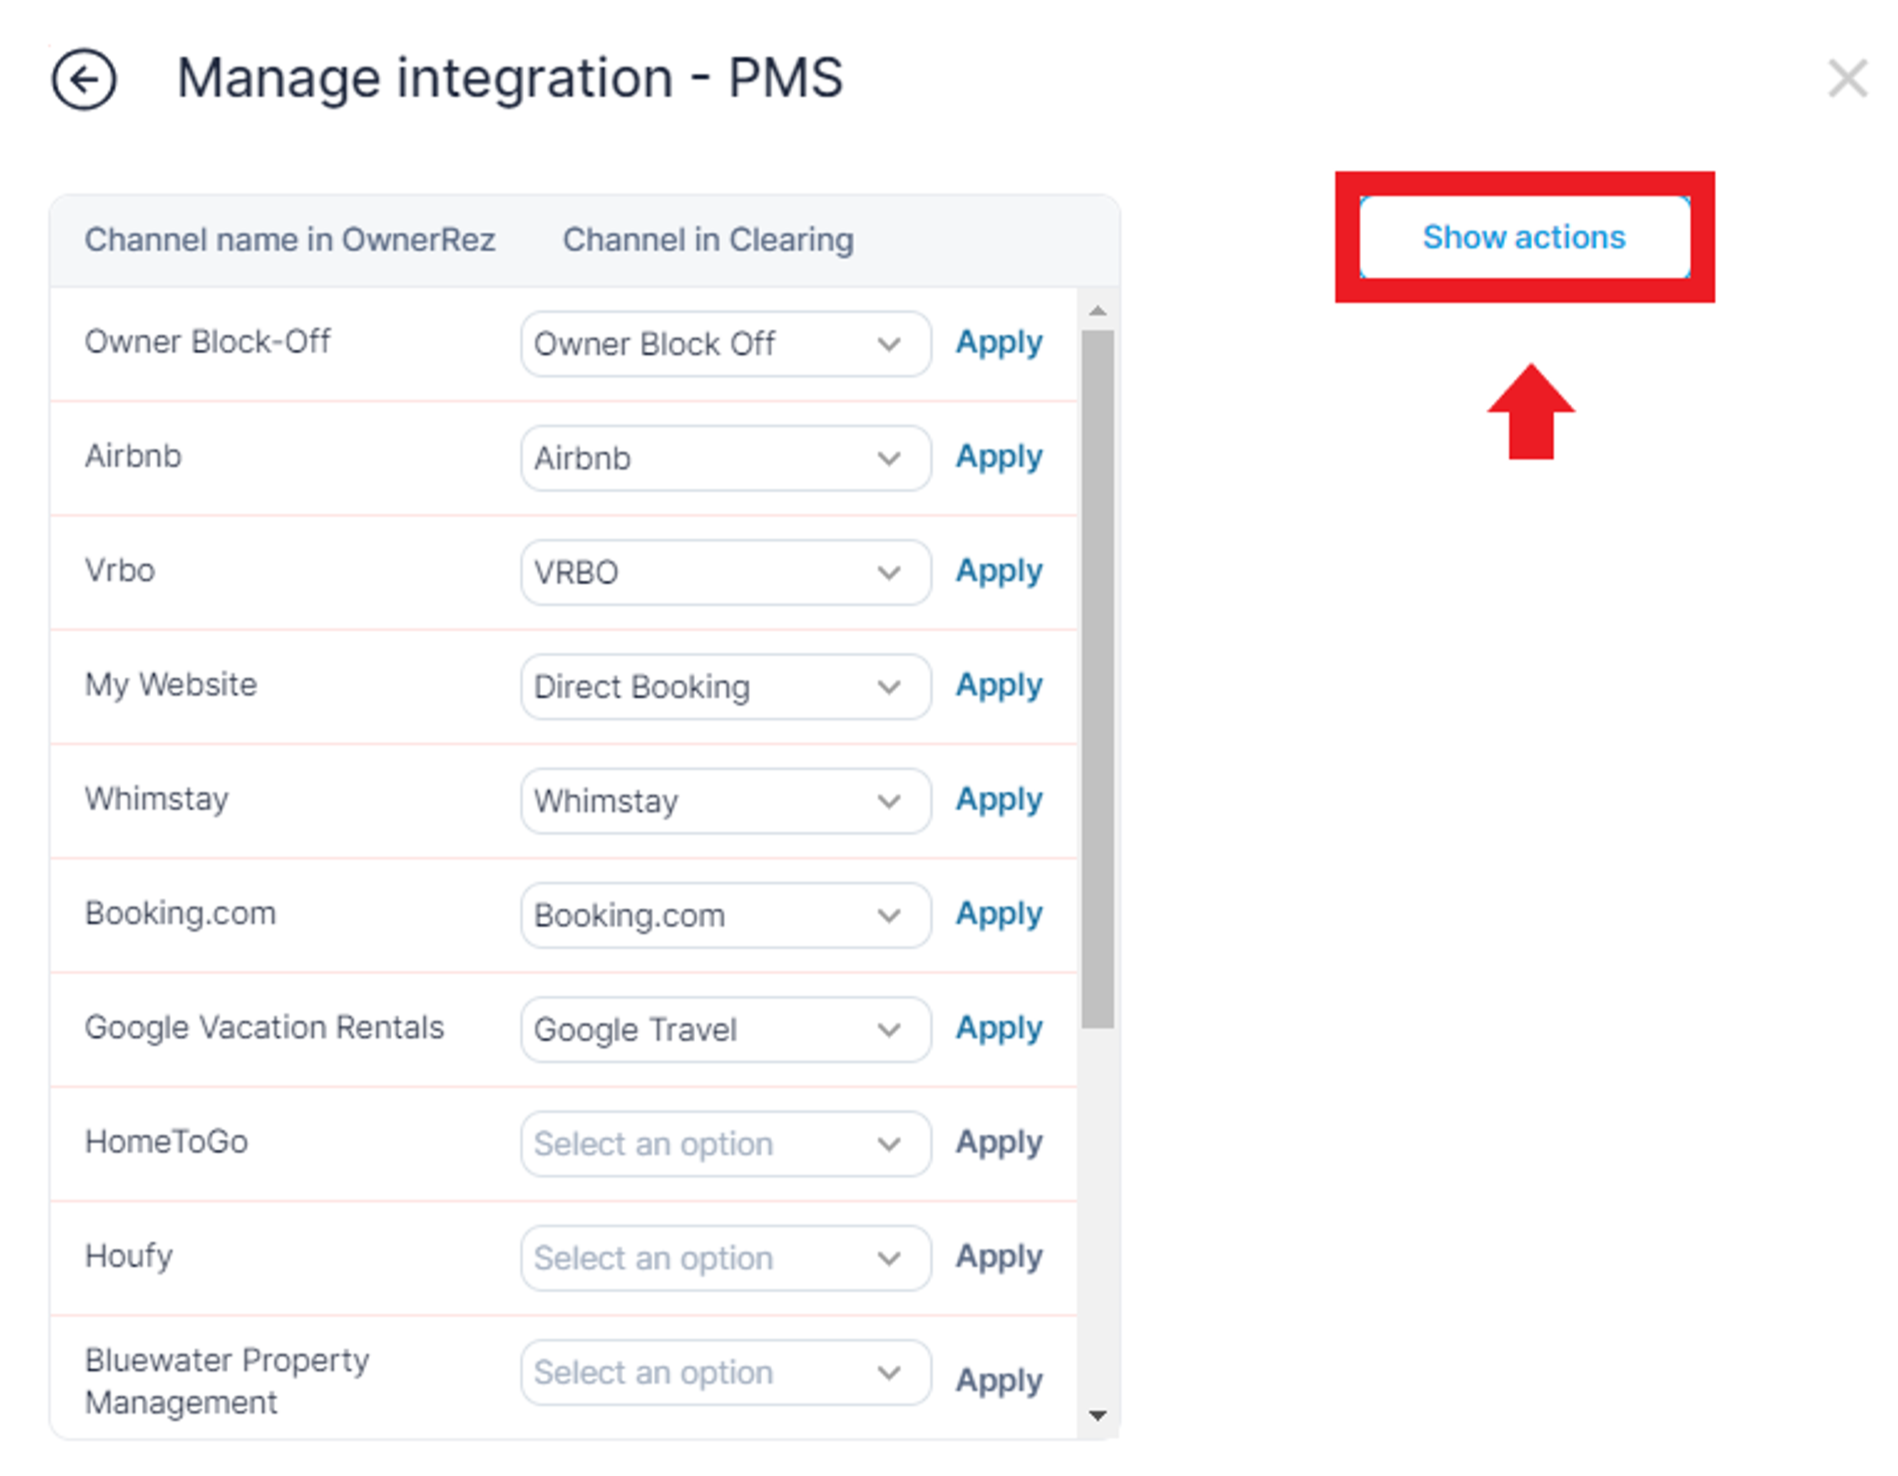
Within the "Integrations" interface click on "Manage Integrations" option, depending on the property management software used (ie. "Manage OwnerRez Integration" for OwnerRez).

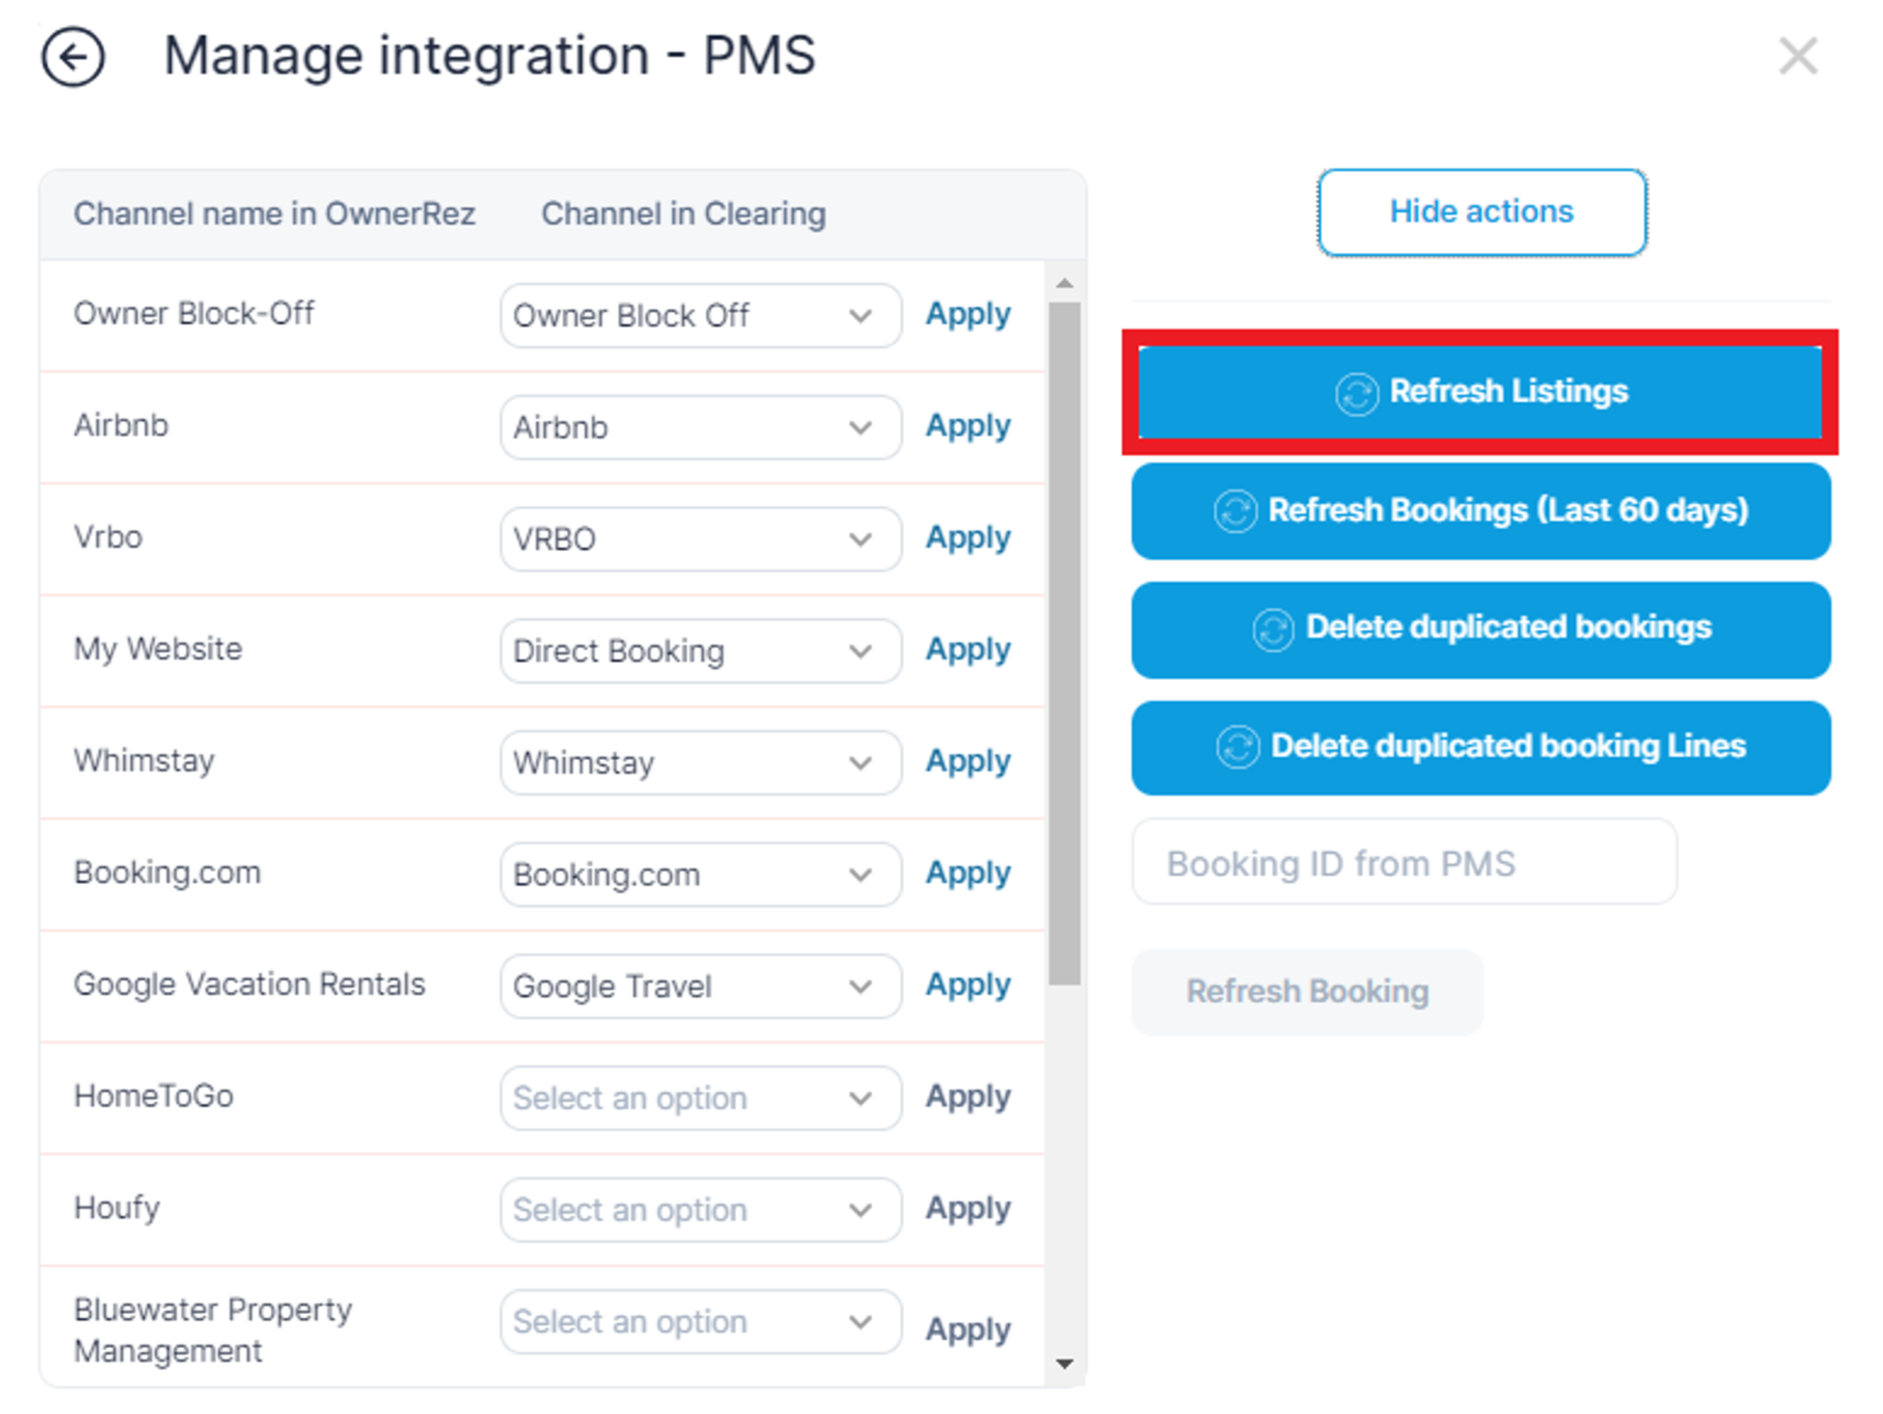
Here click on "Show Actions".
Choose the option “Refresh Listings”.
Effortlessly navigate through the booking refresh process within Clearing, ensuring that your reservation data remains accurate and up-to-date. Say goodbye to double bookings and administrative hassles, and hello to streamlined booking management.
Ready to streamline your booking refresh process and ensure data accuracy in Clearing?
Connect with us for a personalized demo and discover different ways to refresh bookings within Clearing.
Explore our comprehensive knowledge base today to dive deep into Clearing's features and embark on a journey to revolutionize your property management experience.
Clearing is a Financial Technology Company, not a bank.


.png)
.png)


.png)
.png)
.png)
.png)

.png)
.png)
.png)
.png)
%20(1).png)
%20(1).png)
%20(1).png)
.png)
%20(2).png)
%20(1).png)
%20(1).png)
.png)

.png)
.png)
.png)
%20(1).png)
.png)
.png)
.png)
.png)
.png)
.png)
.png)
%20(1).png)
.png)
.png)
.png)
%20(1).png)
%20(1).png)
%20(1).png)


.jpg)
%20(1).png)
%20(1).png)
%20(2).png)
%20(1).png)

%20(1).png)
%20(1).png)
%20(1).png)


%20(1).png)
%20(1).png)
%20(1).png)
%20(1).png)
%20(1).png)


%20(1).png)
%20(1).png)
%20(2).png)
%20(2).png)


%20(2).png)


%20(2).png)
%20(1).png)
.png)


%20(2).png)
%20(2).png)

.jpg)
.png)
.png)