
How to Upload & Manage Expense Receipts in Clearing
Streamline Short-Term Rental expense management operations with document & receipt management in Clearing.
May 17, 2024
Olivia
%20(1).png)
Receipt management is a crucial aspect of financial record-keeping for property managers. Without an efficient system in place, organizing and tracking receipts can become time-consuming and prone to errors. Clearing recognizes these challenges and offers a solution to simplify the receipt upload and management process, ensuring accuracy and efficiency in the overall financial management of property related expenses.
Clearing's receipt management feature revolutionizes the way property managers handle receipts. With advanced parsing capabilities, Clearing automates the extraction of key details from receipts, such as total amounts and individual line items. This automation not only saves time but also reduces the risk of manual errors, ensuring precise financial records. Additionally, Clearing allows users to categorize receipts (based on the chart of accounts), allocate taxes, and split transactions effortlessly, providing comprehensive control over expense management. This is also available through our mobile app, so property managers can take care of their expense bookkeeping at any time, from anywhere in the world.
Simple Steps to Upload and Manage Receipts in Clearing
Step 1: Access Document Management Section in Clearing
Log into your clearing account and navigate to the "Documents" section in the side menu. Select "Receipts" to access the receipt management section, where you can find all the receipts uploaded in the system (whether through the mobile app or web app).

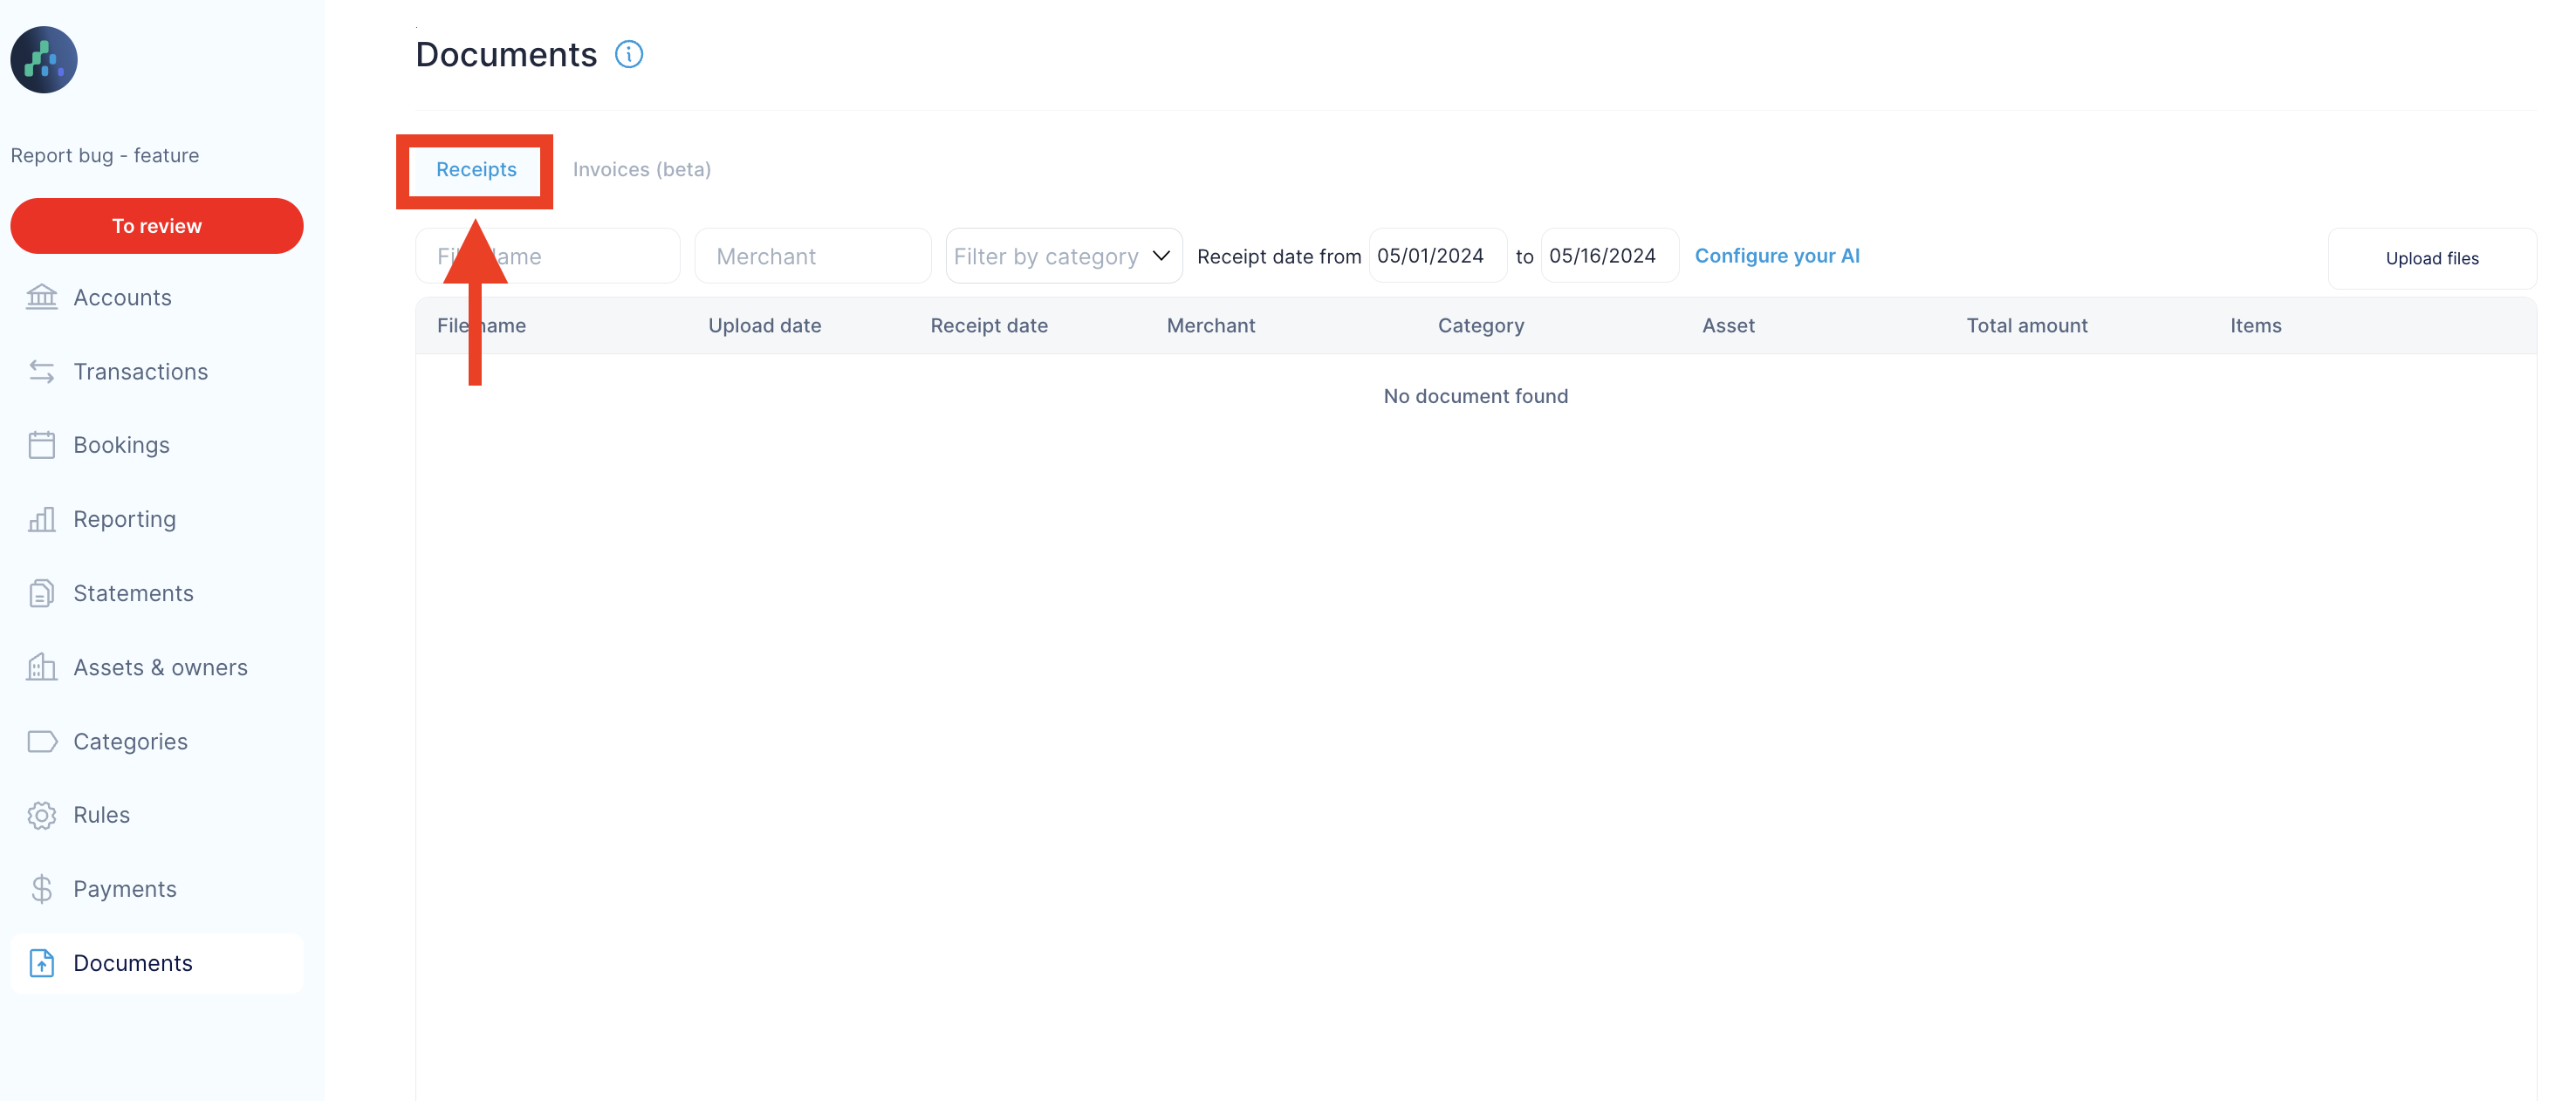
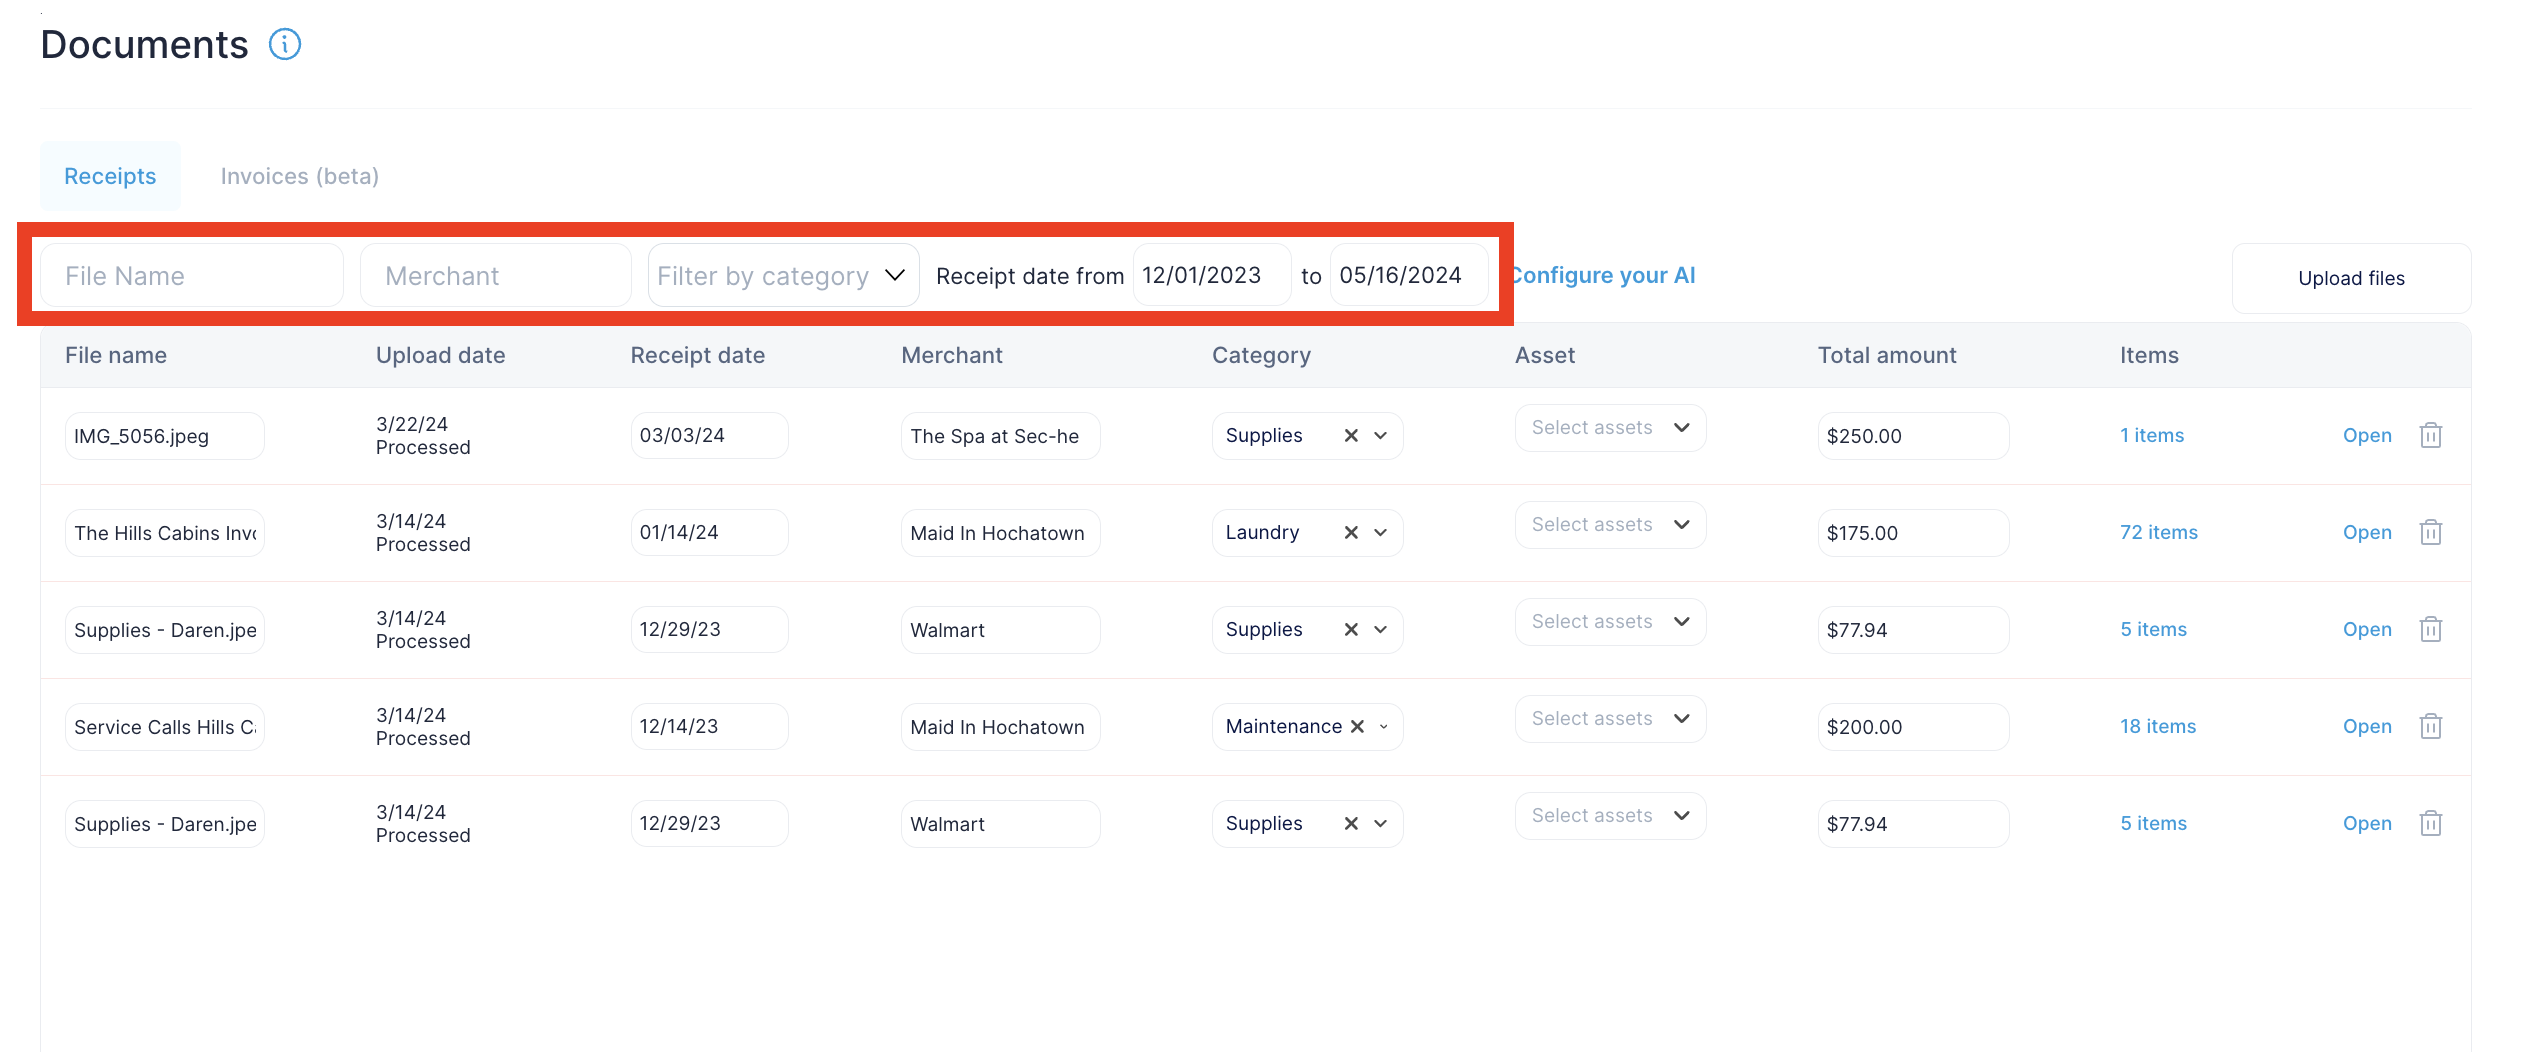
Step 2: Upload Receipts through Web Application
Once in the "Receipts" section of the web application, locate the "Upload files" button and click on it to initiate the process of adding receipts to the Clearing system.

Step 3: Review the Parsed Data
Upon uploading a receipt, Clearing's AI engine will automatically parse through the document, extracting key information such as the total amount, merchant details, and individual line items. Review the parsed data to ensure accuracy, and edit any discrepancies or missing information as needed.
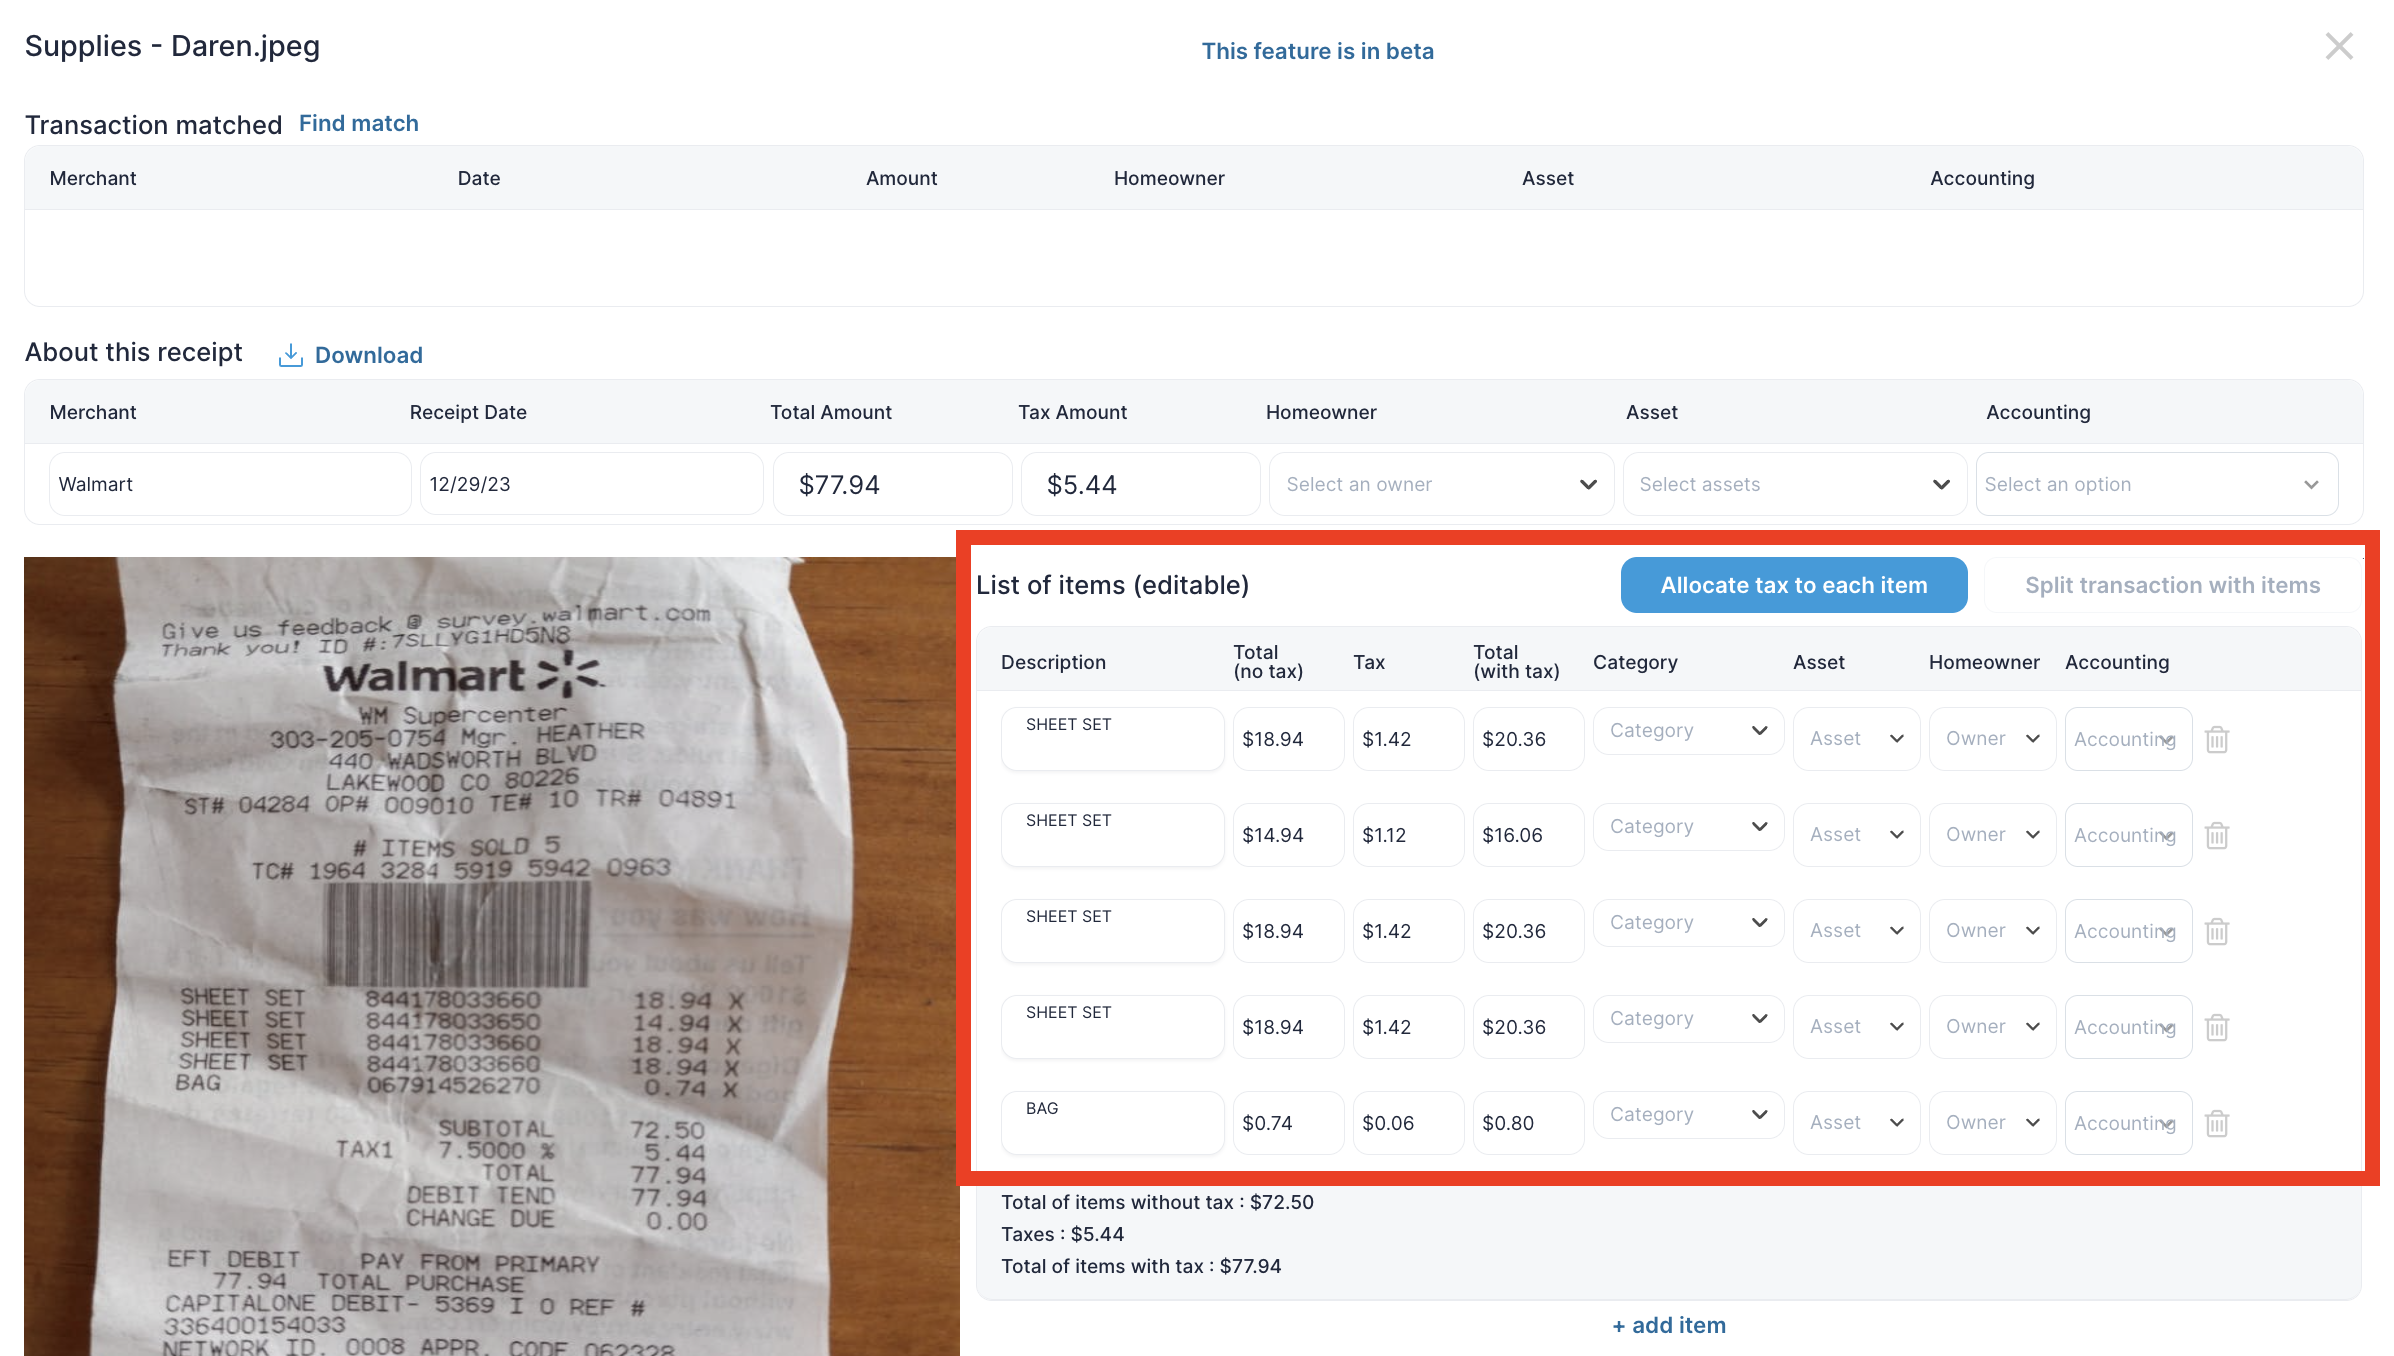
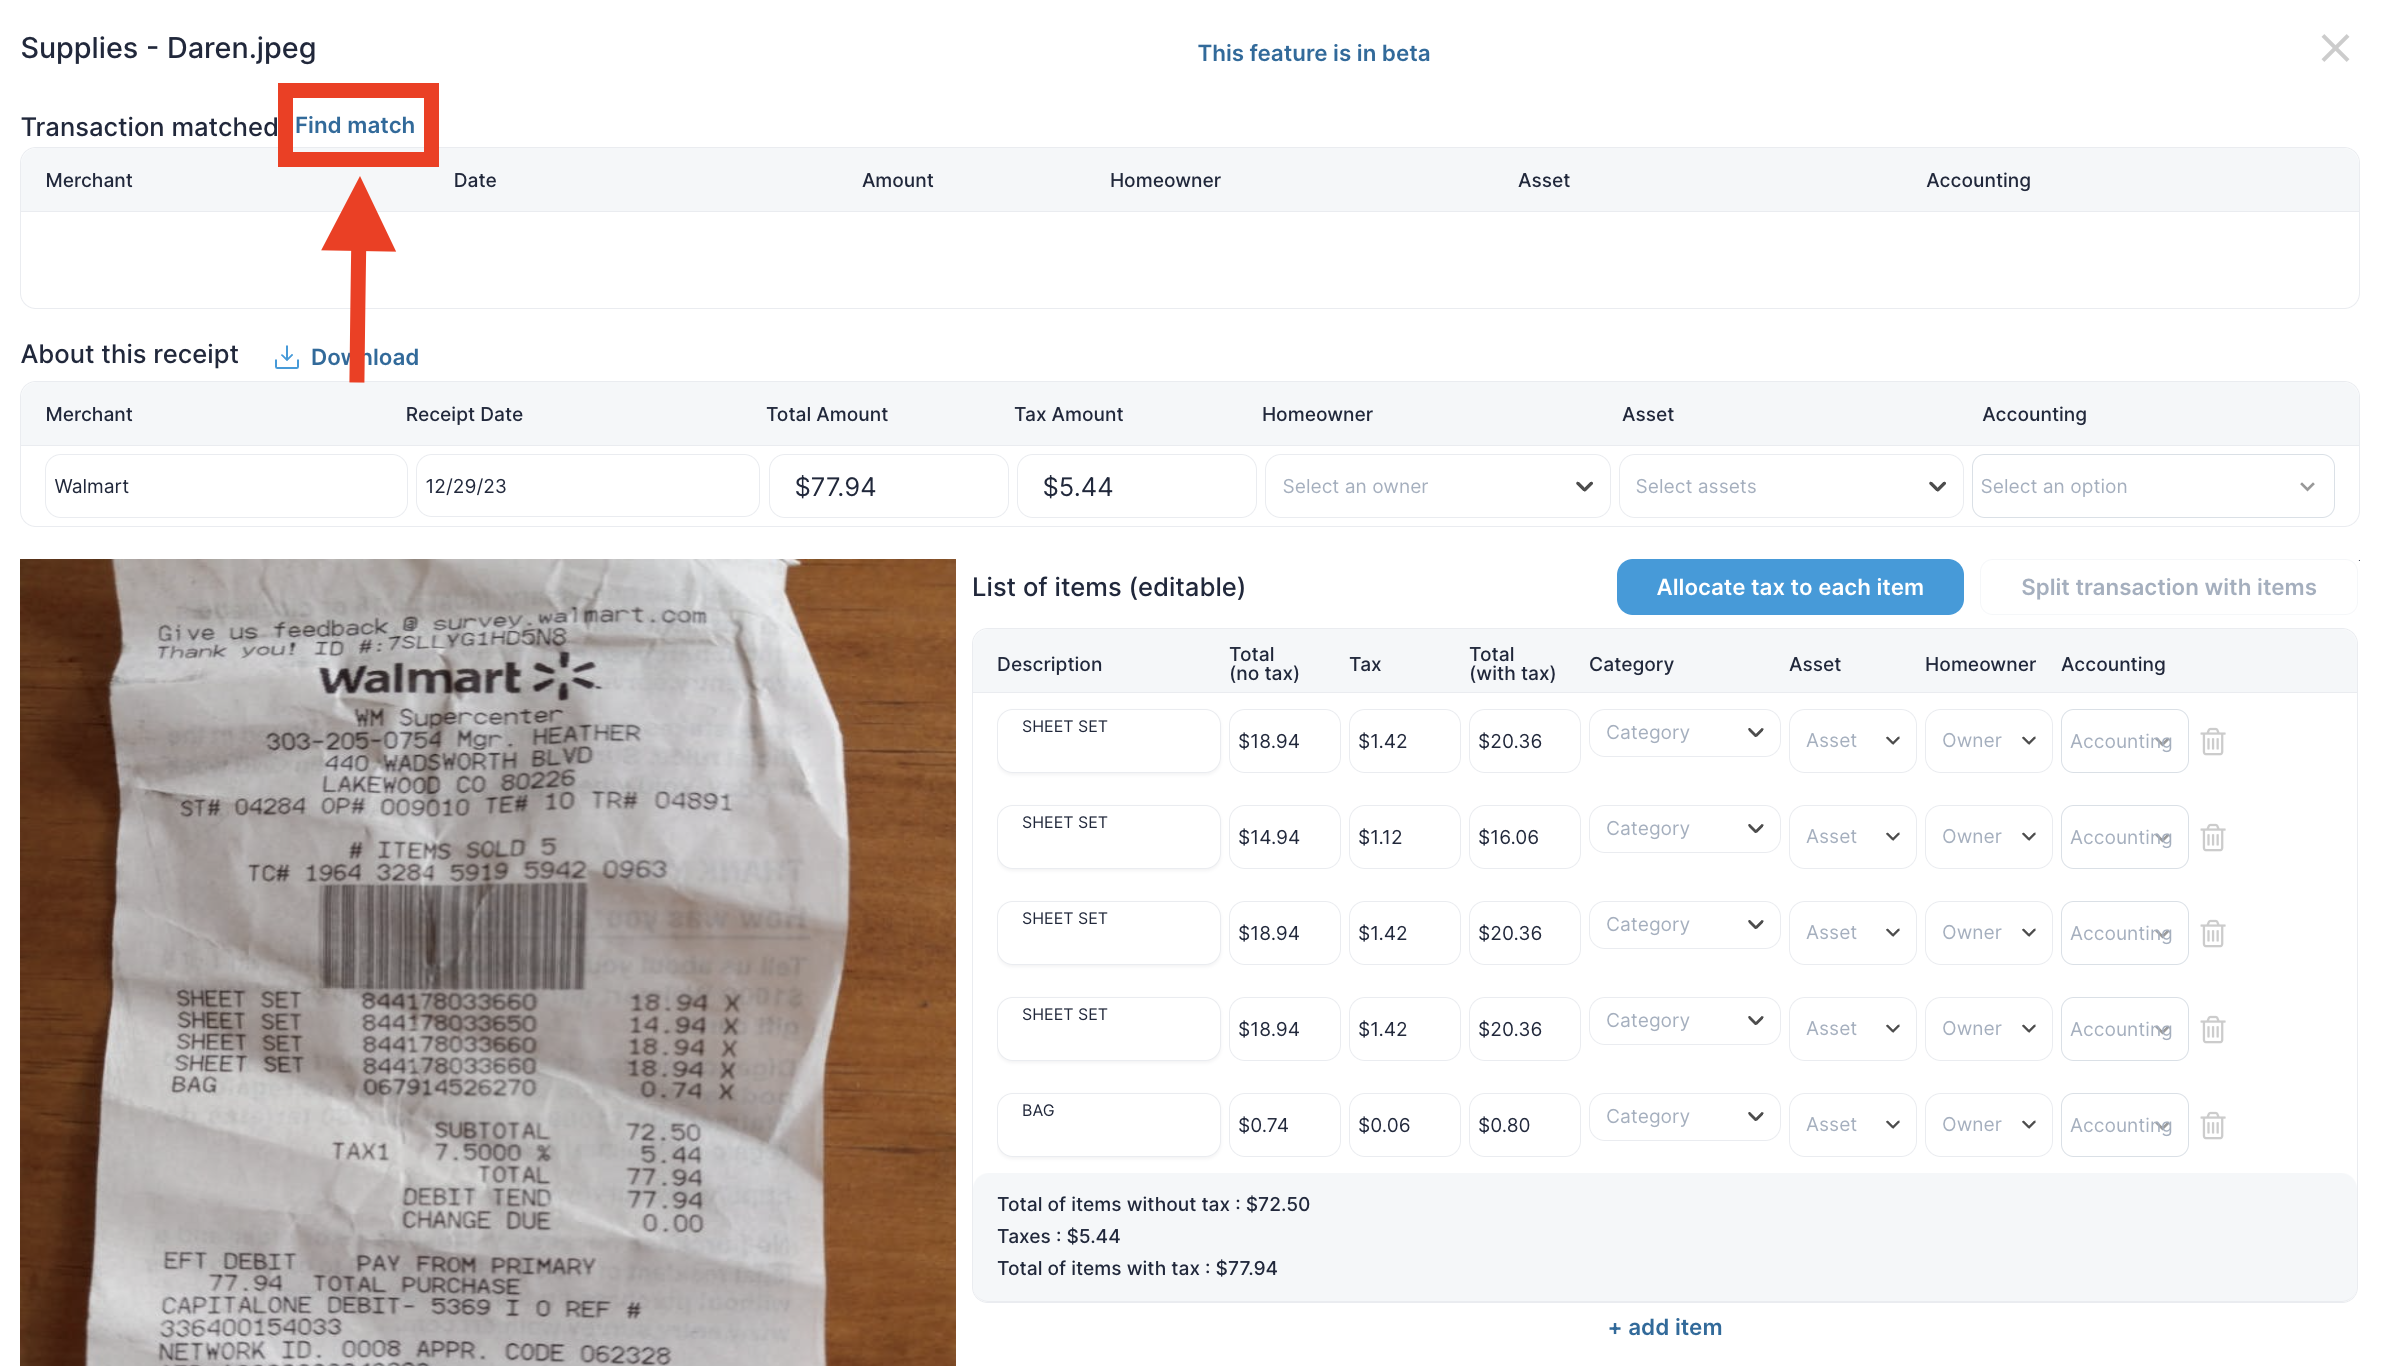
Step 4: Further Itemize or Categorize the Receipt
You can specify each line item based on its Category, Asset, Homeowner, and how it should be billed with our Trust Accounting field. Further, if you need to adjust the tax information, totals, or description details, you can override this as well.

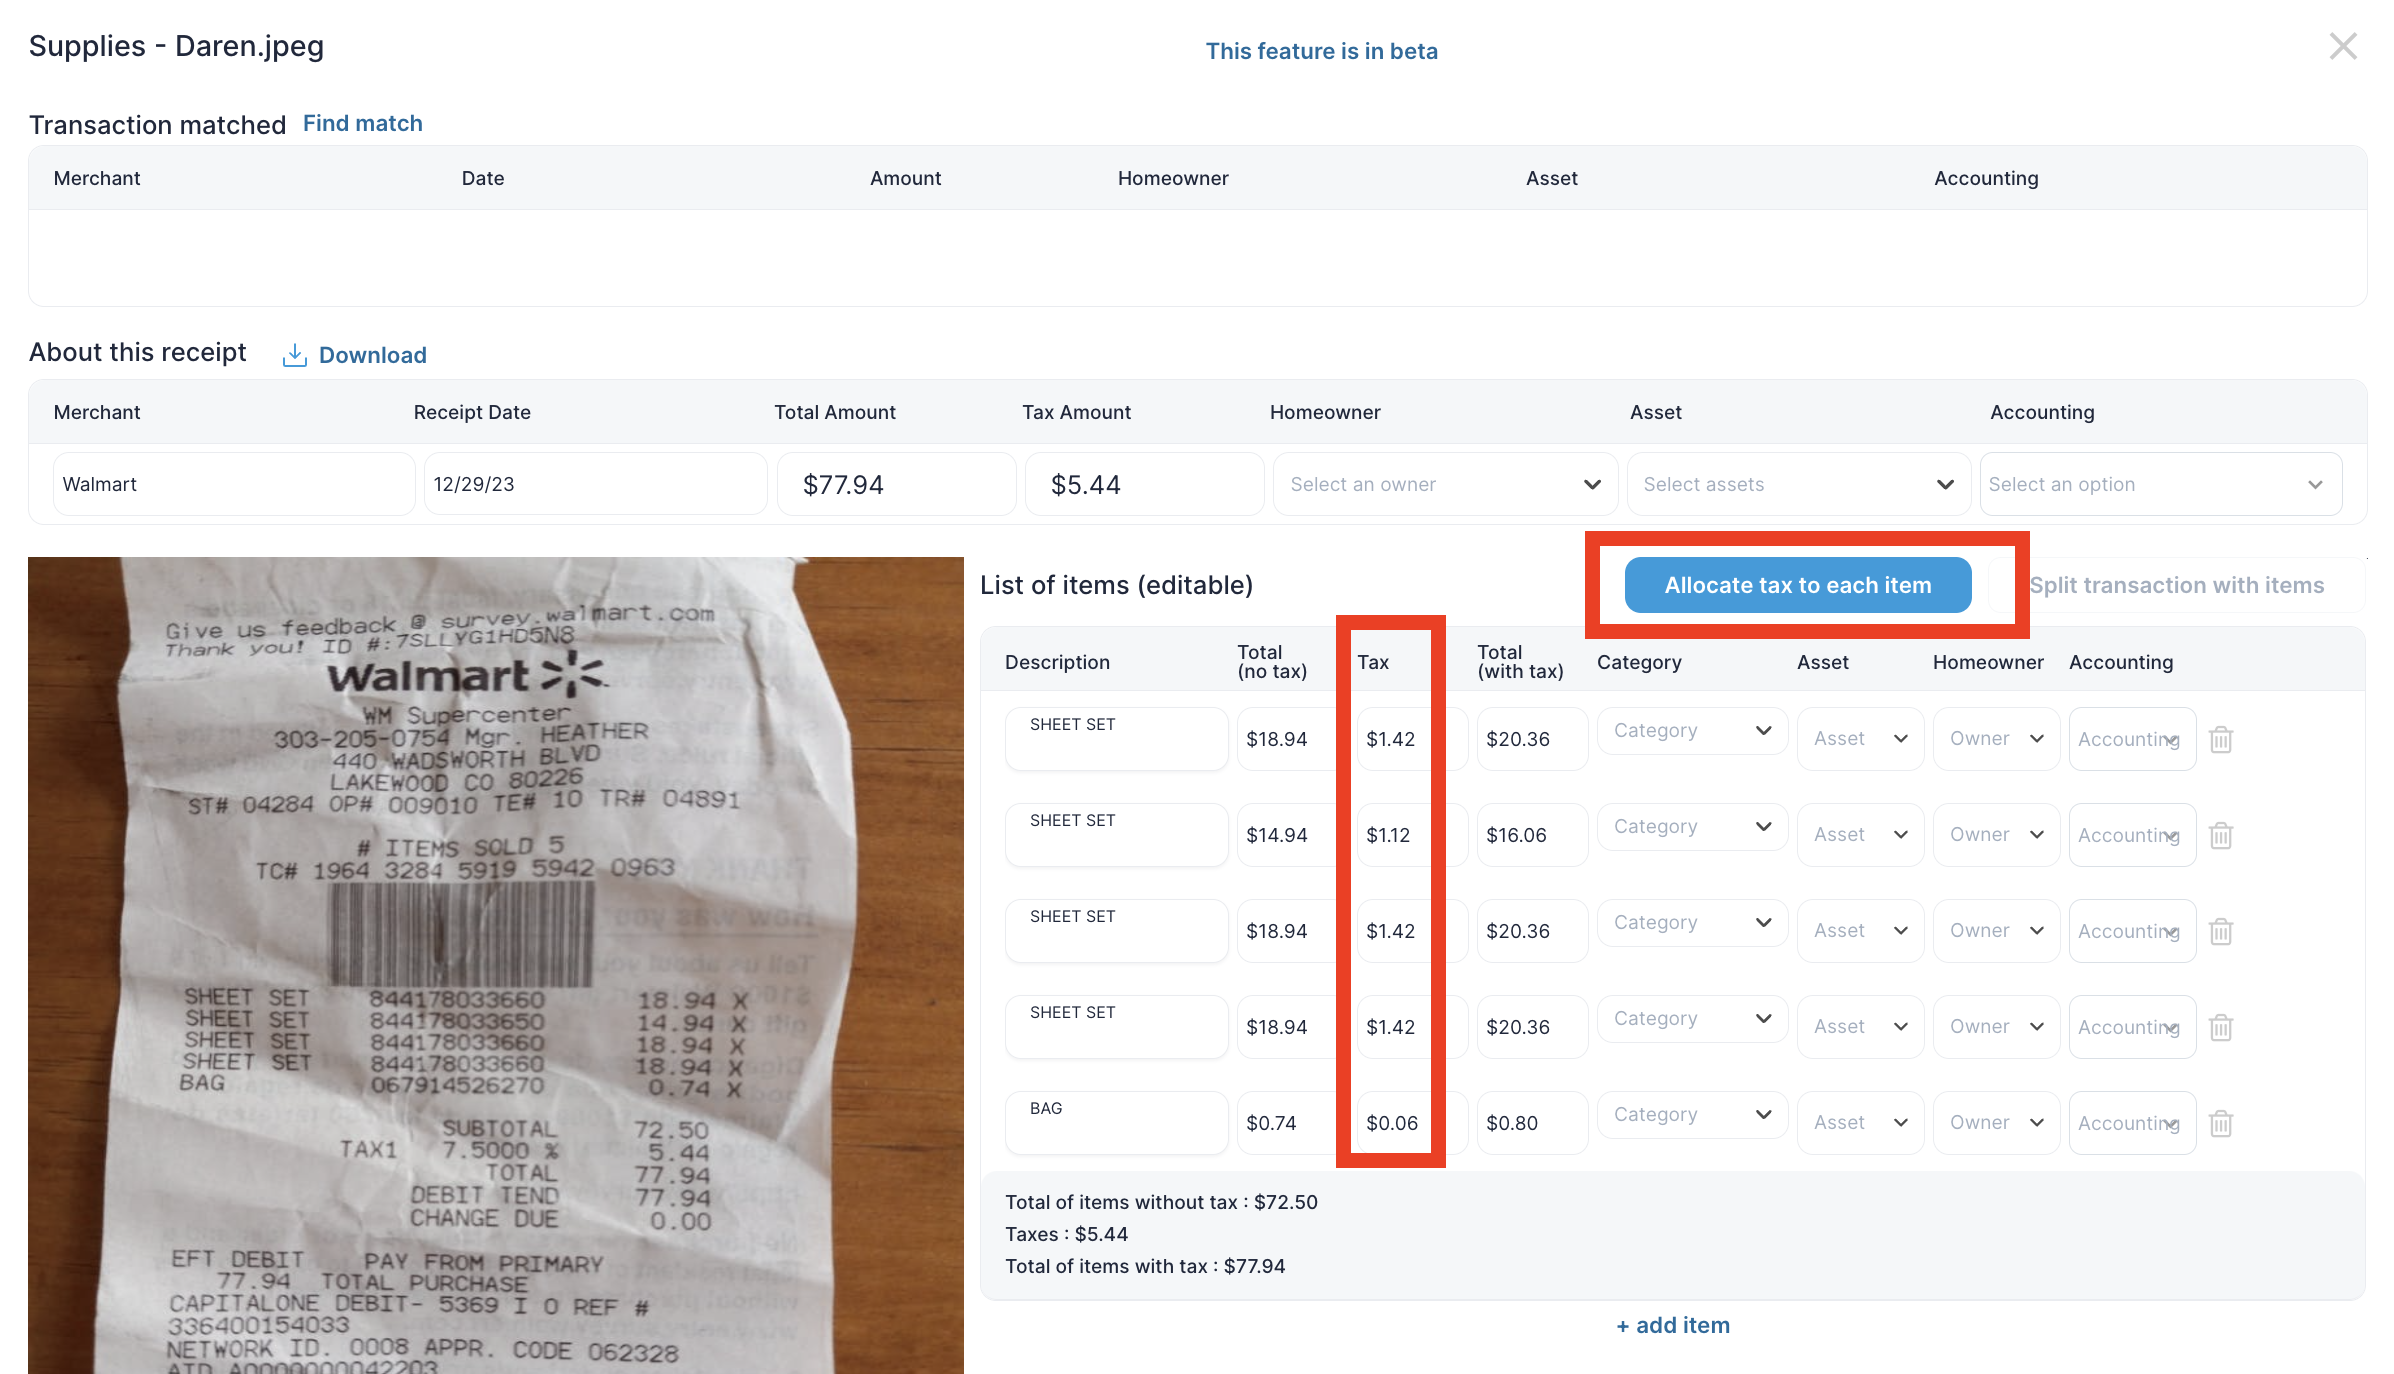
You can click on “Allocate tax to each item” button to allocate taxes to each item to ensure accurate financial reporting and compliance.
Additionally you can split the transaction within item by clicking “ Split transaction with items” button. This will split the transaction details to match the individual line items, in case you’d like to get granular with. your allocations on each receipt.
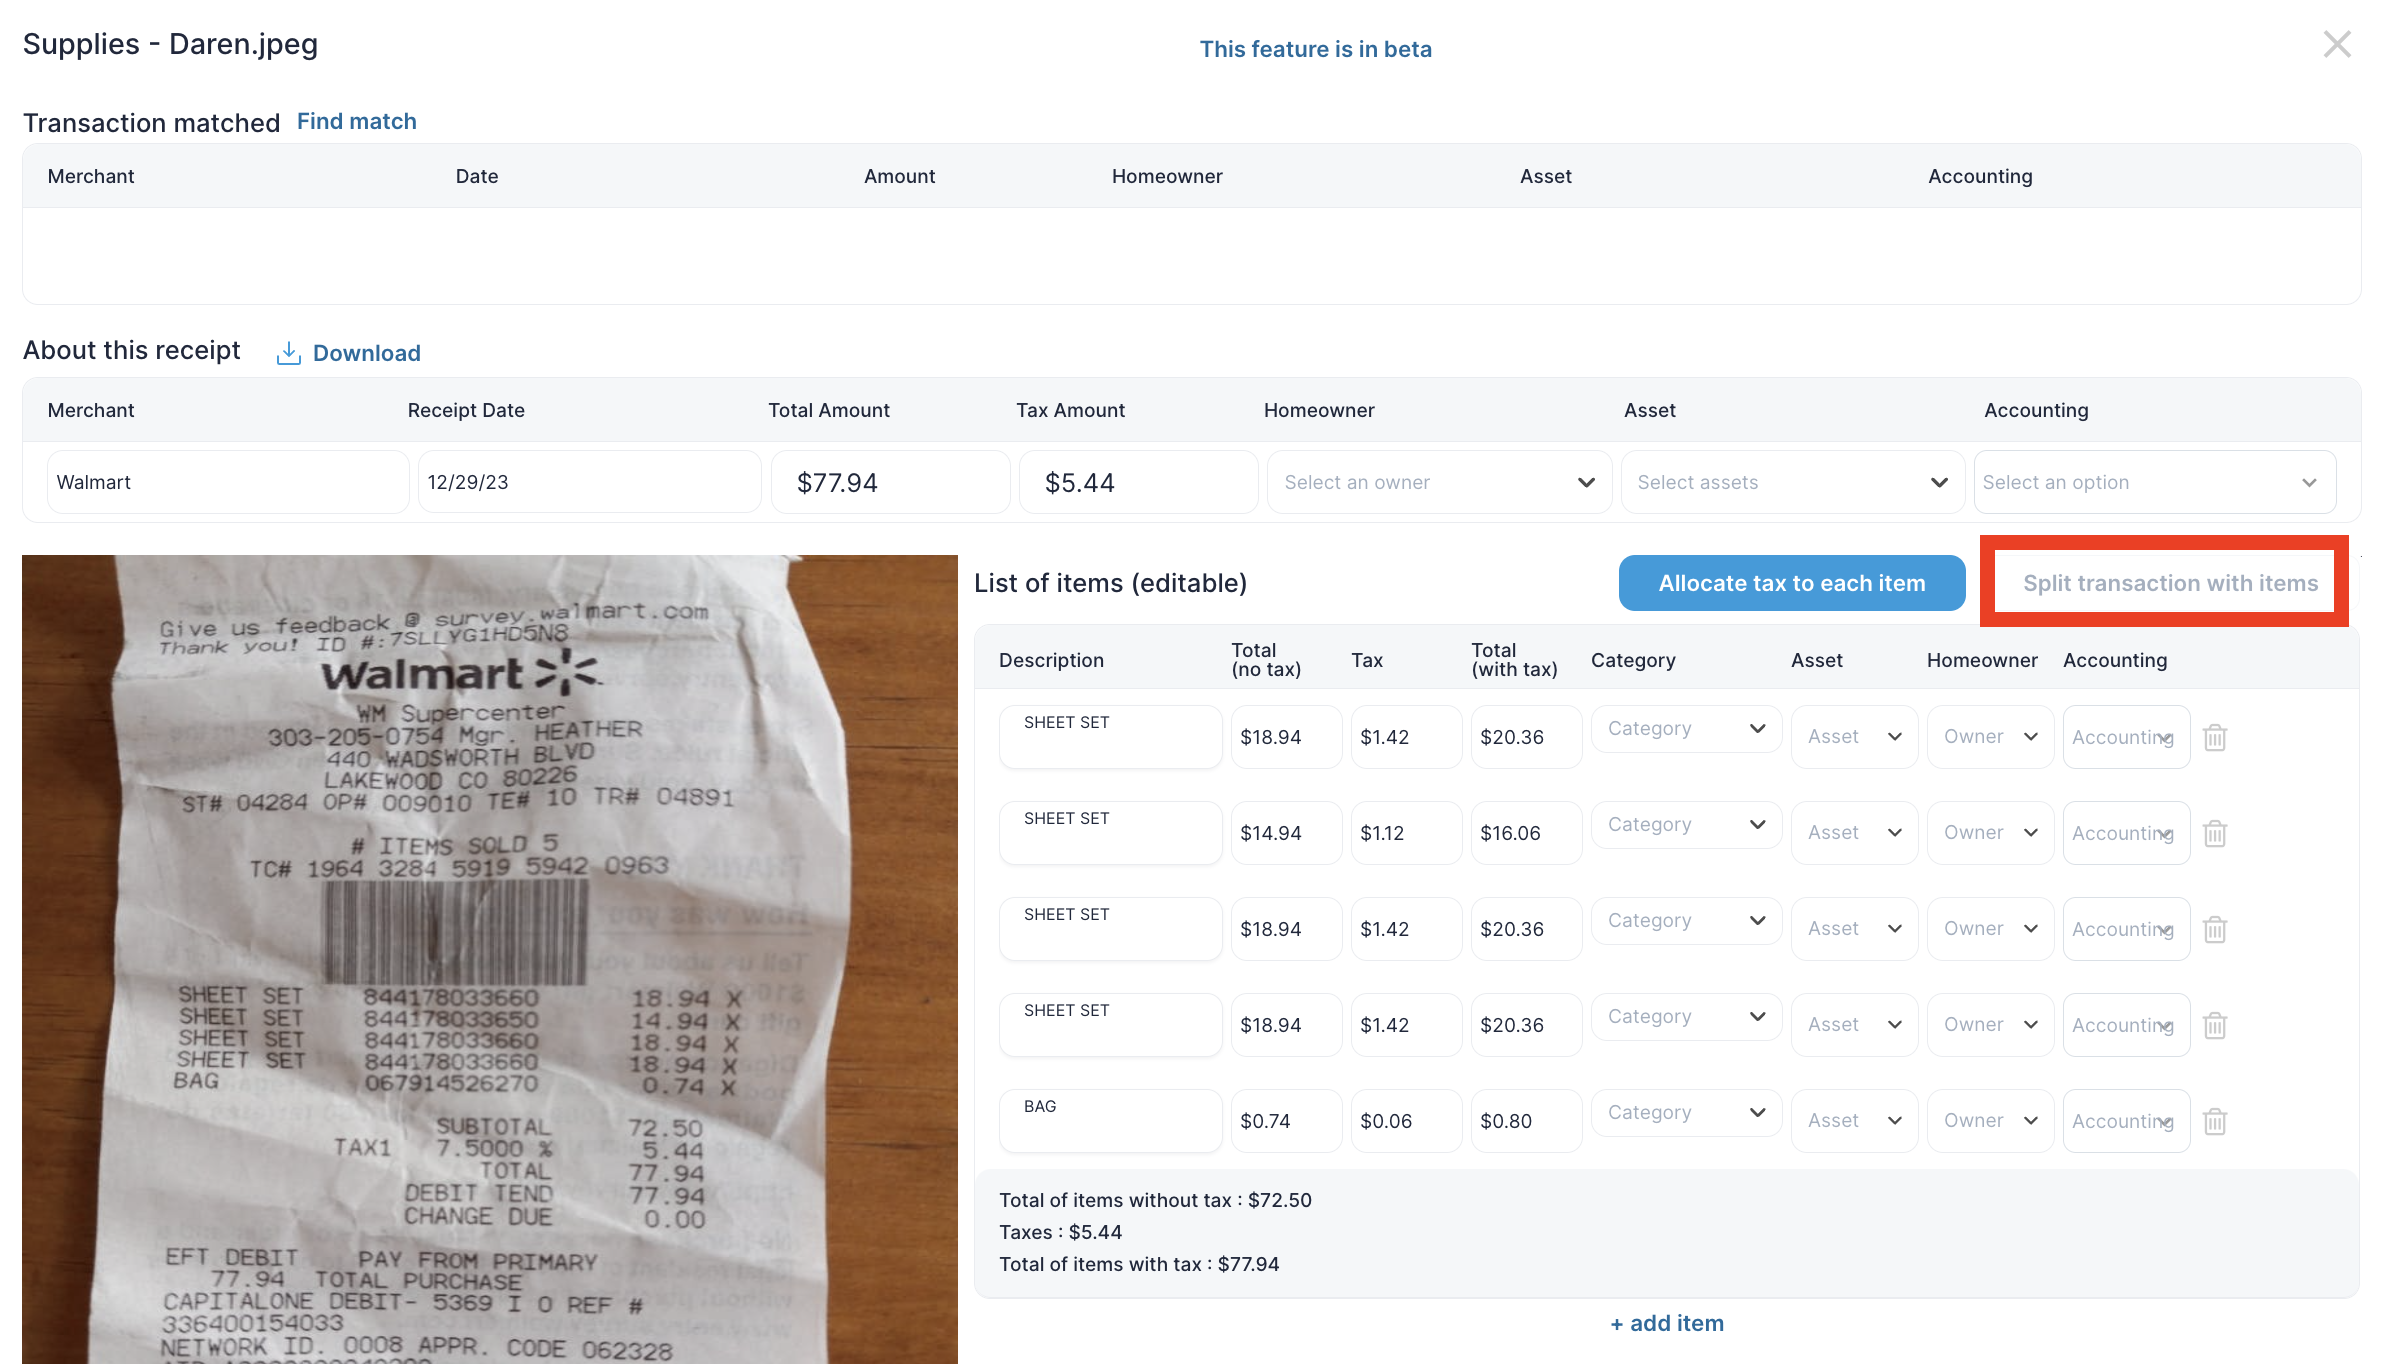
Furthermore, you can also add new line item by clicking on “+ add item” button.

Step 5: Matching Receipts to Transactions
Click the "Find match" button that helps streamline the reconciliation process by matching uploaded receipts with corresponding transactions within the system. The system will look through transactions and find matching options, to which you will be able to connect the receipt to the confirmed bank transaction.
Once the match is found, and confirmed, click on “Match”.

Step 6: Configure AI Settings
Click on “Configure AI Settings” option to customize Clearing's AI settings to align with your specific business needs and preferences. You can configure the AI to recognize keywords or patterns in receipts, and map receipts to specific assets or properties.
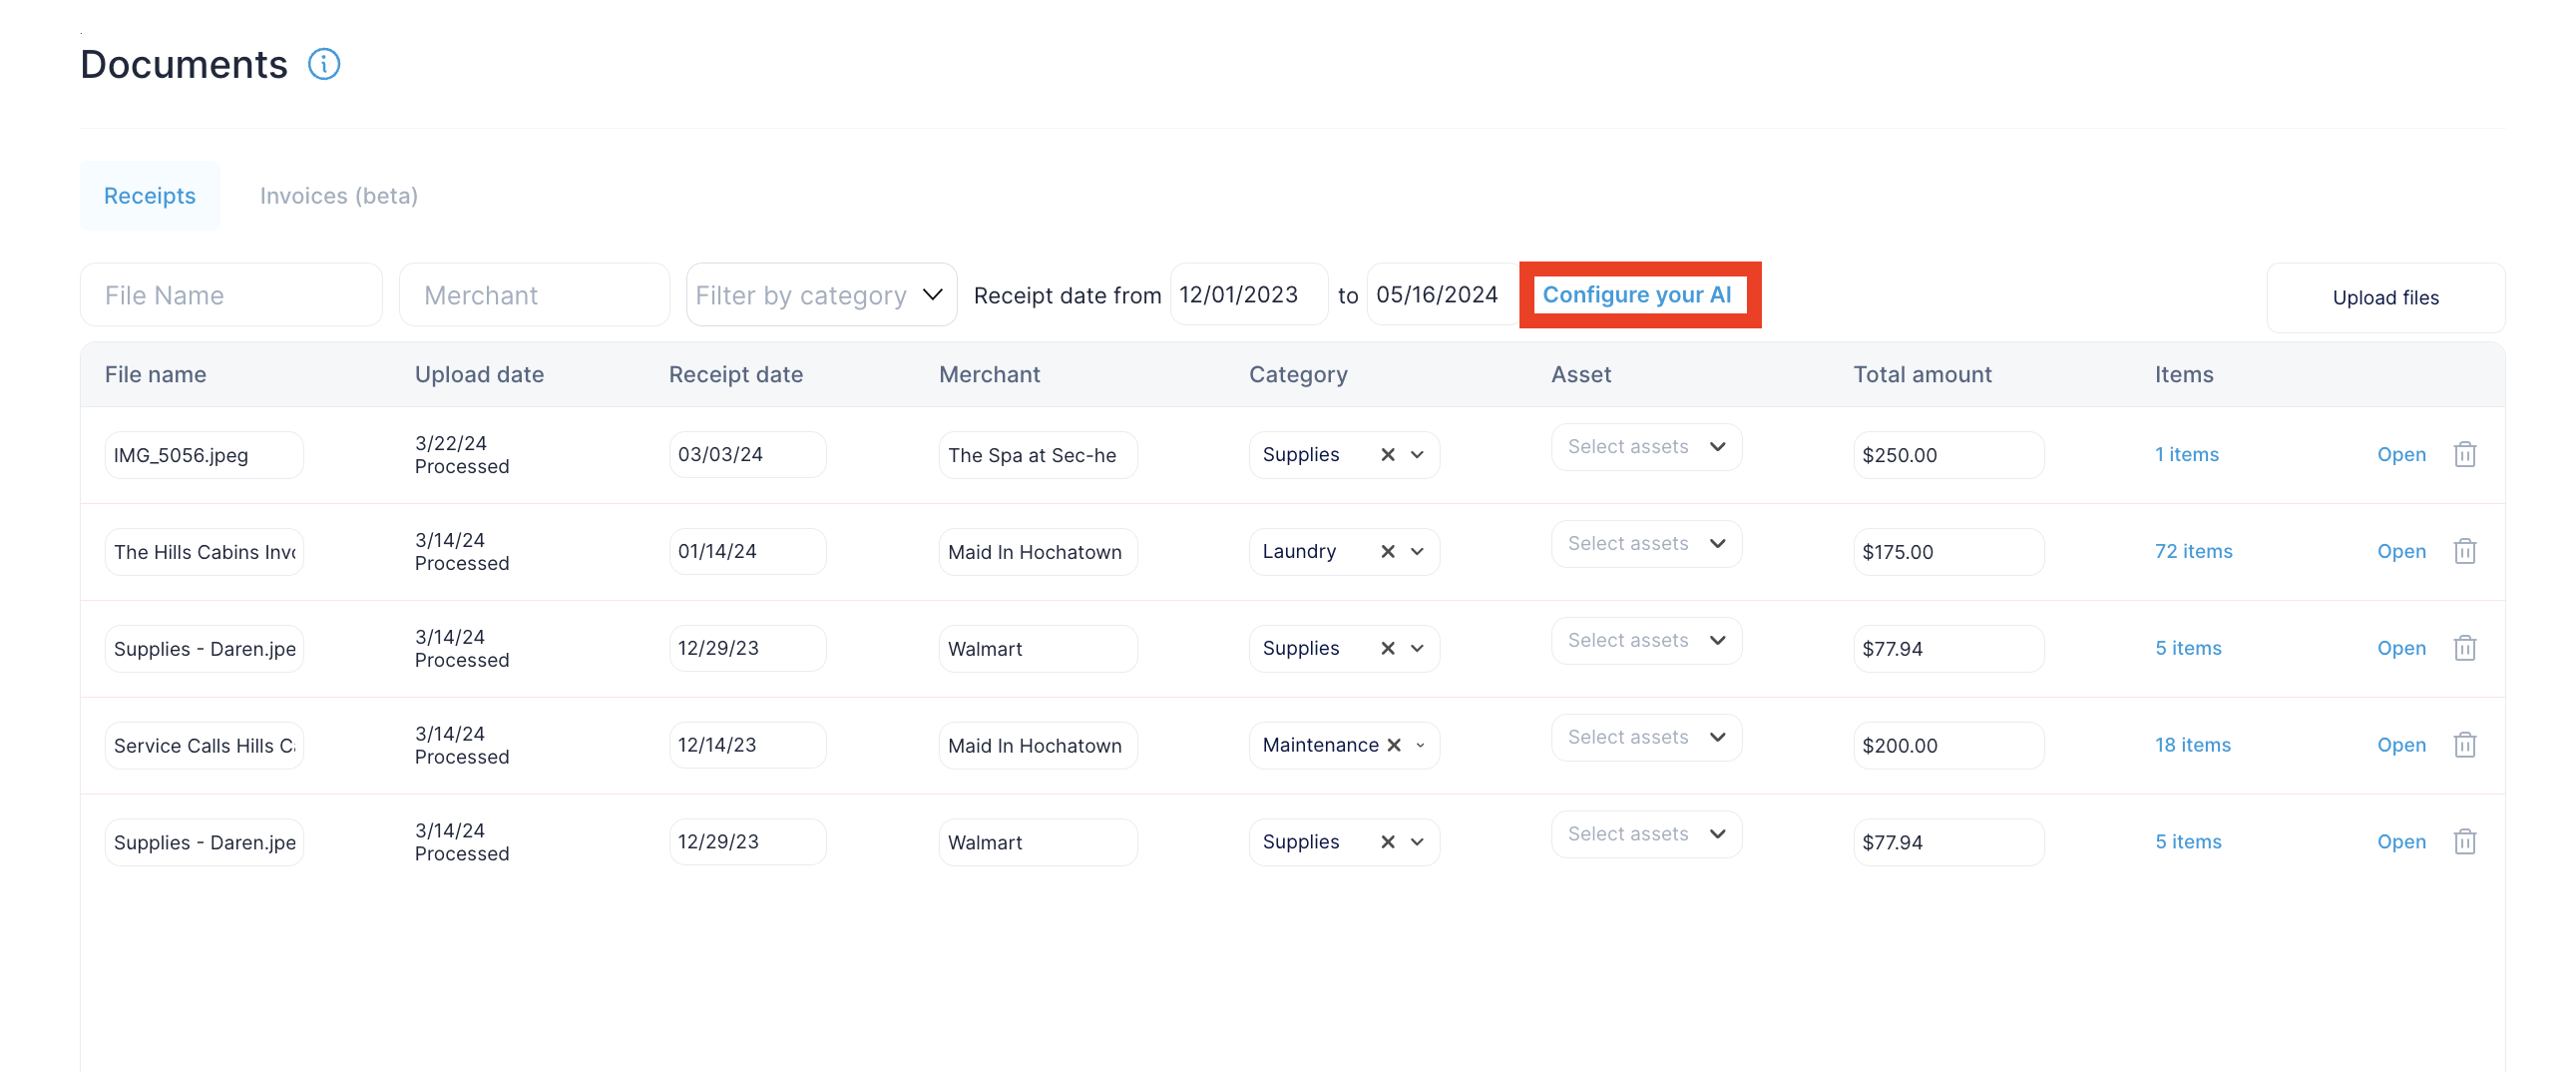
Moreover, you can also filter transactions based on predefined categories, streamlining the receipt management process even further.
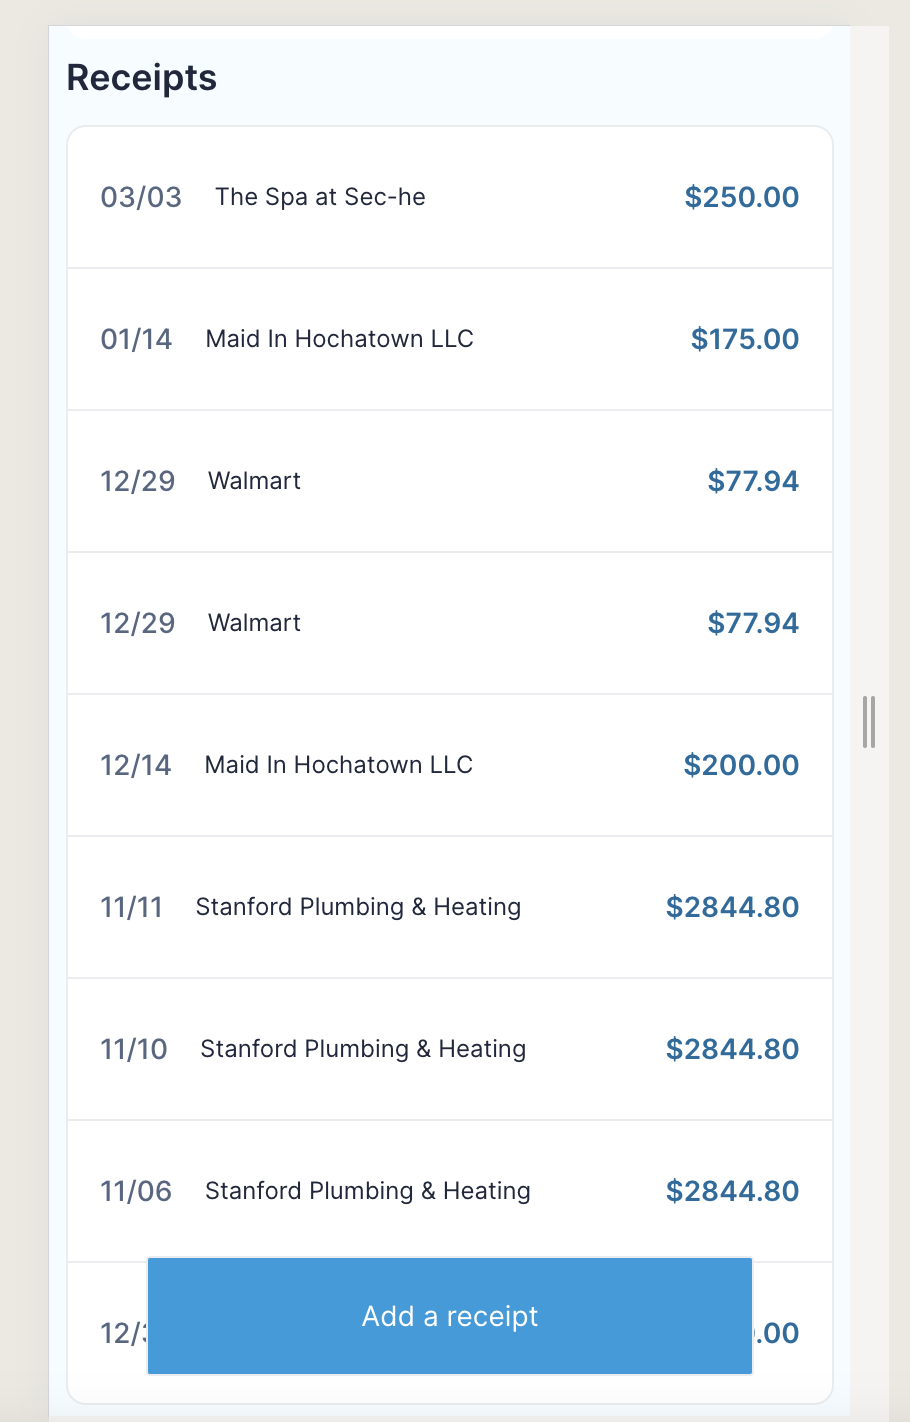
Additional: Clearing's Mobile App - Upload and Manage Receipts
You can take advantage of Clearing's mobile app to manage receipts conveniently on the go: from anywhere, at anytime. Simply download the Clearing mobile app, log in to your account, and use the app to upload, categorize, split, and track receipts from the convenience of your mobile devise. This mobile functionality enhances flexibility and ensures that no receipts are overlooked, even when you're away from your desk. Specific permissions can be set up for employees to be able to use the app, but not access other parts of the software that are not relevant to their job function.
Say goodbye to manual entry of expenses (which can lead to human errors) with Clearing's latest feature designed to revolutionize receipt and expense management. With Clearing, you can effortlessly upload and meticulously manage receipts, saving valuable time and ensuring accuracy in your financial records. Our advanced parsing capabilities automatically extract key details from receipts, allowing you to easily categorize expenses, allocate taxes, and split transactions.
Ready to streamline your expense management process and unlock newfound efficiencies for dealing with receipts?
Connect with us today for a free personalized demo and discover how Clearing can transform the way you upload and manage receipts.
Explore our comprehensive knowledge base today to dive deep into Clearing's features and embark on a journey to revolutionize your Short-Term Rental financial management experience.
Clearing is a Financial Technology Company, not a bank.


.png)
.png)


.png)
.png)
.png)

.png)

.png)

.png)
.png)
.png)
%20(1).png)
%20(1).png)
%20(1).png)
.png)
%20(2).png)
%20(1).png)
%20(1).png)
.png)

.png)
.png)
.png)
%20(1).png)
.png)
.png)
.png)
.png)
.png)
.png)
.png)
%20(1).png)
.png)
.png)
.png)
%20(1).png)
%20(1).png)
%20(1).png)


.jpg)
%20(1).png)
%20(1).png)
%20(2).png)
%20(1).png)

%20(1).png)
%20(1).png)
%20(1).png)


%20(1).png)
%20(1).png)
%20(1).png)
%20(1).png)


%20(1).png)
%20(1).png)
%20(1).png)
%20(2).png)
%20(2).png)


%20(2).png)


%20(2).png)
%20(1).png)
.png)


%20(2).png)
%20(2).png)

.jpg)
.png)
.png)
.png)