
How to Create and Manage Owner Statements at Scale in Clearing
Generate owner statements at scale with Clearing. Learn how to streamline financial reporting, save time, and enhance communication with property owners.
June 6, 2024
Benjamin
%20(1).png)
For property managers, generating accurate and timely owner statements is crucial for maintaining trust and transparency with property owners. However, managing this process at scale can be overwhelming. Handling numerous transactions, ensuring each statement's accuracy, and distributing them efficiently requires a robust solution. Clearing steps in as a solution by enabling property managers to generate owner statements at scale (for all owners at once). This capability not only ensures accuracy but also saves significant time and effort, making the process more manageable and efficient.
Clearing, a leading platform in property management, provides property managers with the tools they need to generate owner statements at scale. By streamlining the process of creating, customizing, and distributing statements for multiple owners, Clearing ensures that property managers can handle large volumes of statements with ease. This solution significantly reduces the time and effort required, minimizes errors, and enhances communication with property owners, ensuring that financial reporting is both accurate and transparent.
Simple Steps to Create Owner Statements at Scale in Clearing
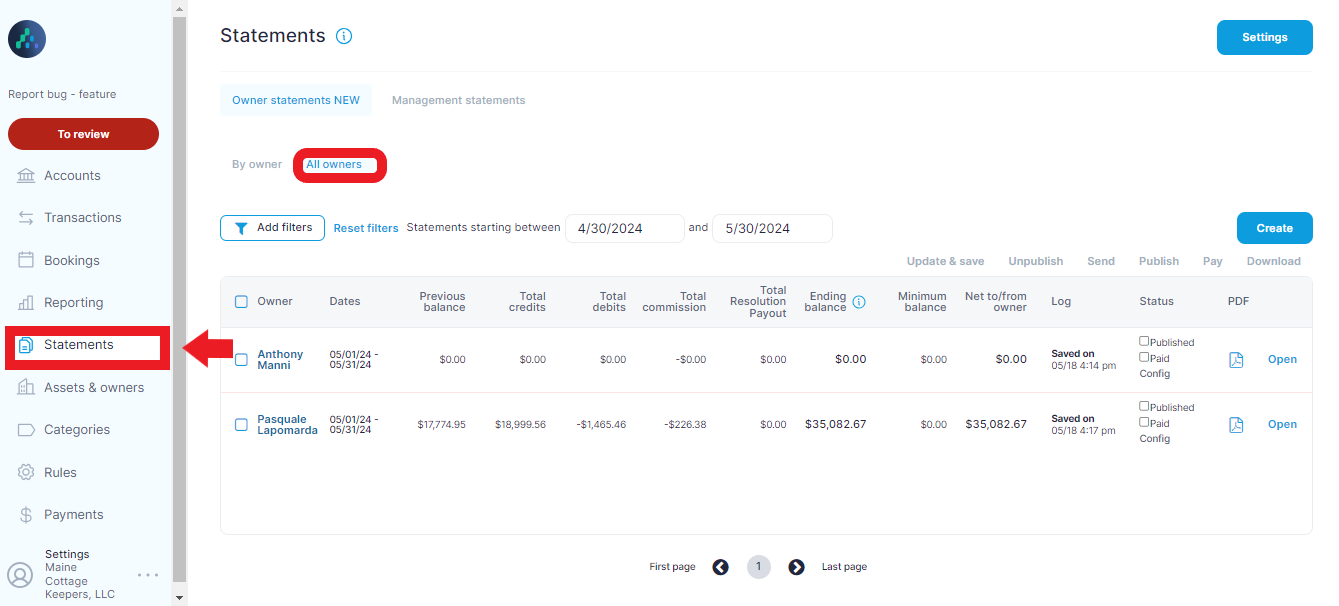
Step 1: Access the Statements Section in Clearing
Log in to your Clearing account and navigate to the “Statements” section in the side menu. This is your central hub for managing and generating owner statements. Click “All Owners” option to start creating statements at scale. Before generating statements, ensure all accounts are fully reconciled.
Step 2: Create Statements
Click the "Create" button.
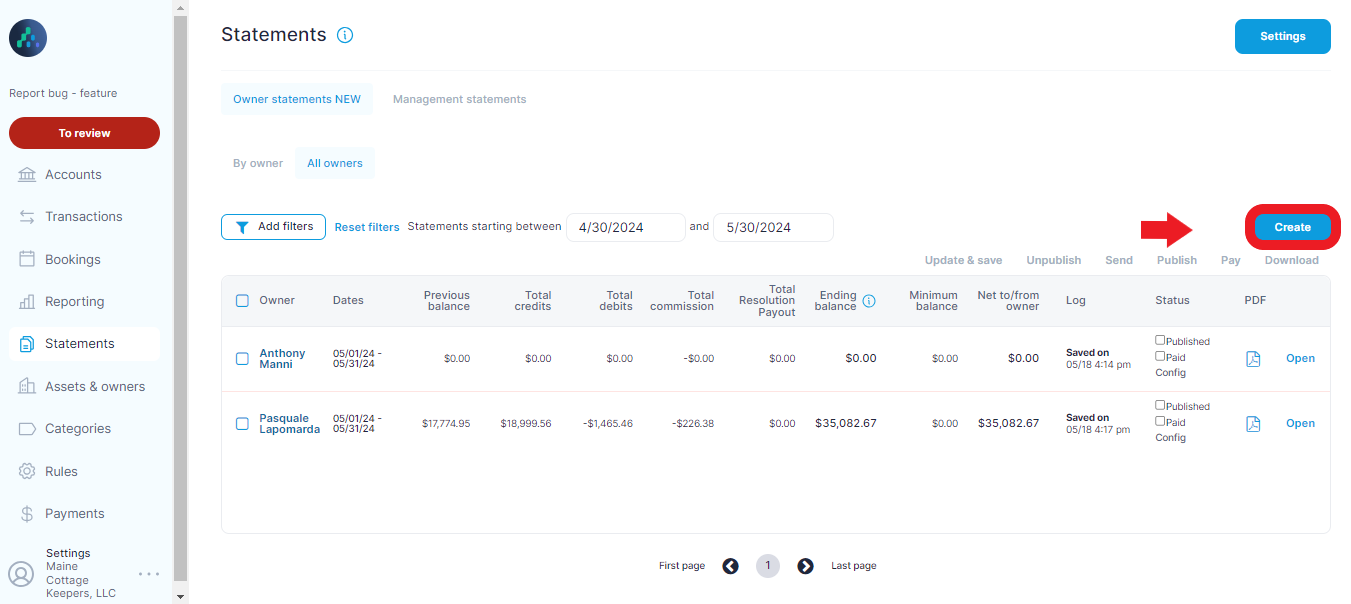
Here, you can select all or multiple owners from a list, allowing you to generate statements for several owners at once. This bulk selection feature is key for managing statements at scale.

Step 3: Set the Date Range
Choose the date range for the statements and Click on “Create”. The date range defines which transactions will be included in each statement. Accurate date range selection ensures that all relevant financial activities are captured.

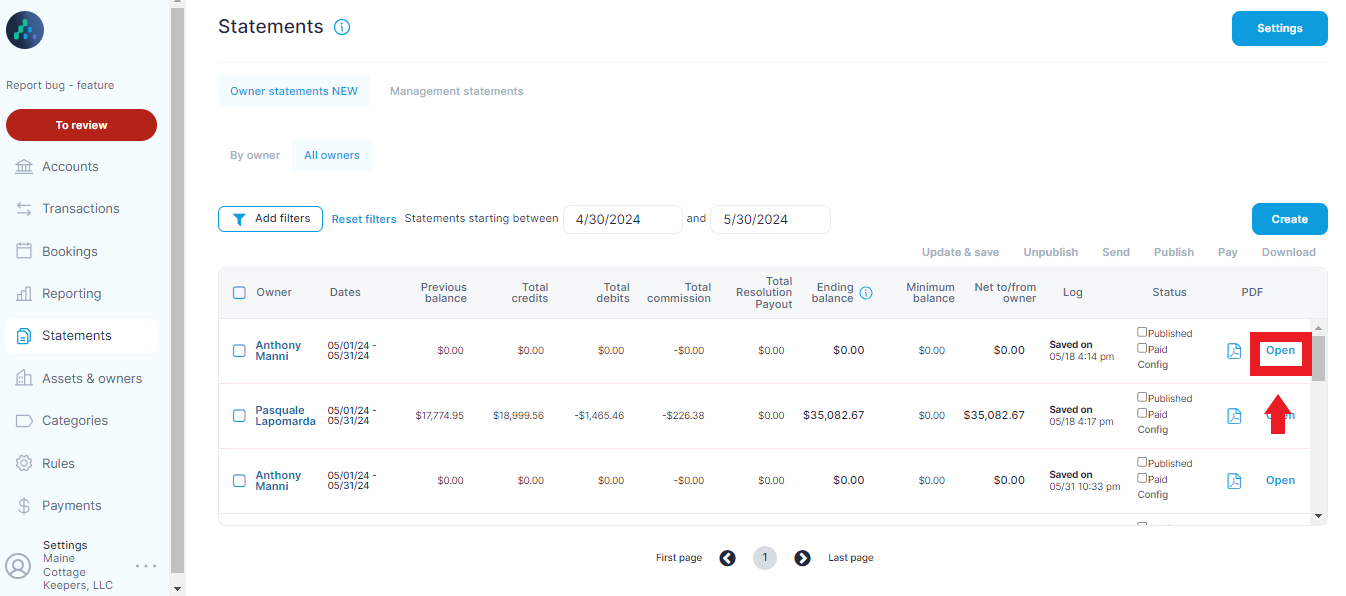
Step 4: Review the Individual Statements
After generating the invoices, Click on “Open” button in line with each statement to review the individual statements for accuracy. This review step helps to catch any discrepancies or errors before distribution.
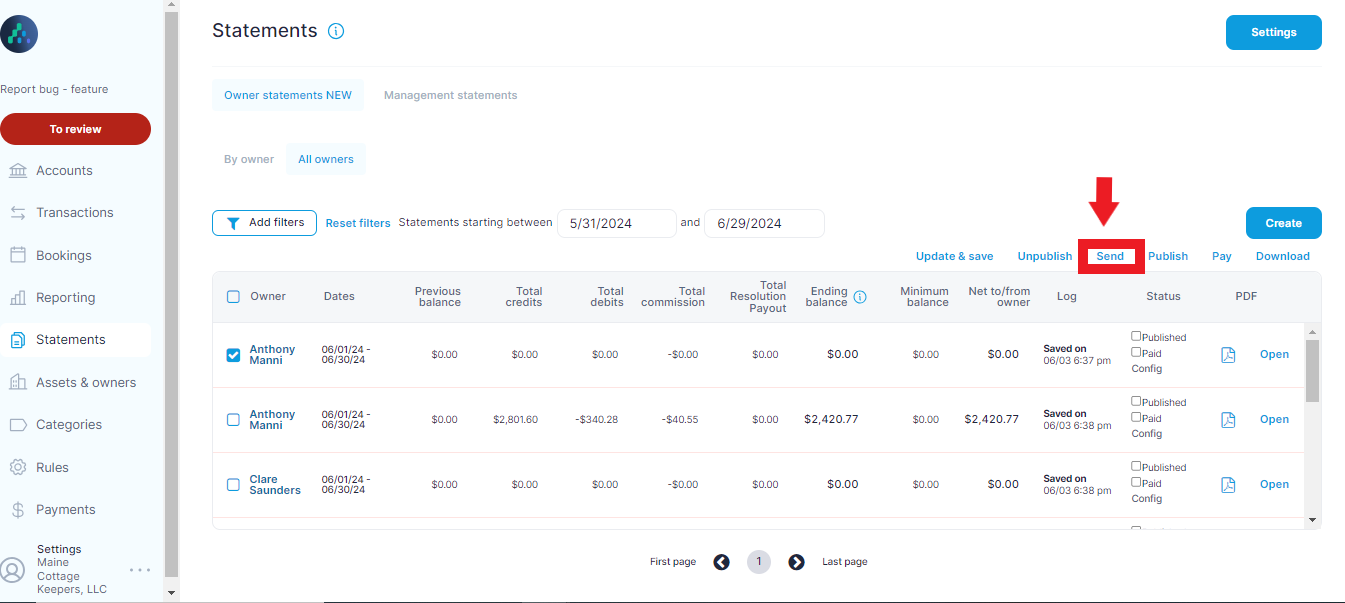
Step 5: Download and Distribute Statements
Select the statement and Click “Download” button to download the statements as PDFs.
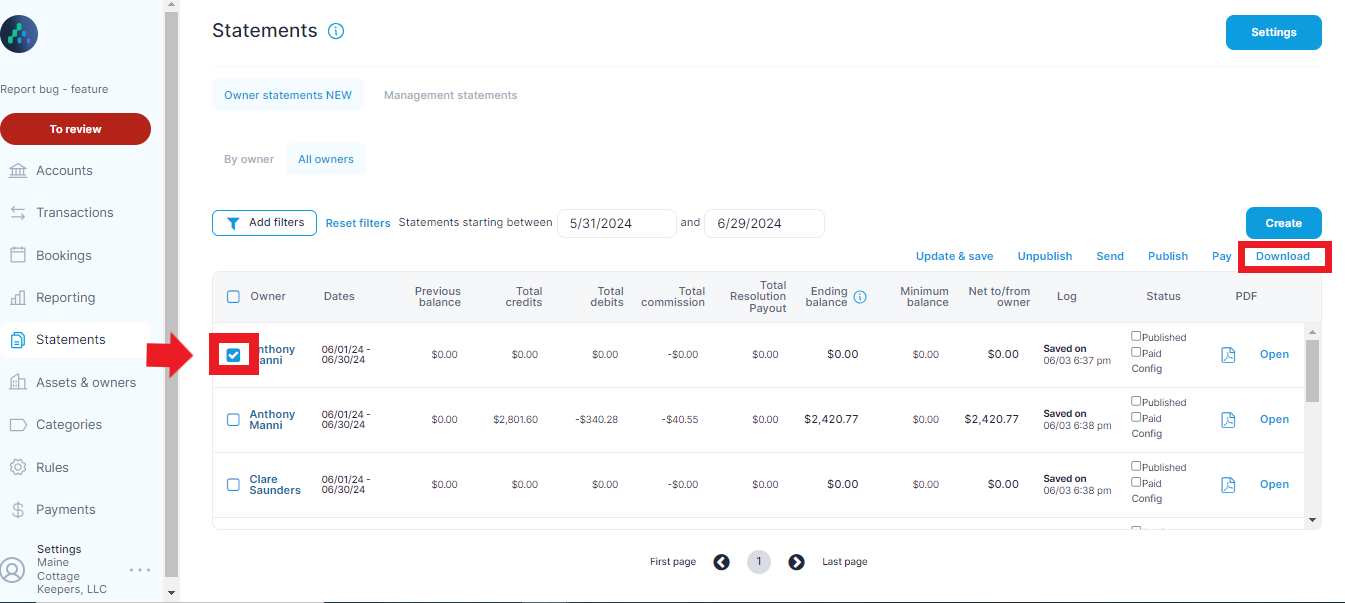
You can also send them to the respective owners via email, including all relevant receipts. This method ensures that owners receive comprehensive and detailed financial reports.
Step 6: Publish or Save Statements
If you publish the statements, they will be accessible through the owner's portal, providing owners with easy access to their financial reports.
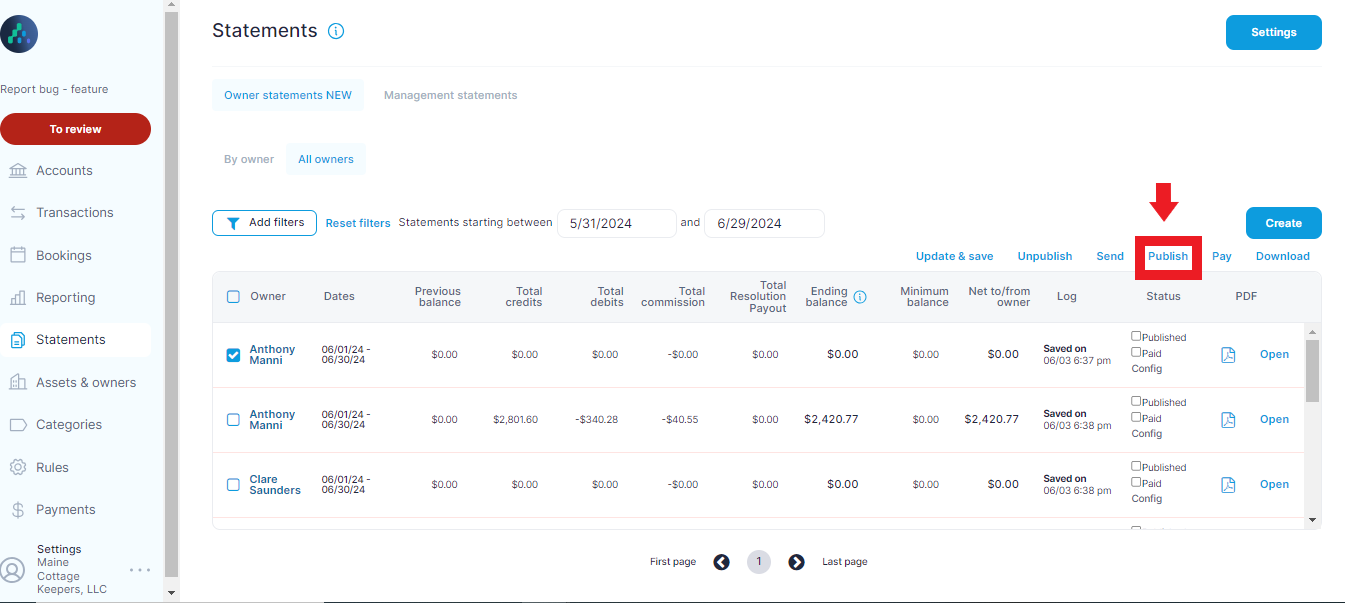
Unpublished statements can be saved for manual distribution via email or download (PDF or Excel), offering flexibility in how you manage statement distribution.
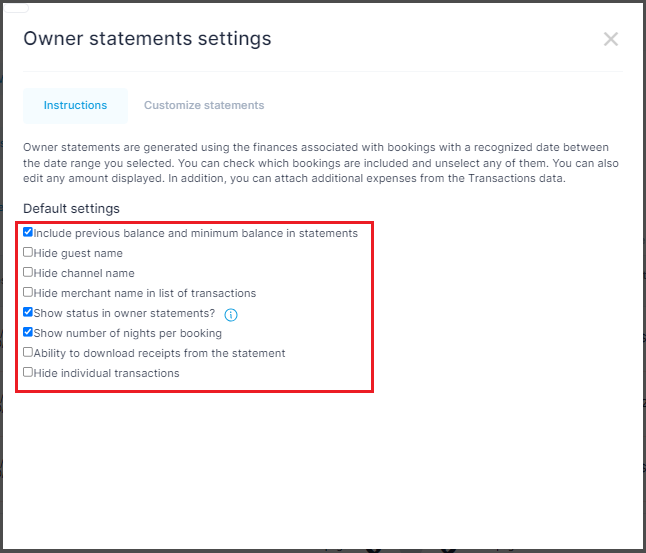
Step 7: Default Settings and Customization
Click on “ Settings” button to adjust default settings according to your requirements.
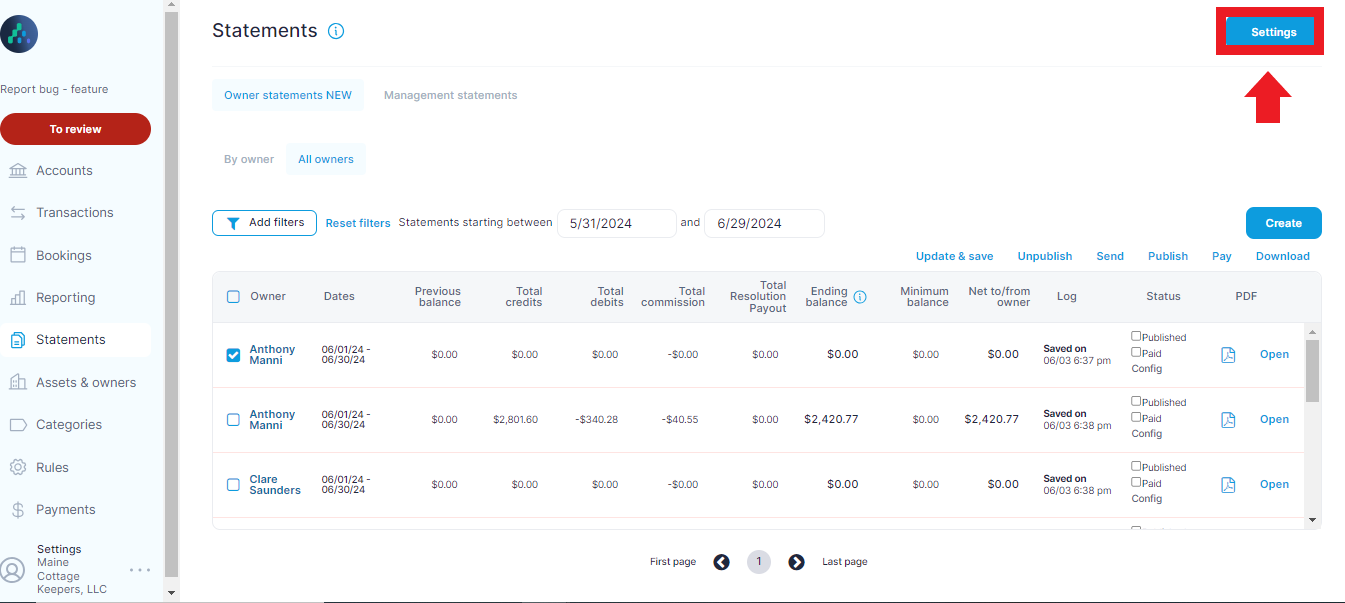
Here you can check the particular options that you want to include in your statement.
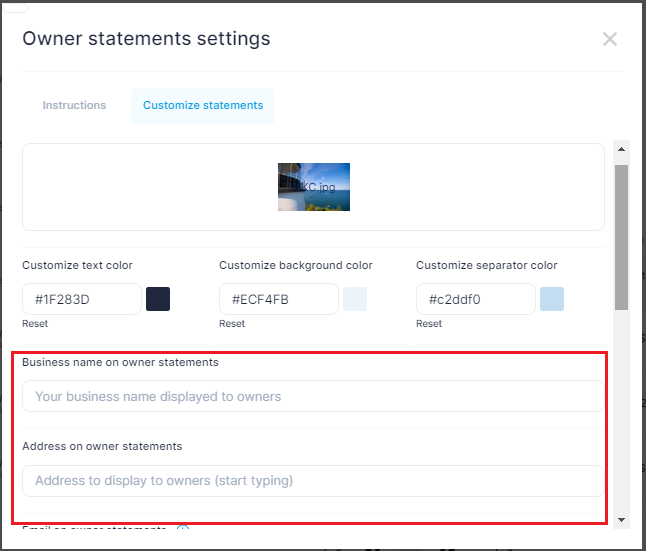
Click on “Customize statements” option to customize business name, address, email on statement, and the colour/branding you wish to use. This includes the logo file you’d like to have on the statement as well.
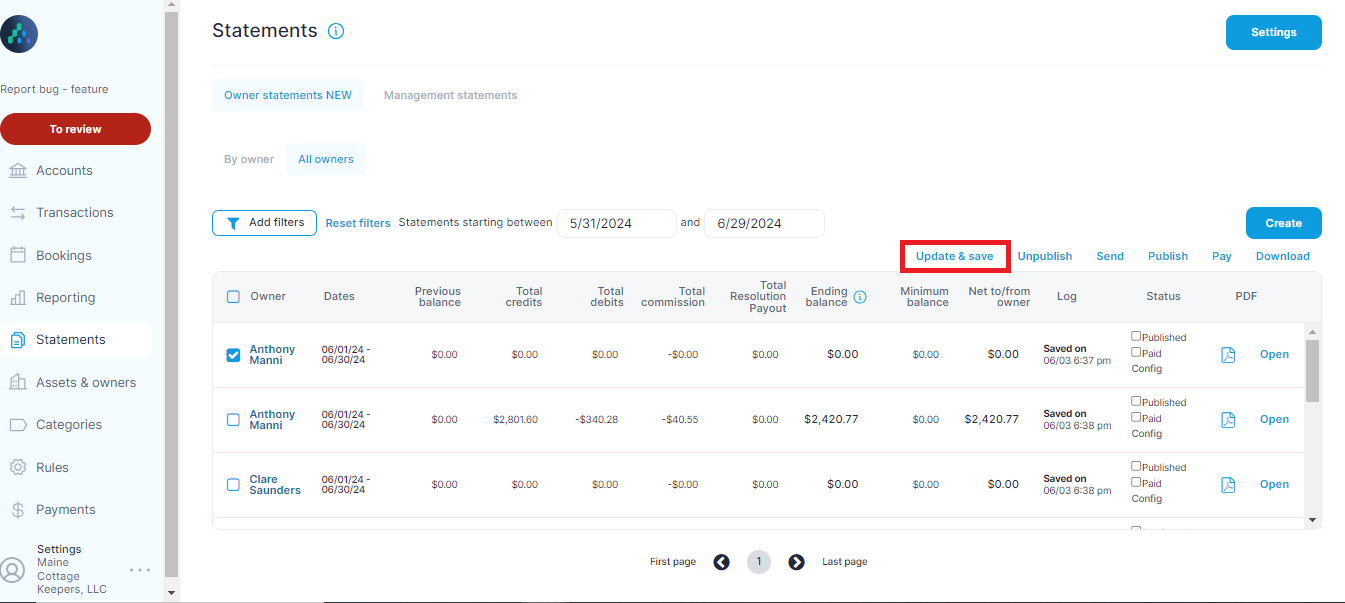
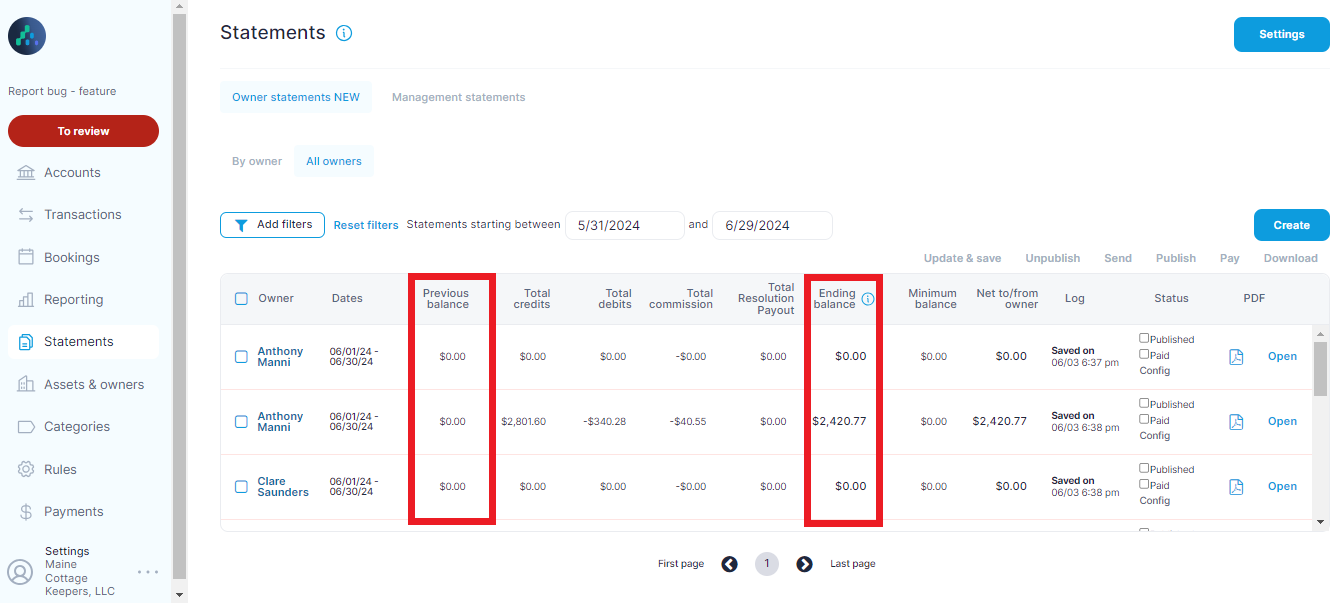
Step 8: Carrying Over Balances
Clearing ensures that property managers can keep an accurate record of previous and ending balances. These balances are crucial for maintaining financial transparency and providing a comprehensive view of financial activities over time.
- Previous Balance: This is the balance carried over from the previous statement period. It includes any outstanding amounts that have not yet been settled.
- Ending Balance: This is the balance at the end of the current statement period, reflecting all transactions within the defined date range.
When generating new statements in Clearing, the previous balance is automatically included, providing a seamless transition from one statement period to the next. This continuity ensures that property managers and owners have a clear understanding of ongoing financial obligations and activities.
Aside: How to Generate Owner Statement for Individual Owners
To generate an owner statement for an individual owner, follow these brief steps:
- Login to Clearing: Log in to your Clearing account with your credentials.
- Go to the Statements Section: Access the “Statement” option from the left-hand side menu.
- Select a Homeowner: Choose a homeowner from the drop-down list.
- Set the Date Range: Define a custom date range for the statement by clicking the “from” and “to” date fields and selecting the appropriate dates.
Now the homeowner statement will be generated or updated as per the defined date range.
For a detailed step-by-step guide, refer to our individual owner statement guide.
Take advantage of Clearing's scalable solution for generating owner statements with greater ease and confidence. Clearing's features not only simplify the process but also ensure that financial reports are accurate, transparent, and tailored to meet the specific needs of each owner. This makes Clearing an invaluable tool for Short-Term Rental property managers aiming to streamline their financial operations and improve financial transparency with property owners.
Are you ready to revolutionize your property management processes and ensure financial accuracy?
Connect with us for a personalized demo and discover how Clearing can transform your statement generation process
Explore our comprehensive knowledge base today to dive deep into Clearing's features and embark on a journey to revolutionize your financial management experience.
Clearing is a Financial Technology Company, not a bank.


.png)
.png)


.png)
.png)
.png)
.png)

.png)

.png)
.png)
.png)
%20(1).png)
%20(1).png)
%20(1).png)
.png)
%20(2).png)
%20(1).png)
%20(1).png)
.png)

.png)
.png)
.png)
%20(1).png)
.png)
.png)
.png)
.png)
.png)
.png)
.png)
%20(1).png)
.png)
.png)
.png)
%20(1).png)
%20(1).png)
%20(1).png)


.jpg)
%20(1).png)
%20(1).png)
%20(2).png)
%20(1).png)

%20(1).png)
%20(1).png)


%20(1).png)
%20(1).png)
%20(1).png)
%20(1).png)
%20(1).png)


%20(1).png)
%20(1).png)
%20(1).png)
%20(2).png)
%20(2).png)


%20(2).png)


%20(2).png)
%20(1).png)
.png)


%20(2).png)
%20(2).png)

.jpg)
.png)
.png)
.png)