
How to Split Transactions to Enhance Bookkeeping Accuracy in Clearing
Learn how to accurately split bulk transactions and allocate these expenses to individual properties in Clearing.
August 14, 2023
Olivia

In the realm of property management, accurately managing financial transactions that involve bulk payments with line items belonging to multiple properties can be a daunting task. Often, a single transaction through a credit card includes purchases for different properties, leading to challenges in allocating each expense line item to distinct categories or properties.
Recently, Clearing introduced the Split Transactions feature to address these challenges, empowering users to efficiently split a transaction and allocate specific expenses to individual properties or categories. This ensures accurate books per listing and simplifies financial operations throughout the reconciliation process. With automated transaction management and the ability to split expenses between properties, Clearing enhances financial visibility and empowers the users to split an expense and reconcile it into different accounts more accurately.
Simple Steps to Split Transactions in Clearing
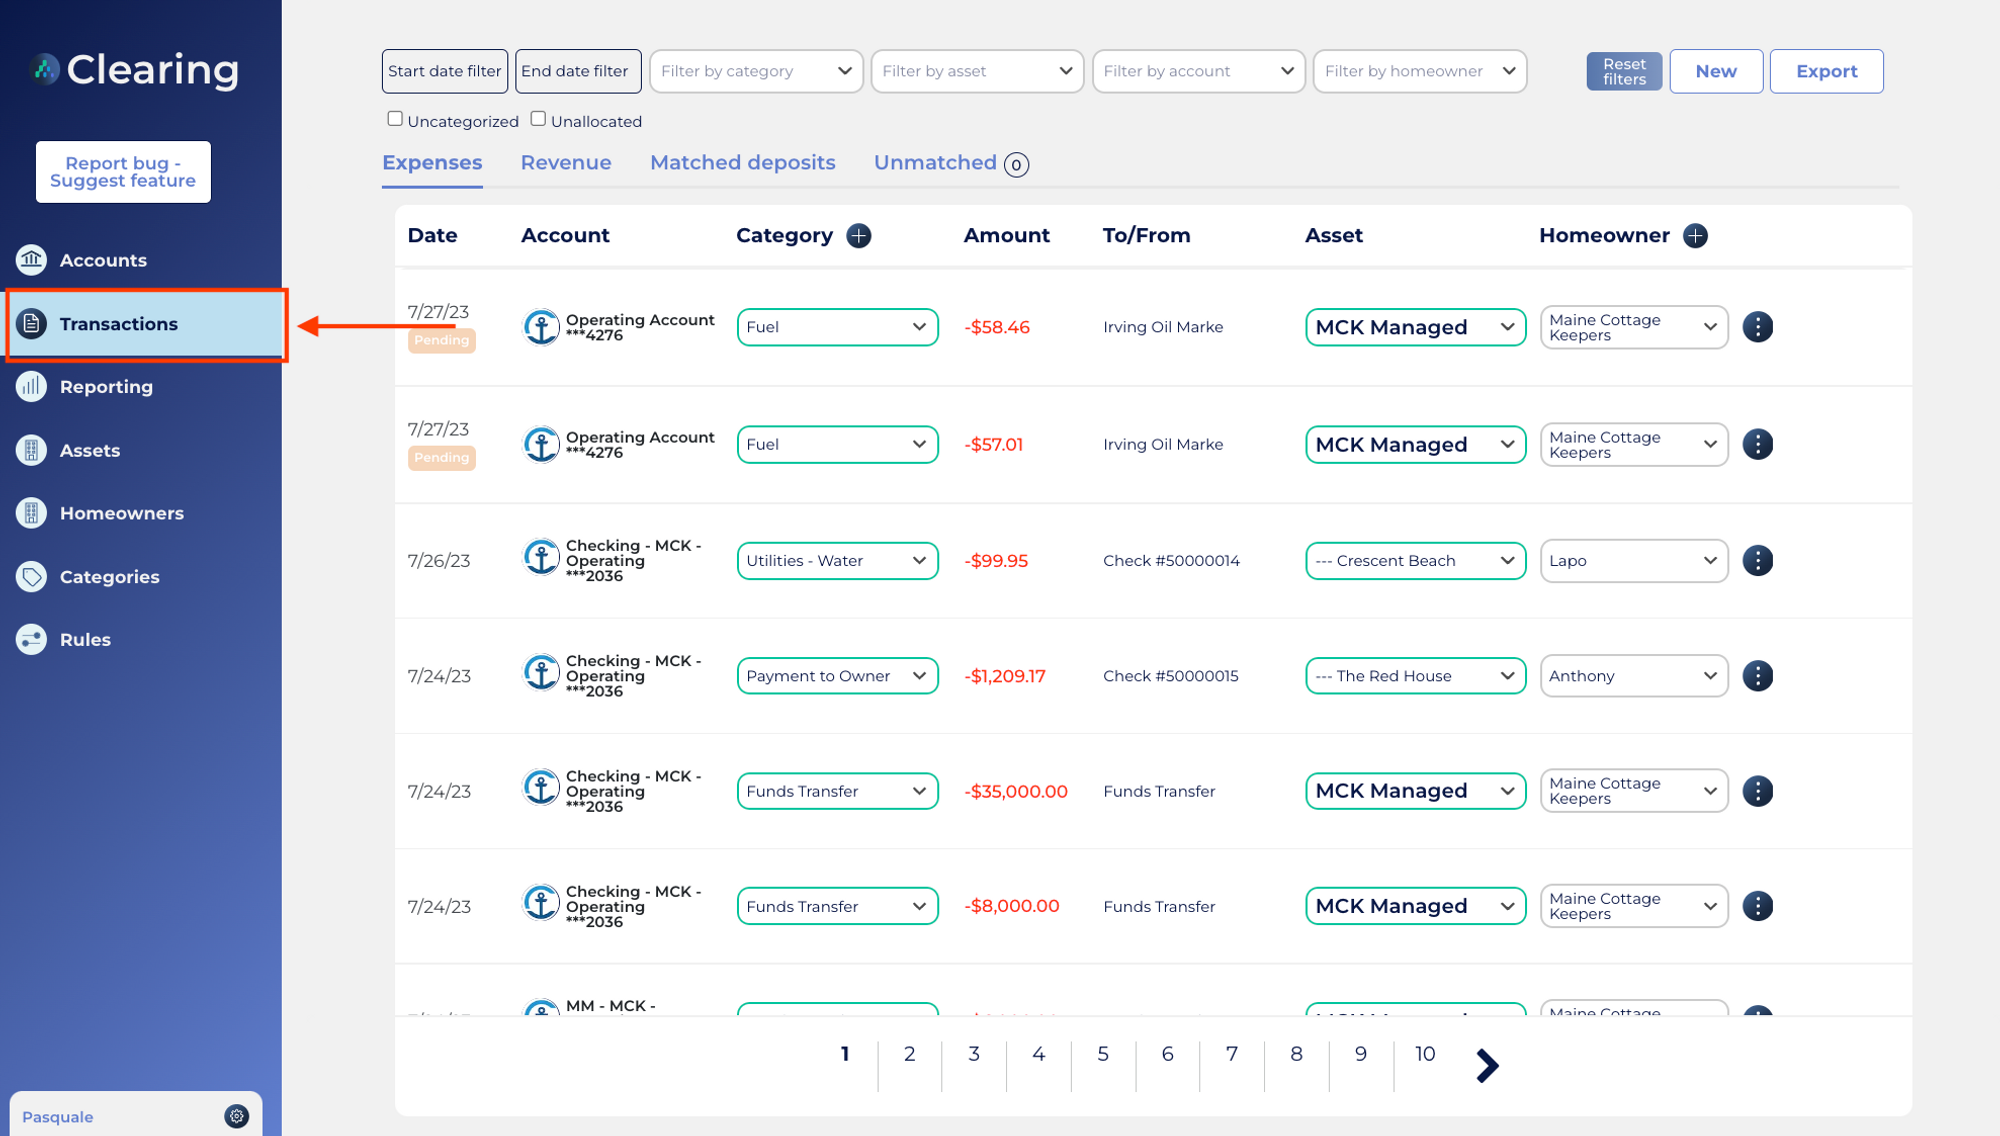
Step 1: Access the Transactions Section in Clearing
Log in to your Clearing account and navigate to the "Transactions" section in the side menu.
Step 2: Initiate the Splitting Process
In the Transaction management interface, choose the financial transaction that you want to split, whether it's a revenue or an expense transaction. Click on the “three dots” button located on the right side of the selected financial transaction.
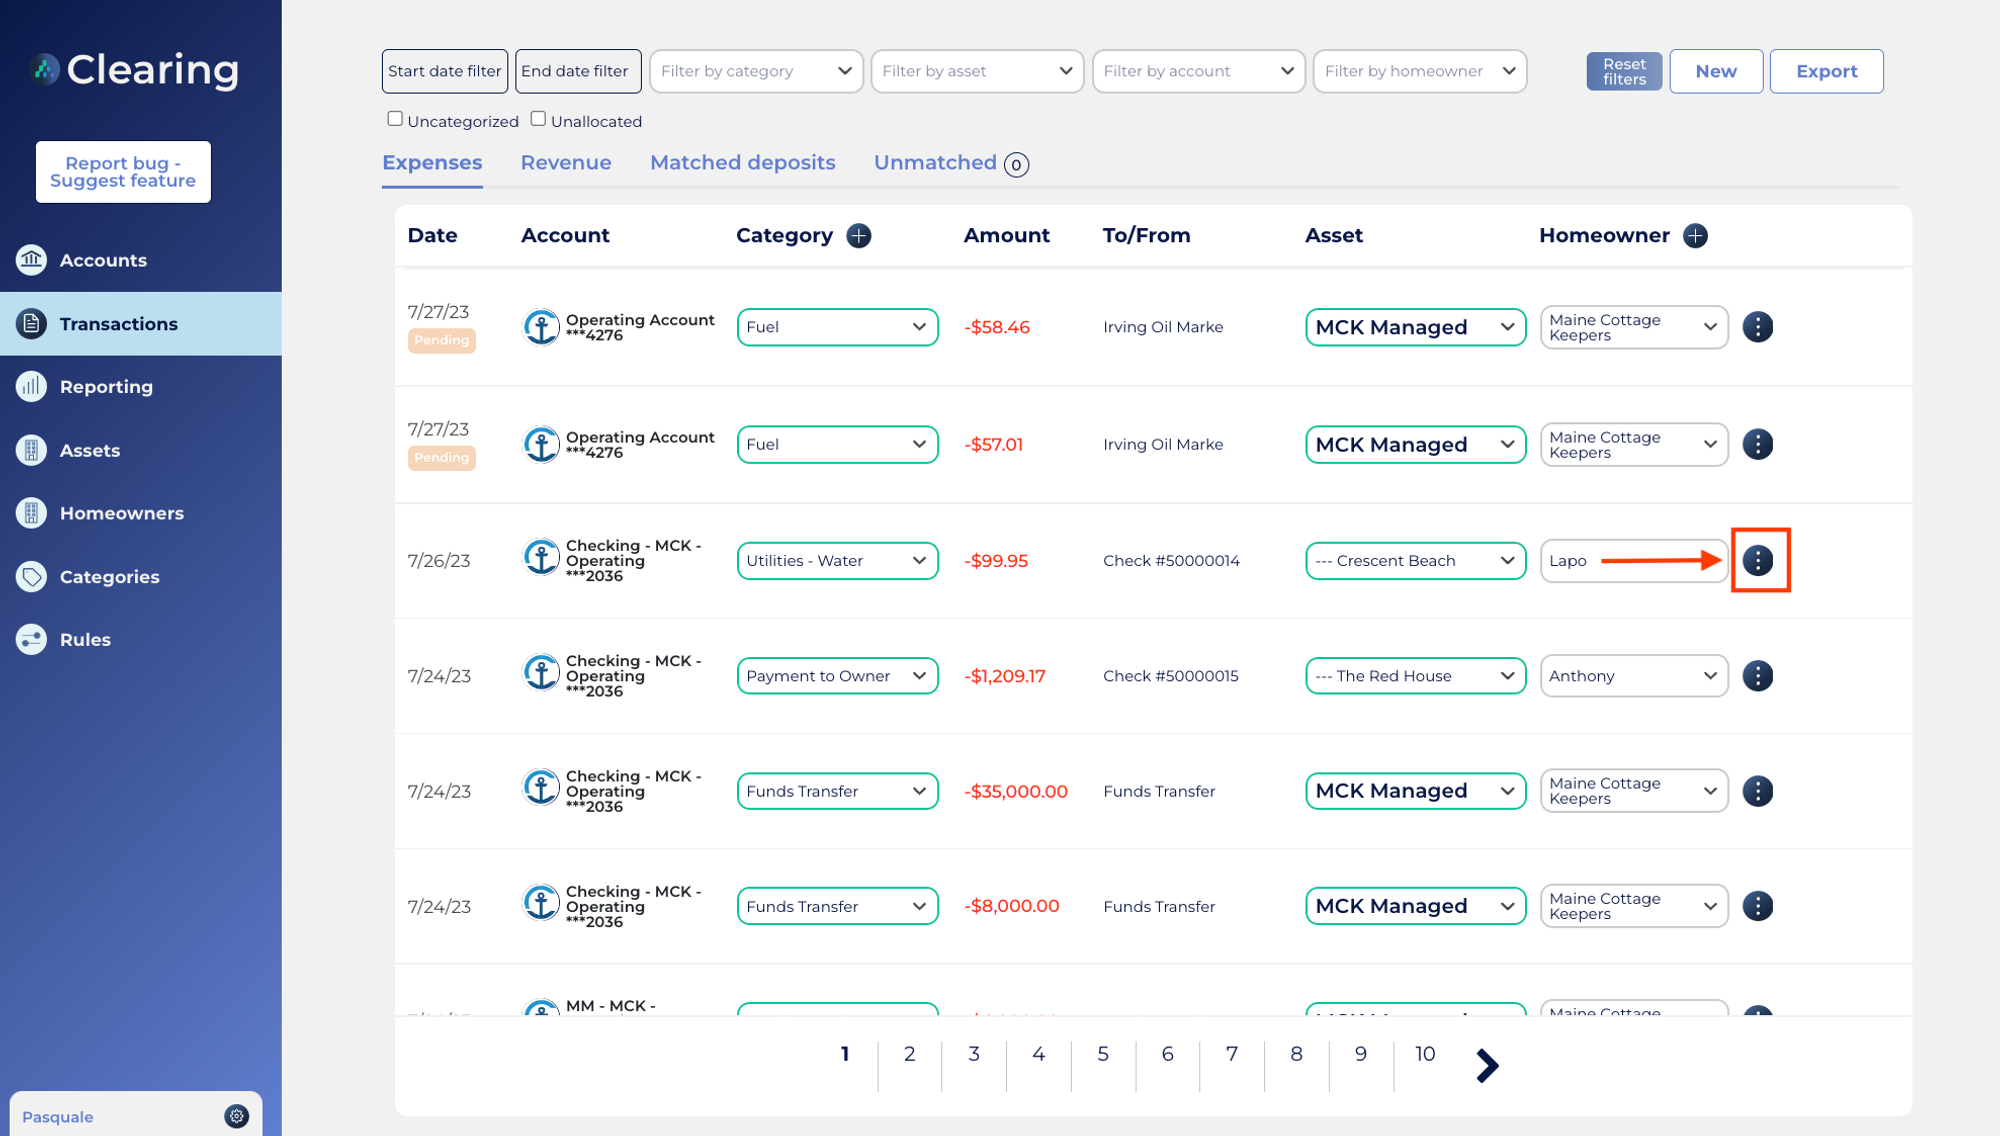
Clicking on the “three dots” button will take you to the "Transaction Details" page, where you can click on the "Split Transaction" option to initiate the splitting process.

Step 3: Allocate Expenses to Specific Properties or Transactions
Once you have clicked on "Split Transaction” link, you'll be presented with a screen where you can enter the desired allocation amounts for each specific property asset or category. The platform will automatically calculate the remaining balance to be allocated, ensuring precise expense distribution.
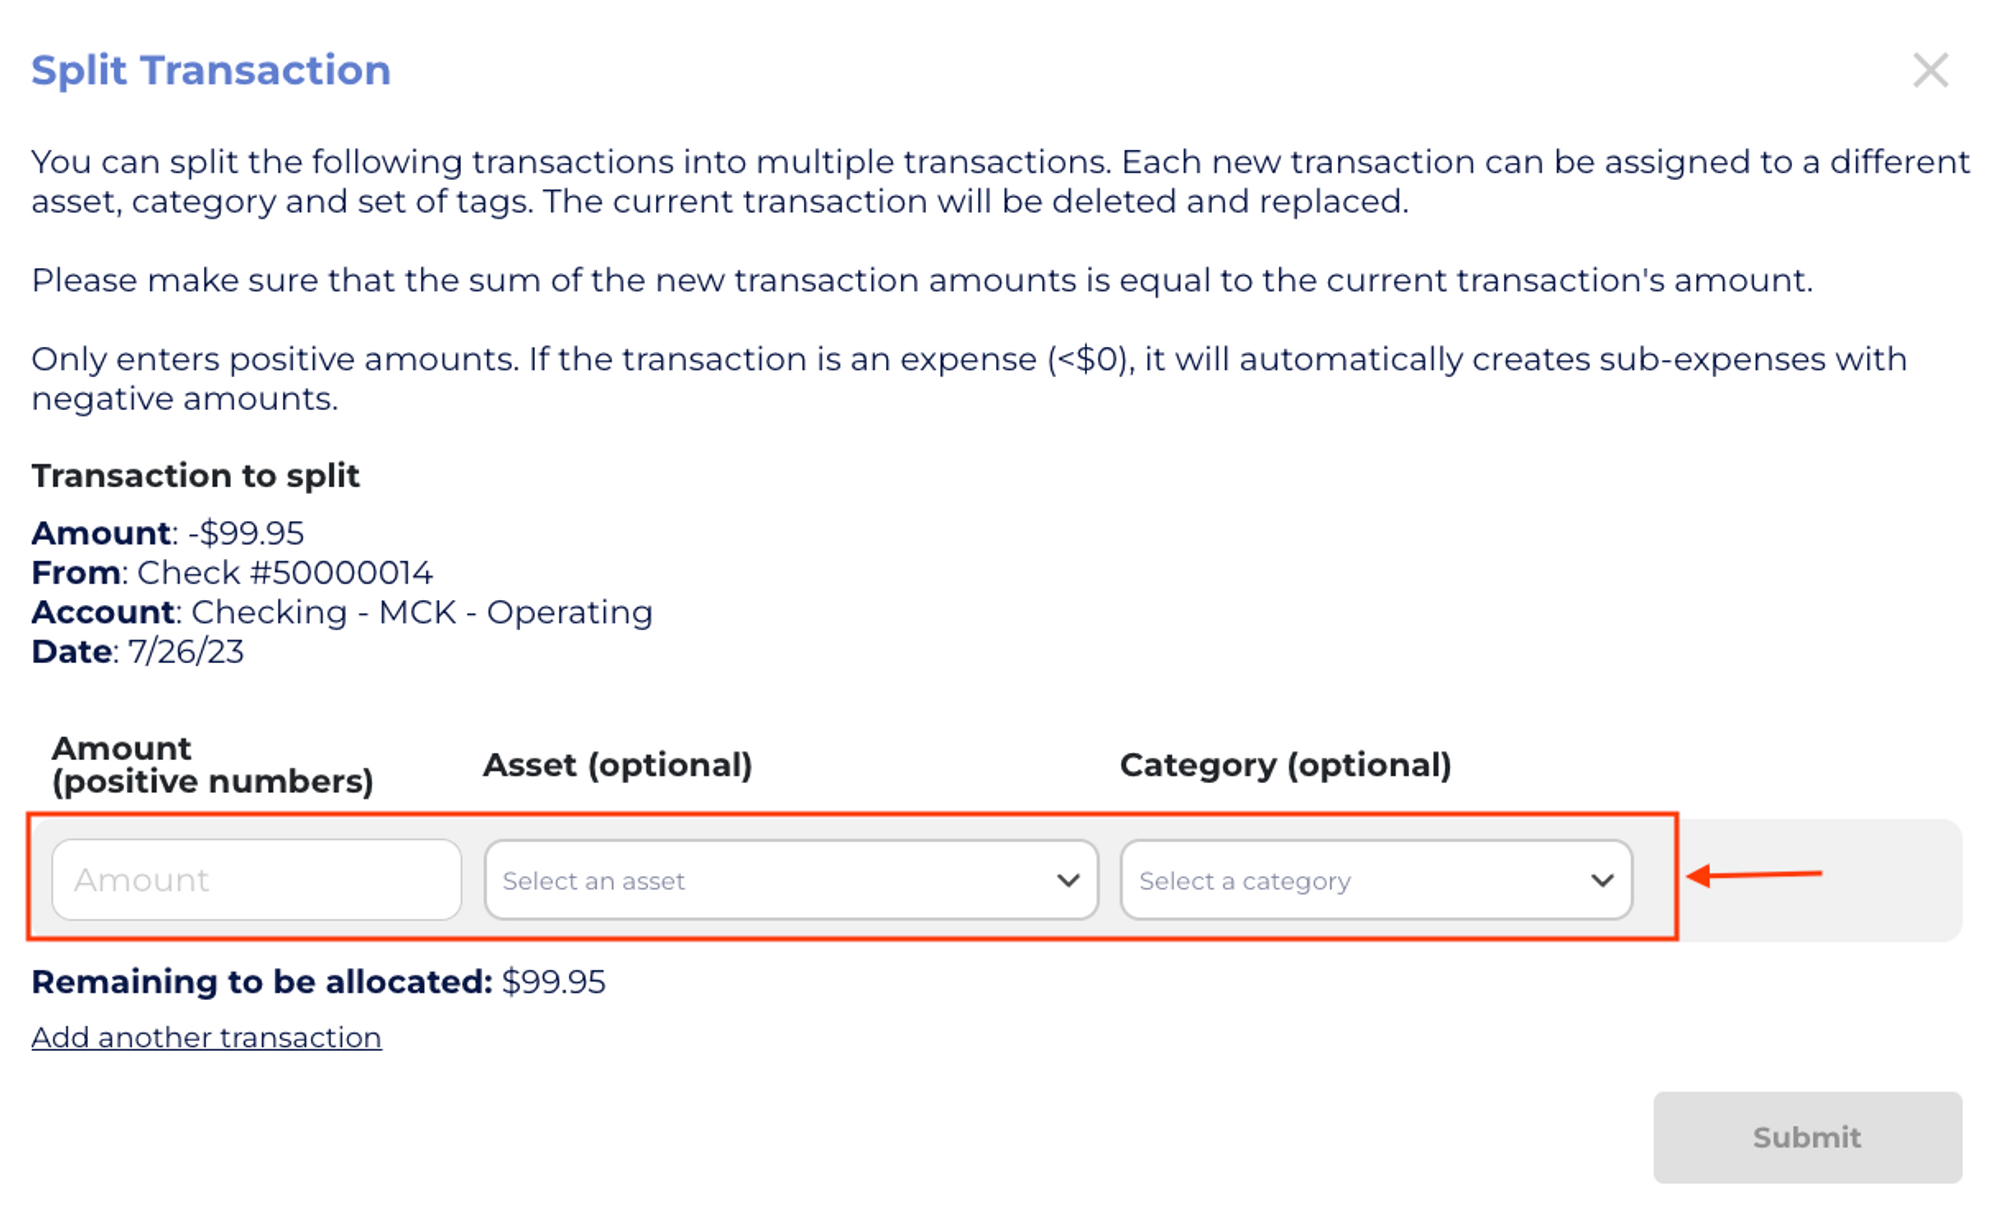
You can continue adding transactions by clicking the “Add another Transaction” option until the remaining balance reaches zero, indicating that the transaction has been fully allocated.

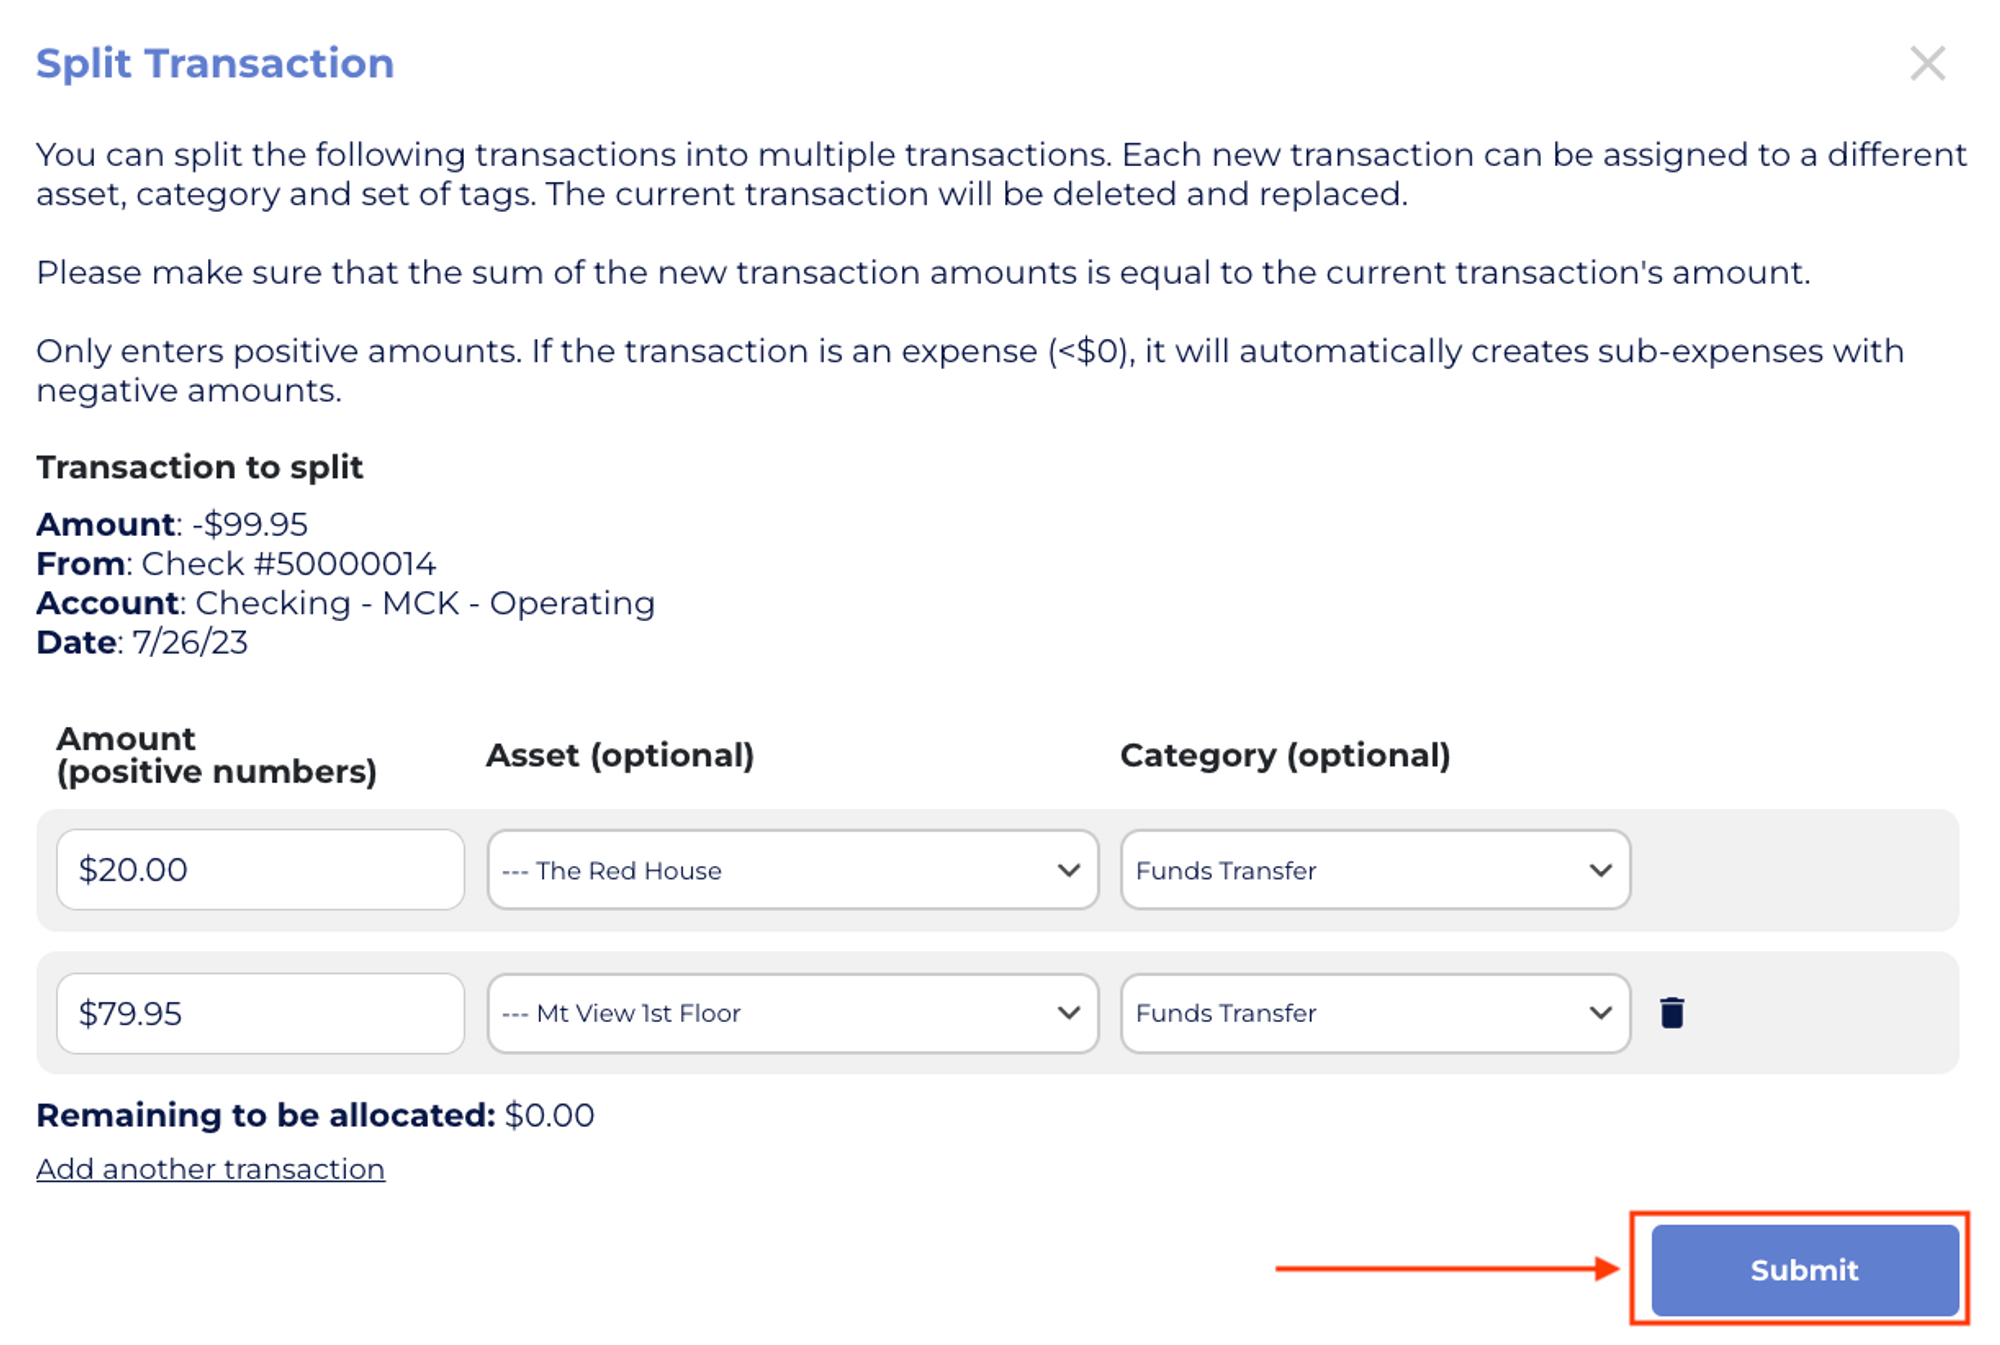
Step 4: Review and Submit
Once you have allocated expenses for all relevant properties or categories, review the details to ensure accuracy. If everything looks correct, click the "Submit" button. The platform will create new individual transactions with the allocated expense amounts for each property or category, as you have specified.
Ready to take control of your financial transactions and unlock a new level of precision with Clearing's Split Transactions feature?
Request a personalized demo now to explore the full potential of Clearing's Split Transactions feature and learn how to efficiently split transactions, allocate expenses between properties or categories, and maintain accurate books per listing.
Explore Clearing's product updates and discover a treasure trove of powerful features that will streamline your financial operations, transaction management, bookkeeping, and overall accounting processes.
Clearing is a Financial Technology Company, not a bank.


.png)
.png)


.png)
.png)
.png)
.png)

.png)

.png)
.png)
.png)
%20(1).png)
%20(1).png)
%20(1).png)
.png)
%20(2).png)
%20(1).png)
%20(1).png)
.png)

.png)
.png)
.png)
%20(1).png)
.png)
.png)
.png)
.png)
.png)
.png)
.png)
%20(1).png)
.png)
.png)
.png)
%20(1).png)
%20(1).png)
%20(1).png)


.jpg)
%20(1).png)
%20(1).png)
%20(2).png)
%20(1).png)

%20(1).png)
%20(1).png)
%20(1).png)


%20(1).png)
%20(1).png)
%20(1).png)
%20(1).png)
%20(1).png)


%20(1).png)
%20(1).png)
%20(1).png)
%20(2).png)
%20(2).png)


%20(2).png)


%20(2).png)
%20(1).png)
.png)


%20(2).png)
%20(2).png)

.jpg)
.png)
.png)
.png)