
How to Create and Automate Recurring Transactions in Clearing
Discover how to effortlessly create and automate recurring transactions within Clearing. Streamline your financial processes, save time, and ensure accuracy.
November 8, 2023
Olivia
%20(1).png)
Managing financial transactions, especially recurring expense transactions, has long been a manual and time-consuming challenge for individuals and businesses. The cumbersome process of recording, tracking, and categorizing these transactions often leads to errors, consuming valuable resources. This is where Clearing steps in as the solution to this challenge by empowering users to easily automate recurring transactions, making it easier to create and manage recurring transaction records for expenses and revenues.
Clearing, a leading platform in property management, has introduced a user-friendly “Recurring Transactions” feature that provides users with a comprehensive and efficient approach to managing repetitive financial entries. By automating the classification of recurring expenses and transactions, this feature ensures accuracy and efficiency, eliminating the potential for errors in data entry and classification. This innovative solution streamlines financial processes, saving time and reducing errors while keeping financial records organized.
Simple Steps to Create and Automate Recurring Transactions in Clearing
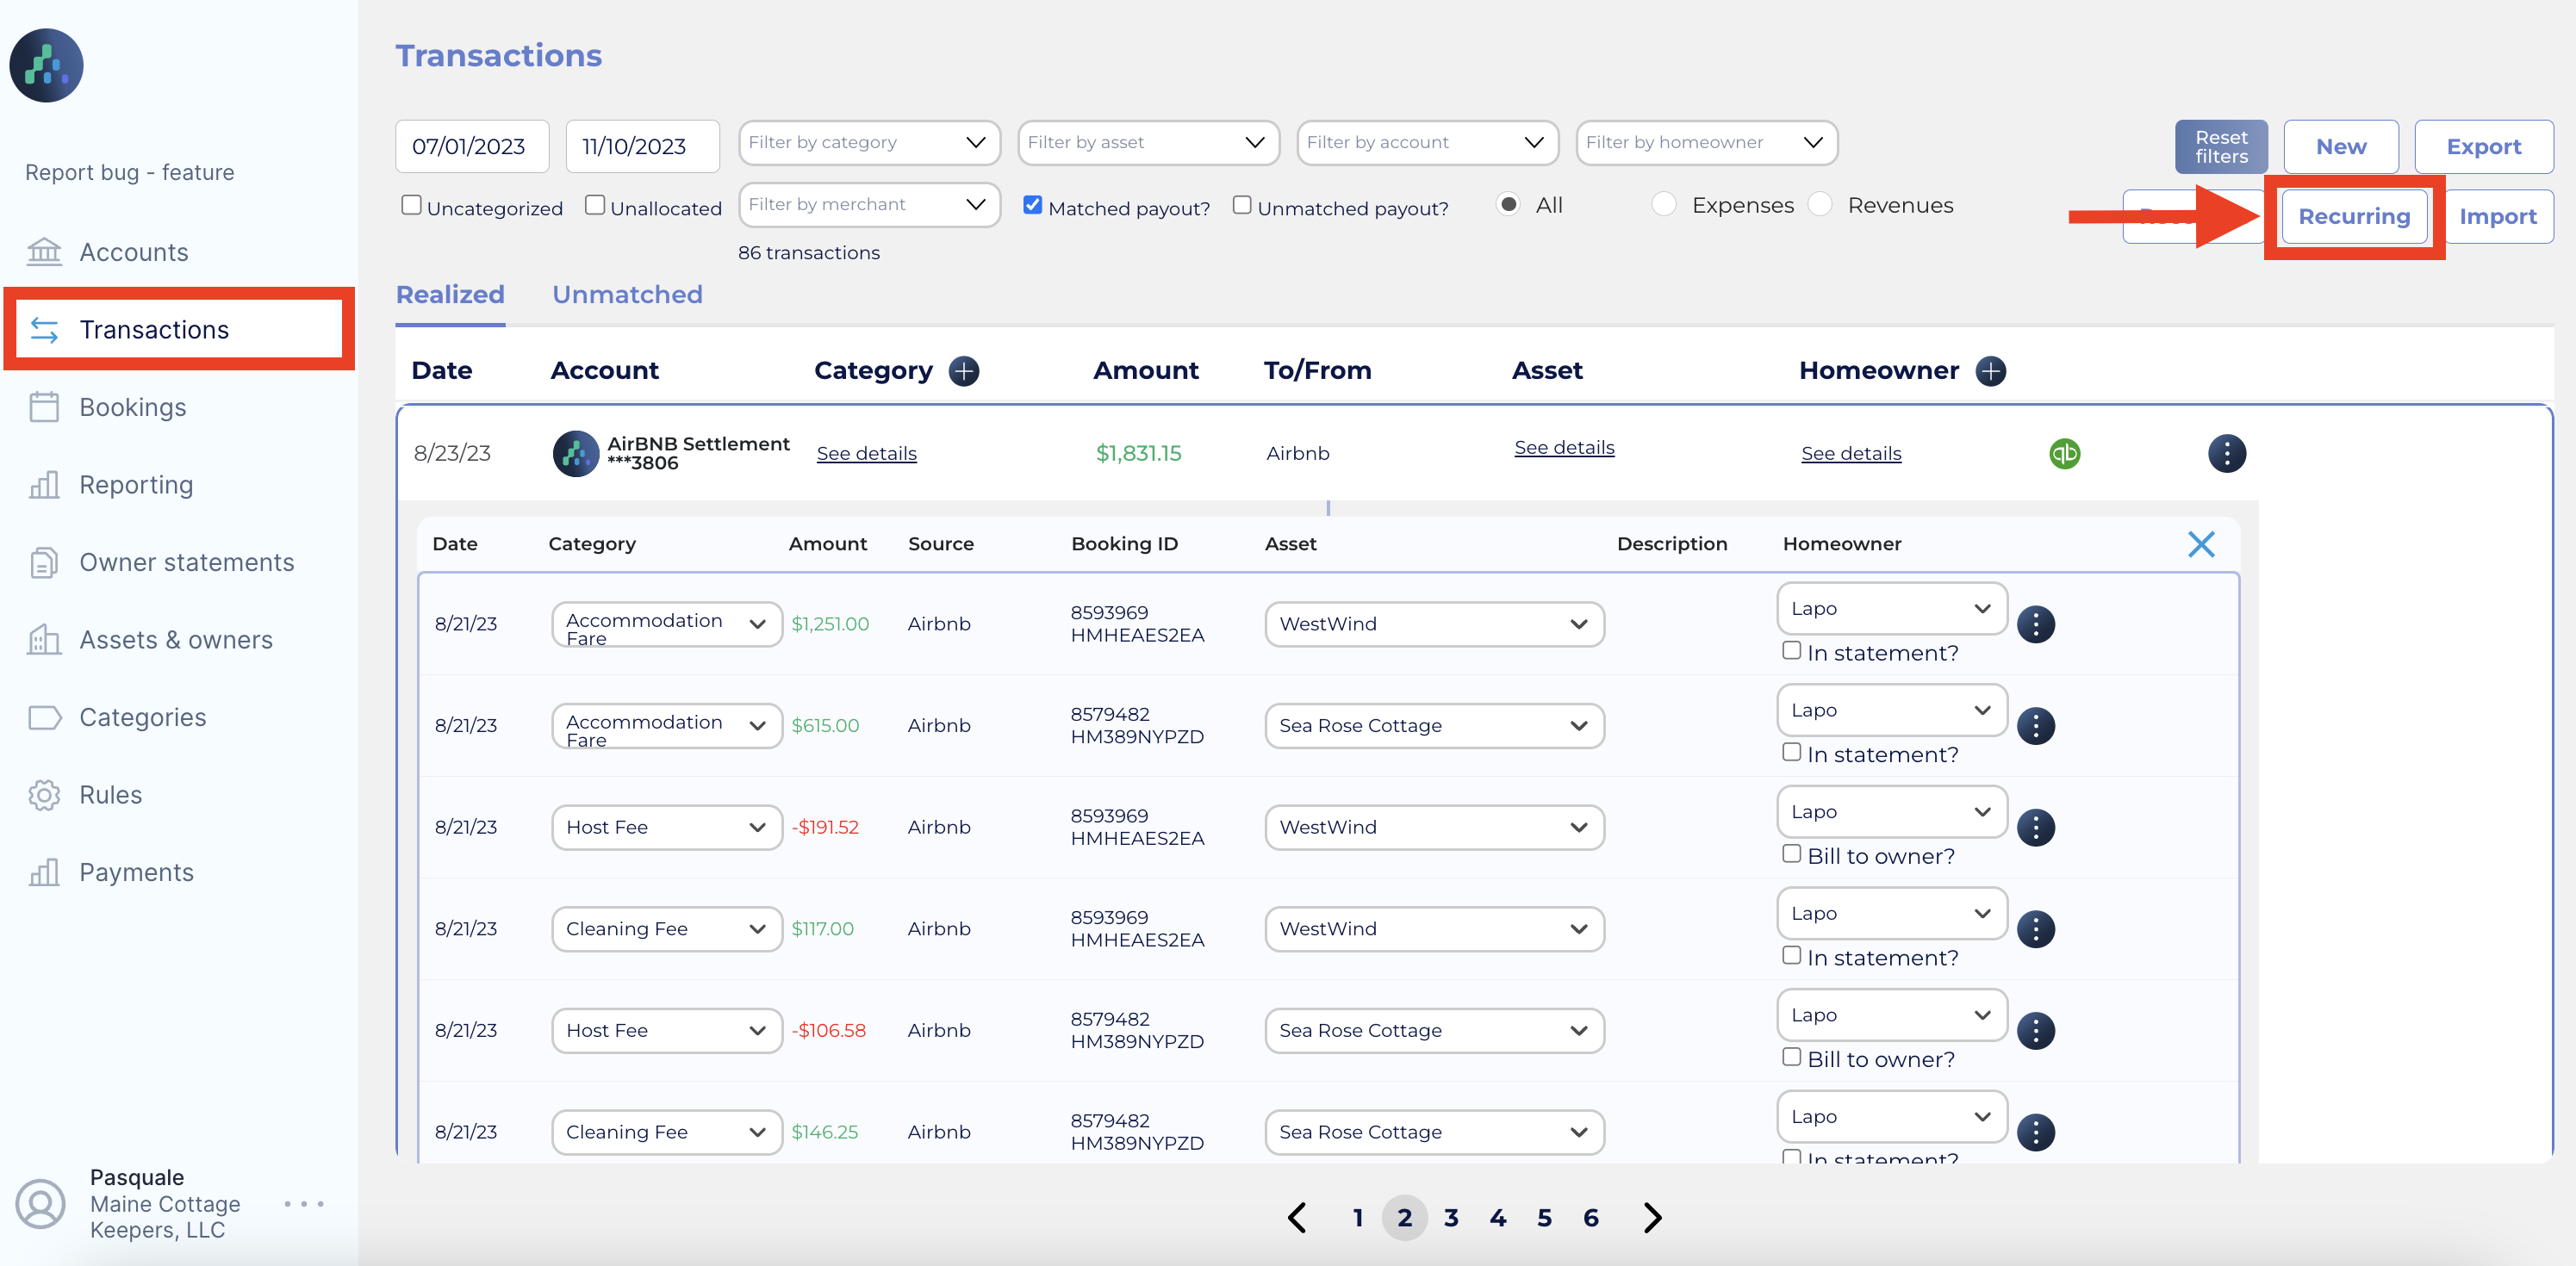
Step 1: Access the Recurring Transaction Interface in Clearing
Log into your Clearing account and navigate to the “Transactions” section in the side menu. Within the "Transactions" section, look for the specific option or tab dedicated to recurring transactions and click on it.
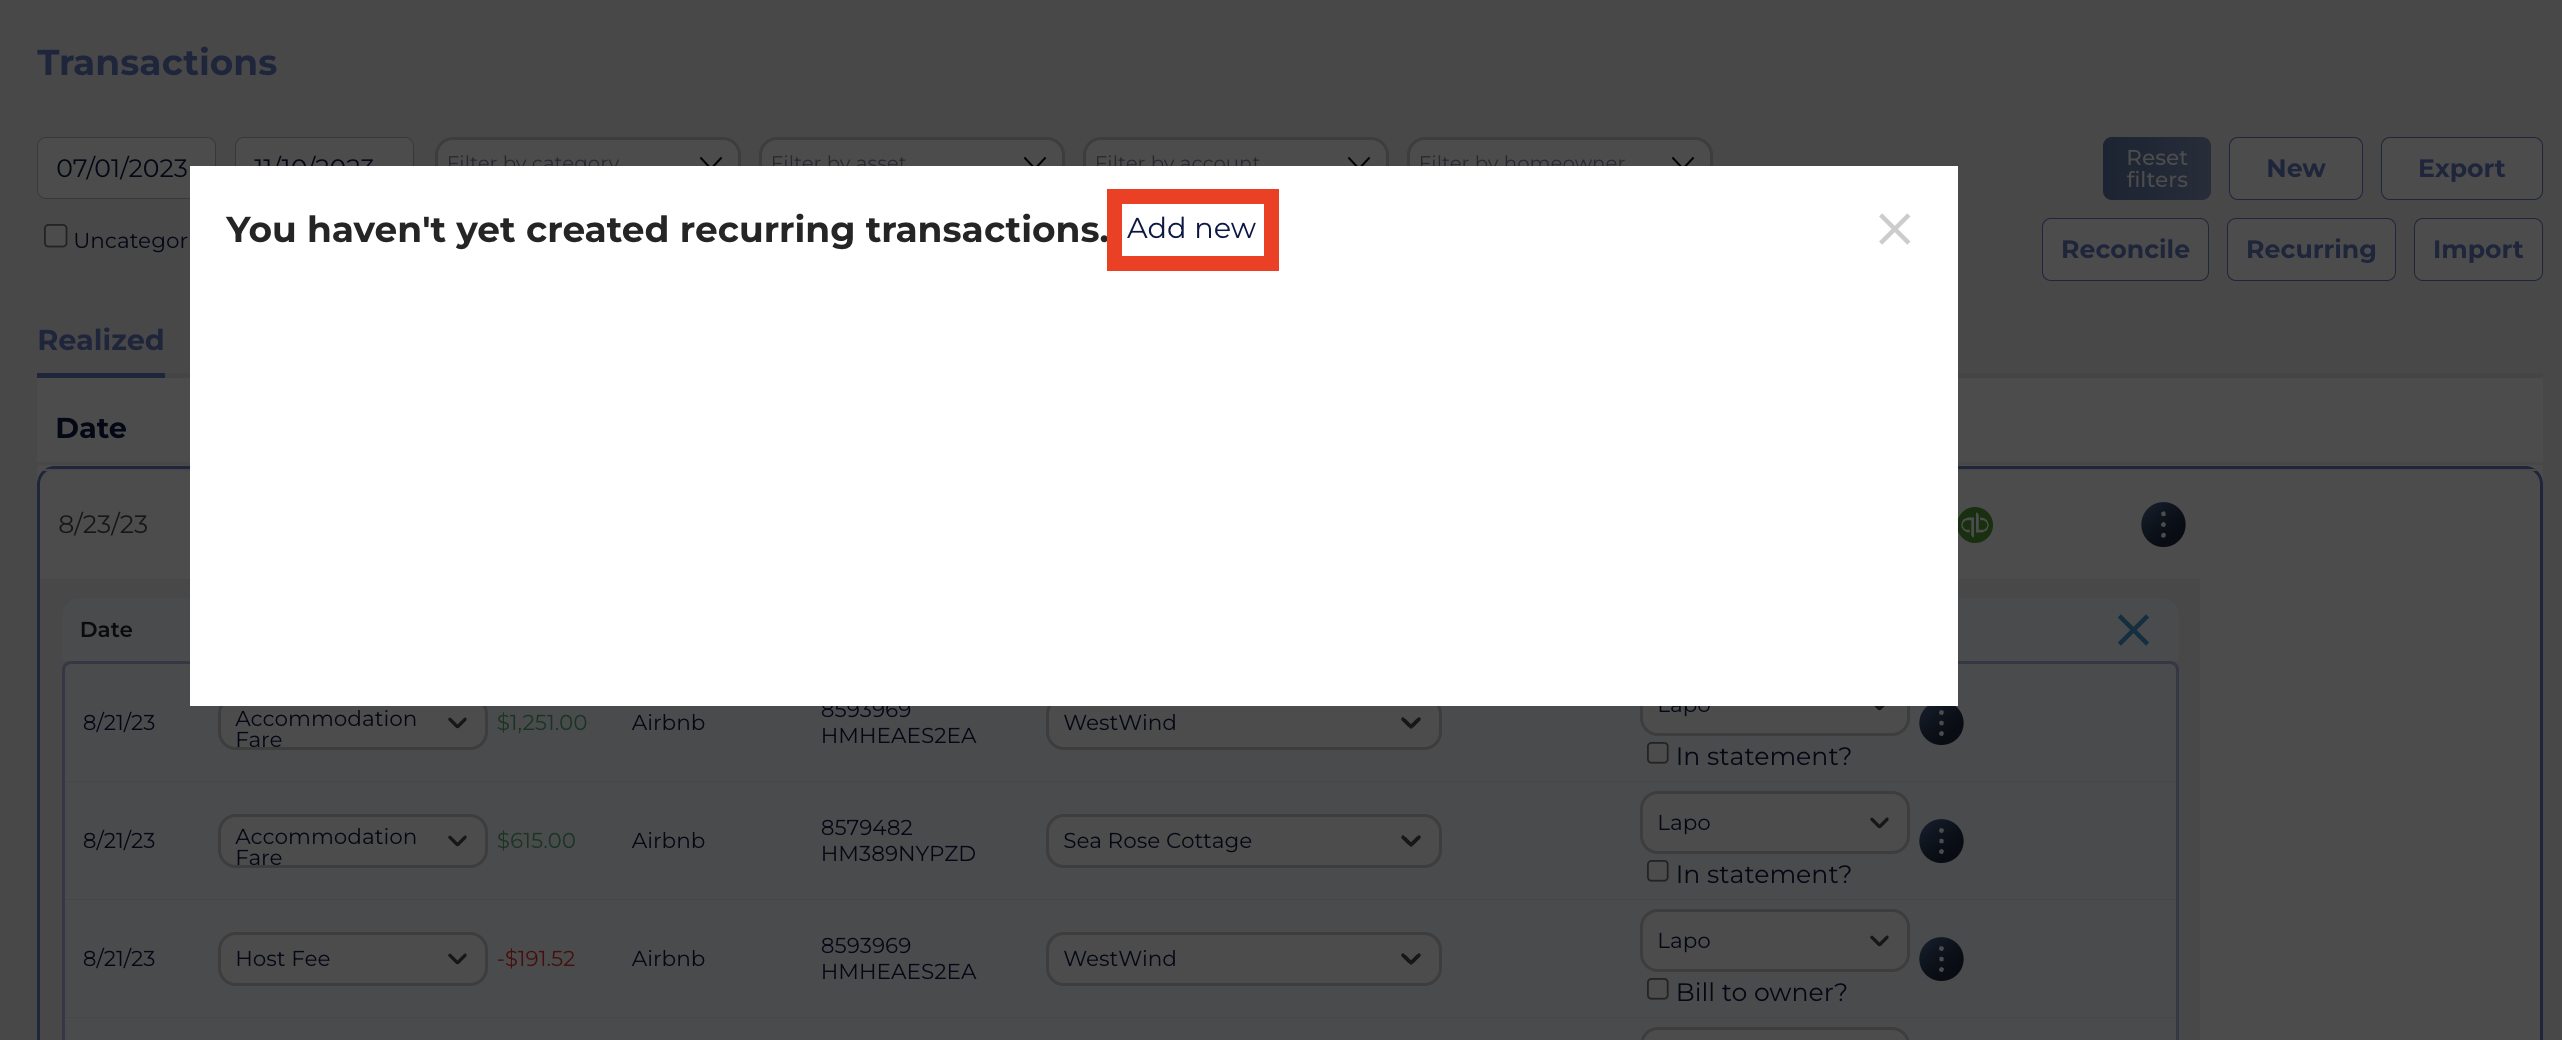
Step 2: Add a New Recurring Transaction
Inside the Recurring Transactions interface, click on the “ Add new” option to add a new recurring transaction.
Once clicked, input essential details such as merchant information, transaction amounts, relevant categories, and asset information in relevant boxes.
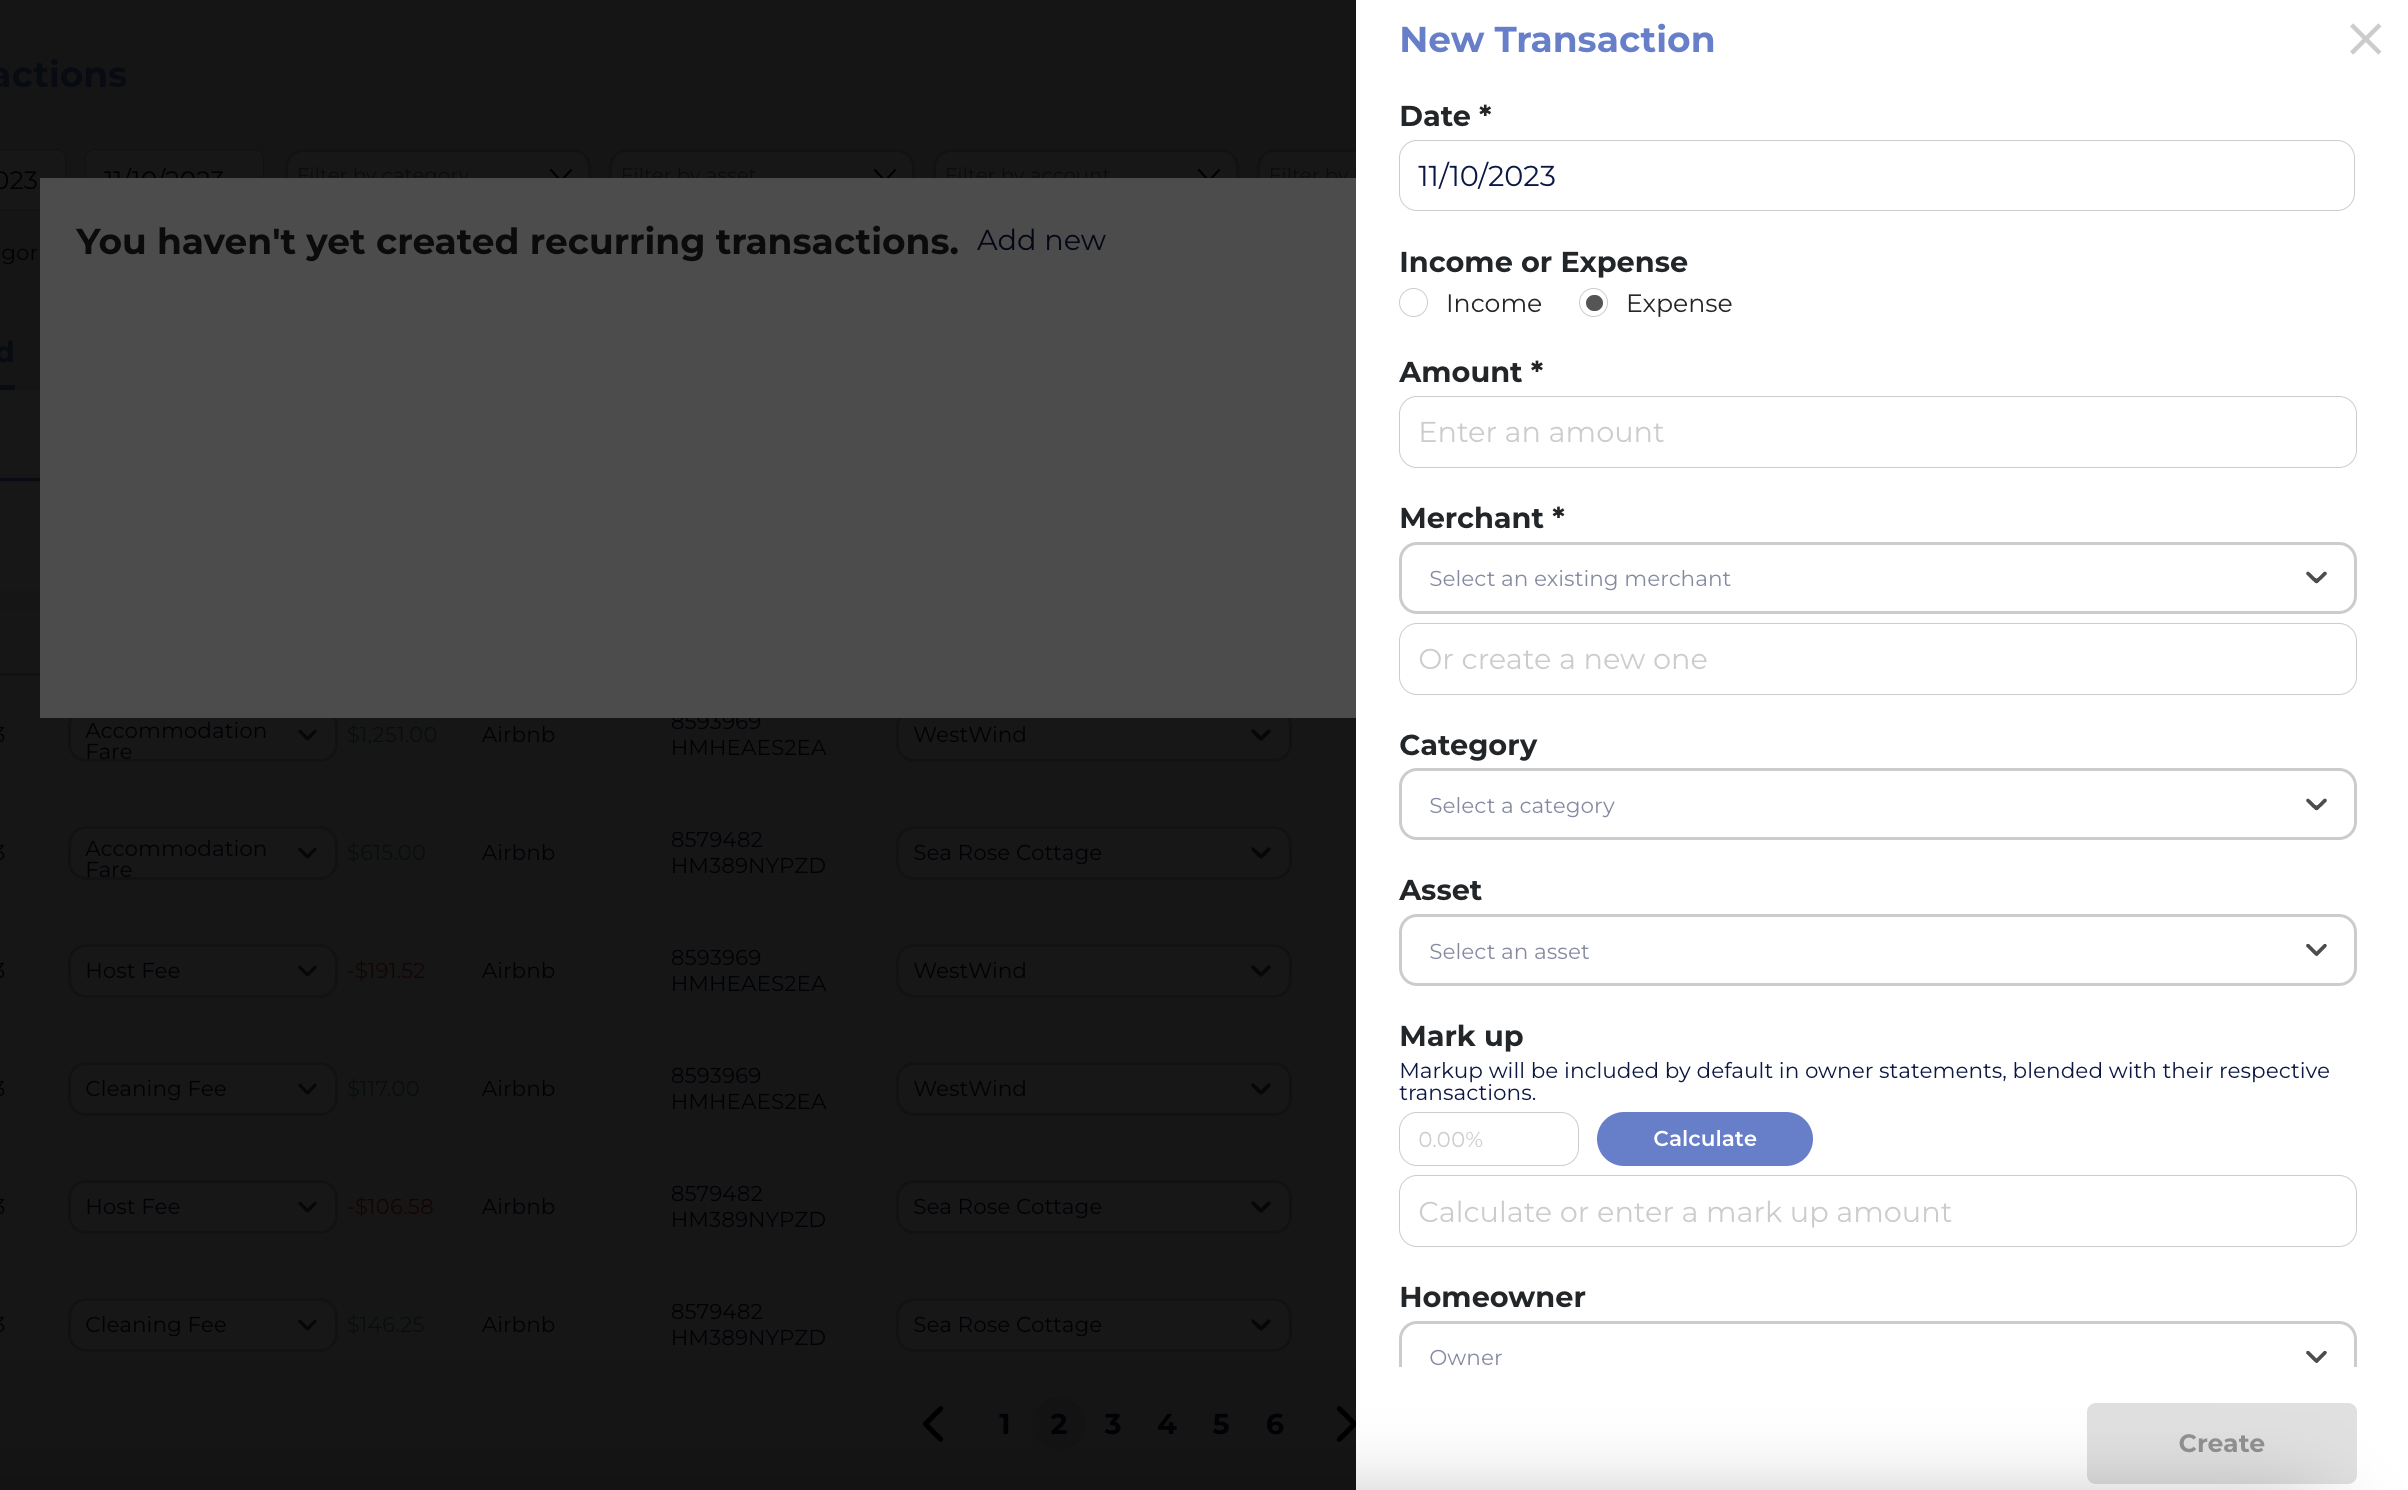
After filling out all the information, click on “ make it recurring”.

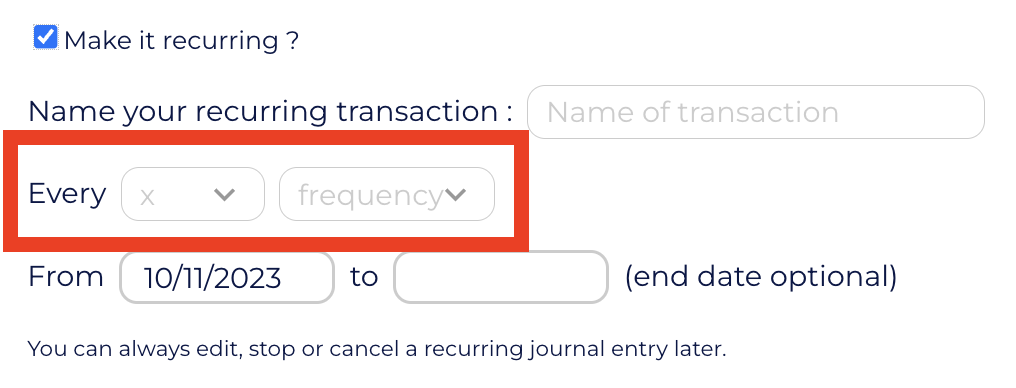
Step 3: Customize Your Entries and Recurrence Schedule
Tailor each entry with a name for easy identification.
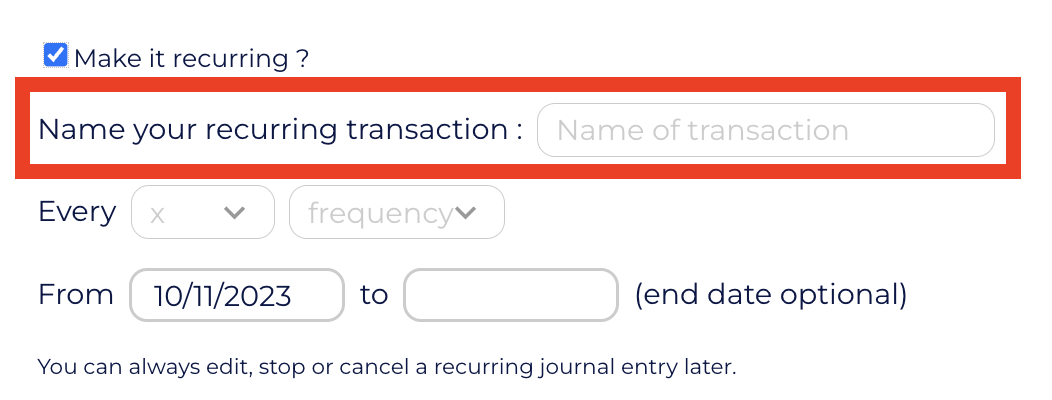
Set the frequency and scheduling for each recurring transaction. Choose whether it's a daily, weekly, monthly, or custom recurrence.
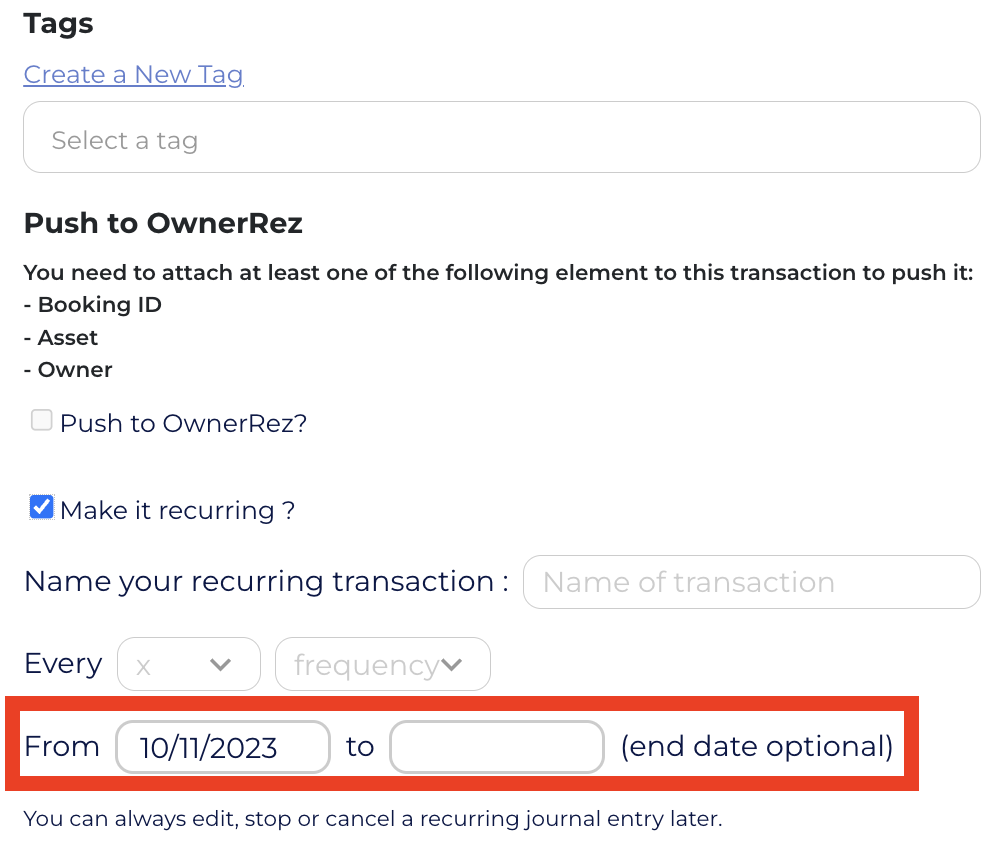
Establish a date range to define the period the transaction will occur. You can leave the end date empty for transactions that need to be continuous and indefinitely repeated.
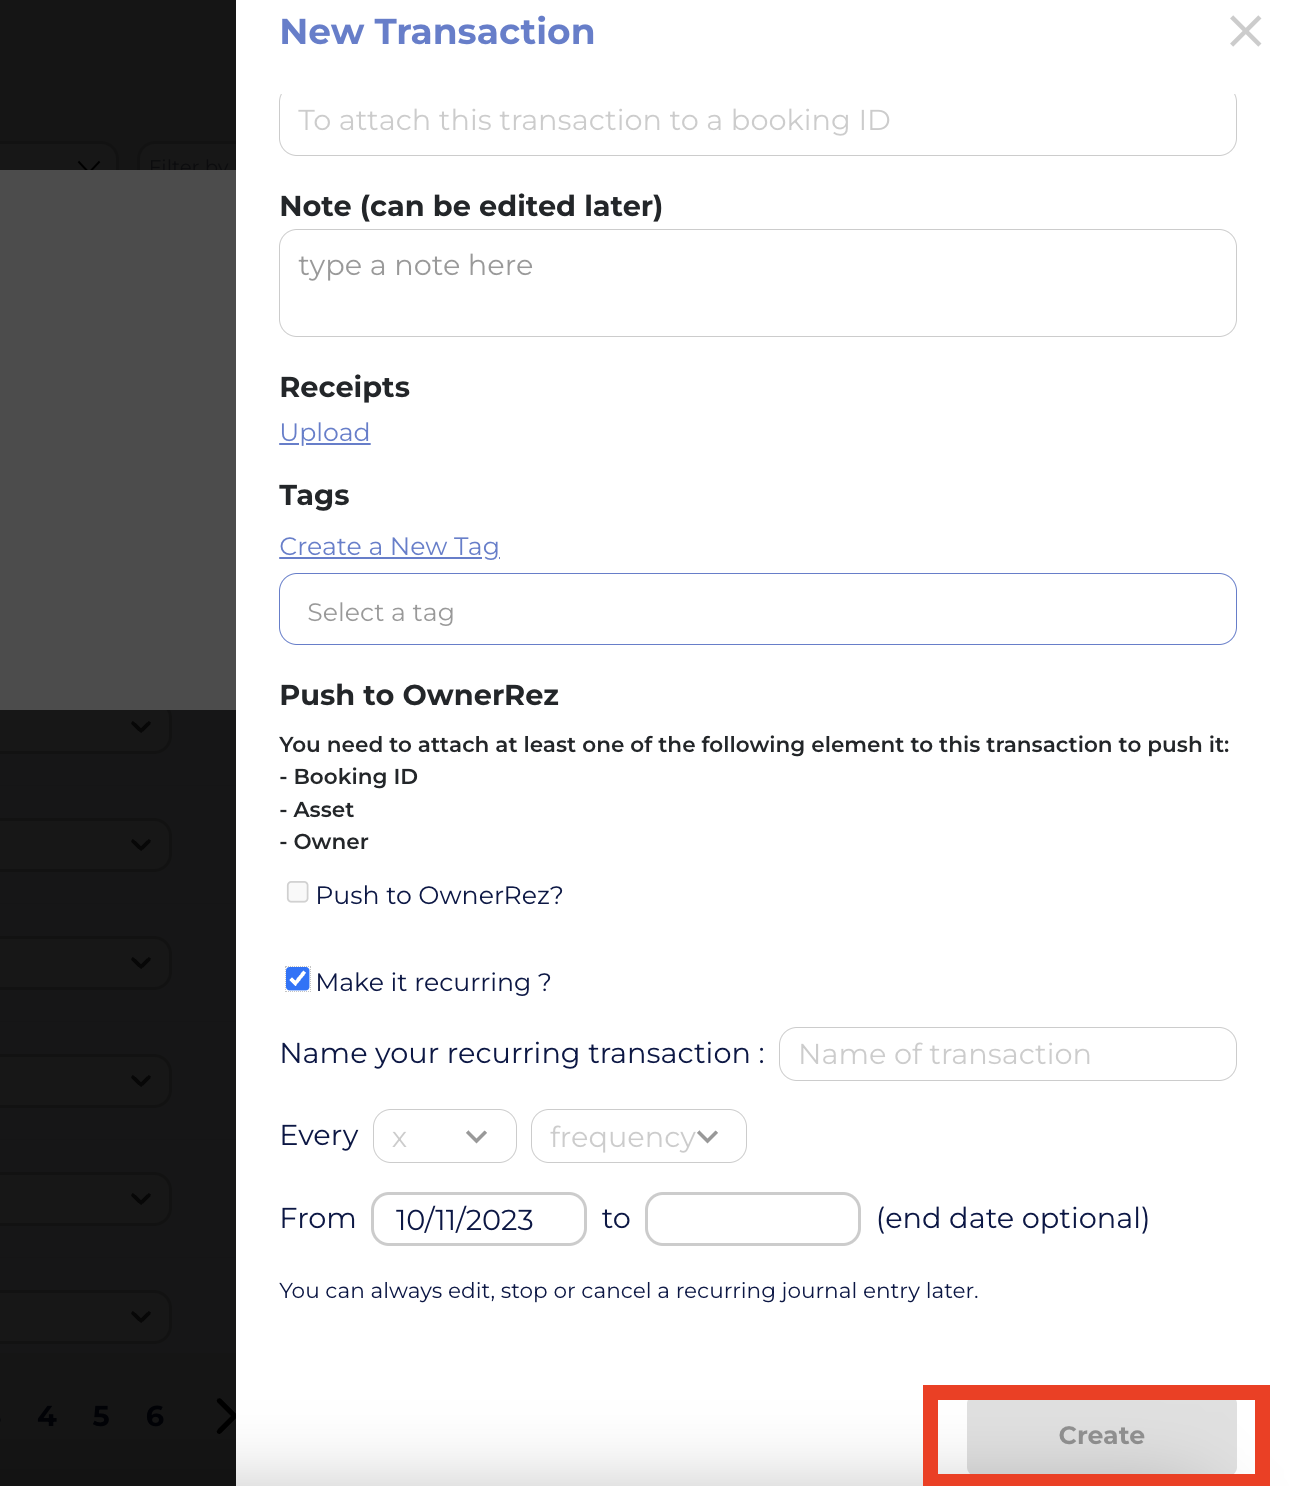
Step 4: Save Your Recurring Transactions
After inputting all the necessary details and customizations, click on the "Create" button to save the details of your recurring transaction.
Once saved, you can easily monitor and manage your recurring transactions within the dedicated interface. This allows for ongoing adjustments and ensures that your financial records remain accurate and up-to-date
Take advantage of Clearing's Recurring Transactions feature to save time, ensure accuracy, and keep your financial records organized.
Ready to revolutionize the way you manage your finances?
Sign up for a free personalized demo and discover how to create and automate recurring transactions in Clearing.
Explore our comprehensive knowledge base today to dive deep into Clearing's features and embark on a journey to revolutionize your financial management experience.
Clearing is a Financial Technology Company, not a bank.


.png)
.png)


.png)
.png)
.png)
.png)

.png)

.png)
.png)
.png)
%20(1).png)
%20(1).png)
%20(1).png)
.png)
%20(2).png)
%20(1).png)
%20(1).png)
.png)

.png)
.png)
.png)
%20(1).png)
.png)
.png)
.png)
.png)
.png)
.png)
.png)
%20(1).png)
.png)
.png)
.png)
%20(1).png)
%20(1).png)
%20(1).png)


.jpg)
%20(1).png)
%20(1).png)
%20(2).png)
%20(1).png)

%20(1).png)
%20(1).png)
%20(1).png)


%20(1).png)
%20(1).png)
%20(1).png)
%20(1).png)
%20(1).png)


%20(1).png)
%20(1).png)
%20(1).png)
%20(2).png)
%20(2).png)


%20(2).png)


%20(2).png)
%20(1).png)
.png)


%20(2).png)
%20(2).png)

.jpg)
.png)
.png)
.png)