
How to Use Sub-Balances for Efficient Fund Management in Clearing
Streamline your fund management with Clearing's Sub-Balances. Learn how to efficiently use Sub-Balances for transparent and organized financial workflows in property management.
August 15, 2023
Corey
.png)
Managing funds for multiple homeowners and property assets in a Short-Term Rental business can be a complicated task. The conventional practice of receiving funds in a single bank account often leads to the mixing of funds and issues related to visibility, transparency, and organization. Clearing offers a powerful solution to address these challenges by introducing Sub-Balances for efficient fund management. This feature empowers property managers to separate funds and group funds for specific properties and homeowners, providing enhanced control and flexibility over property finances.
Clearing's Sub-Balances revolutionize fund management by offering unparalleled transparency and control over rental property finances. By separating funds with Sub-Balances, property managers can improve the organization of funds, streamline transactions, and ensure owner visibility into the financial management of their specific properties. This feature can serve as an effective tool for efficiently handling working capital for specific Short-Term Rentals and making vendor payments from specific Sub-Balances much easier.
Simple Steps to Setting Up Sub-Balances in Clearing
Step 1: Access the Sub-Balances in Clearing
Log in to your Clearing account and navigate to the "Accounts" section in the side panel. On the main account page click on "View Sub-Balances" to access the Sub-Balance management interface.
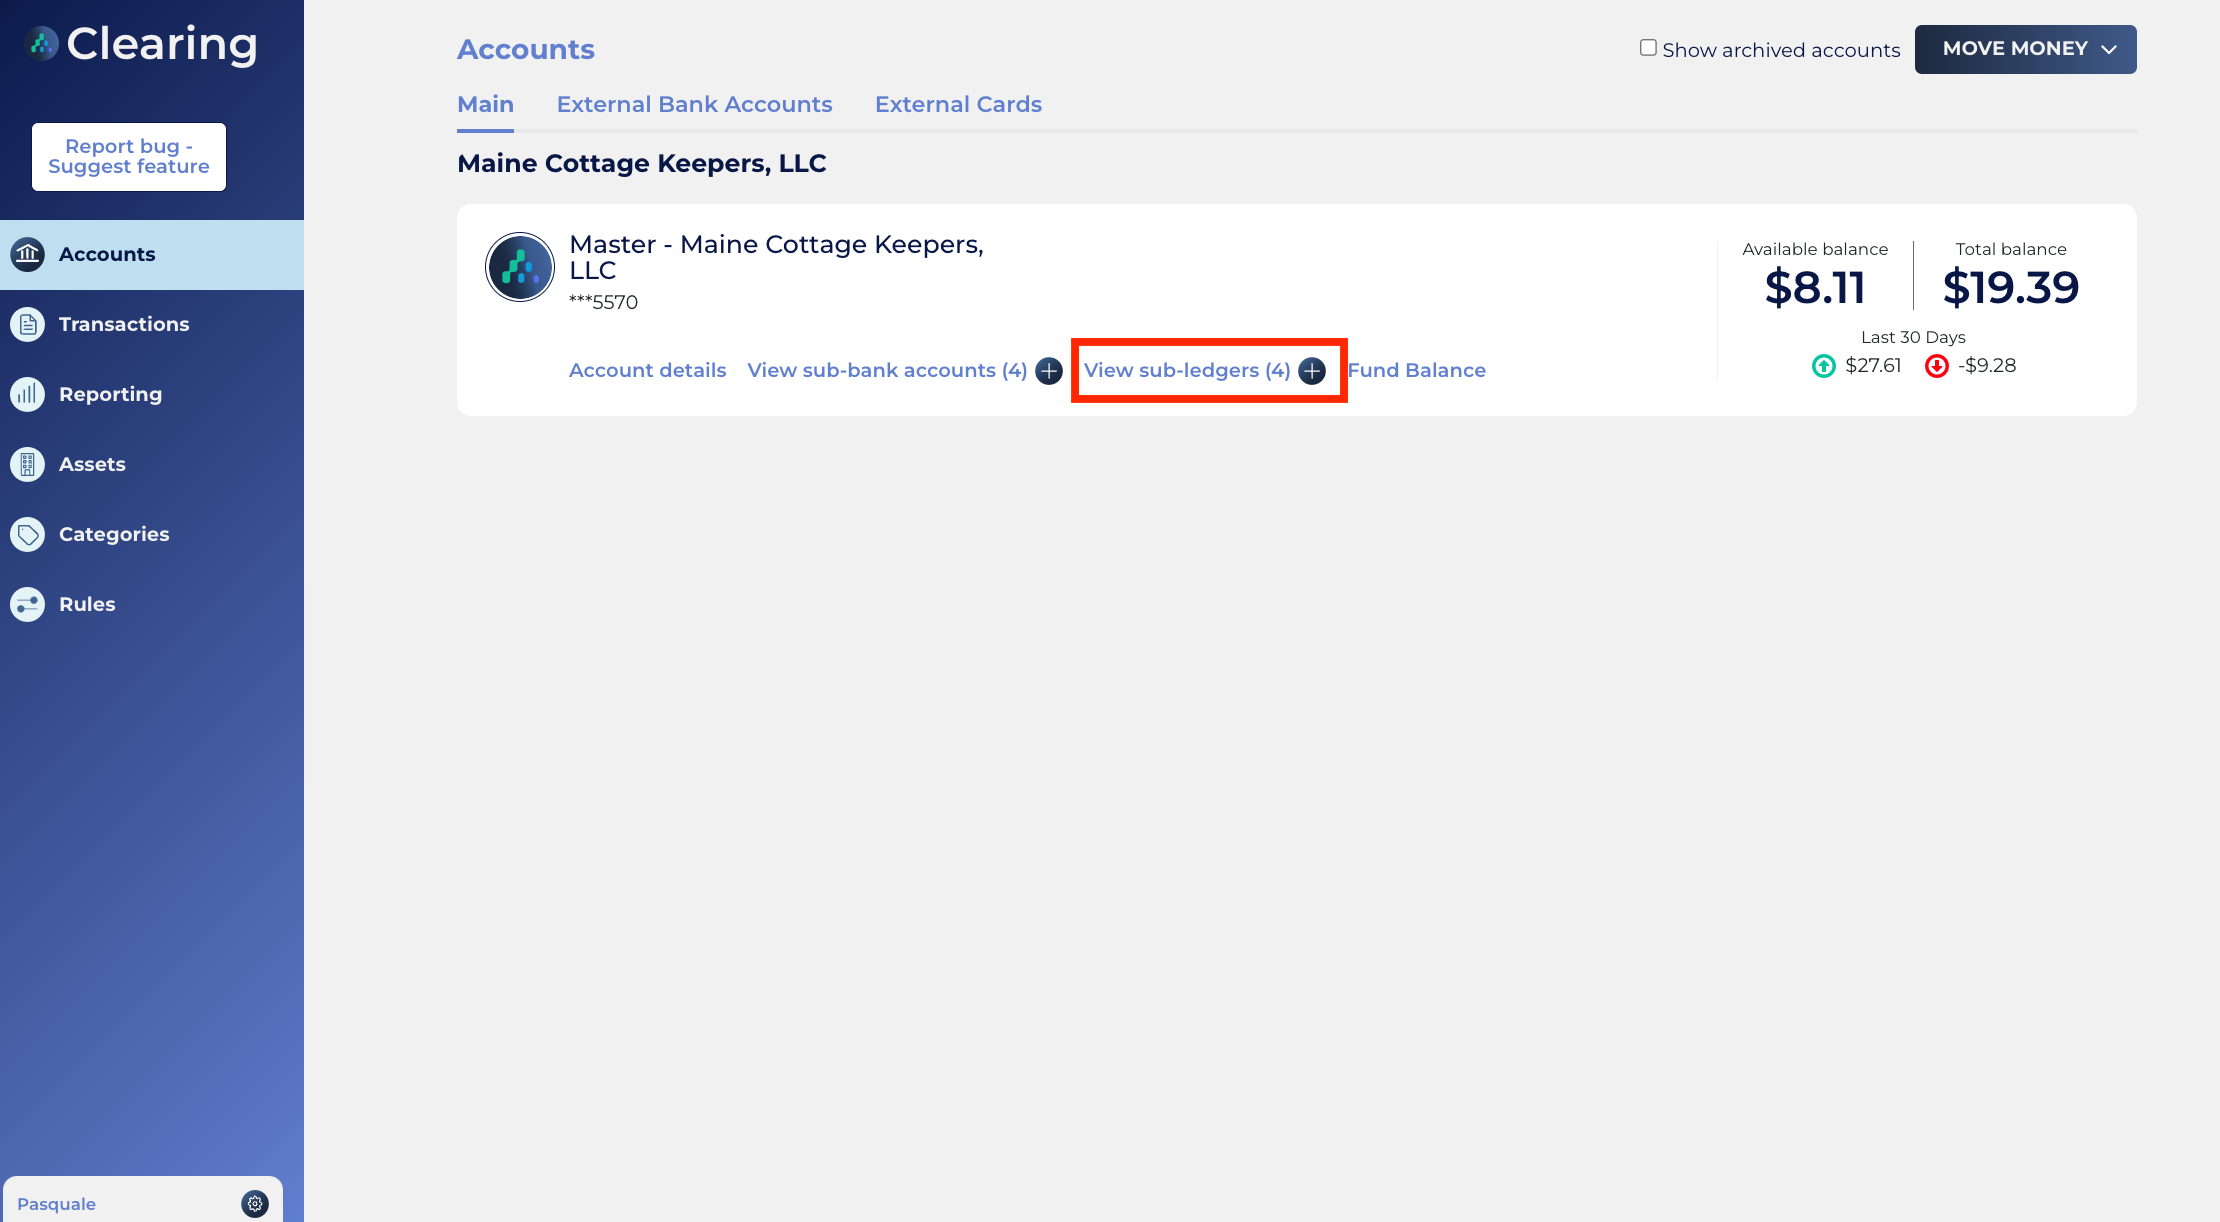
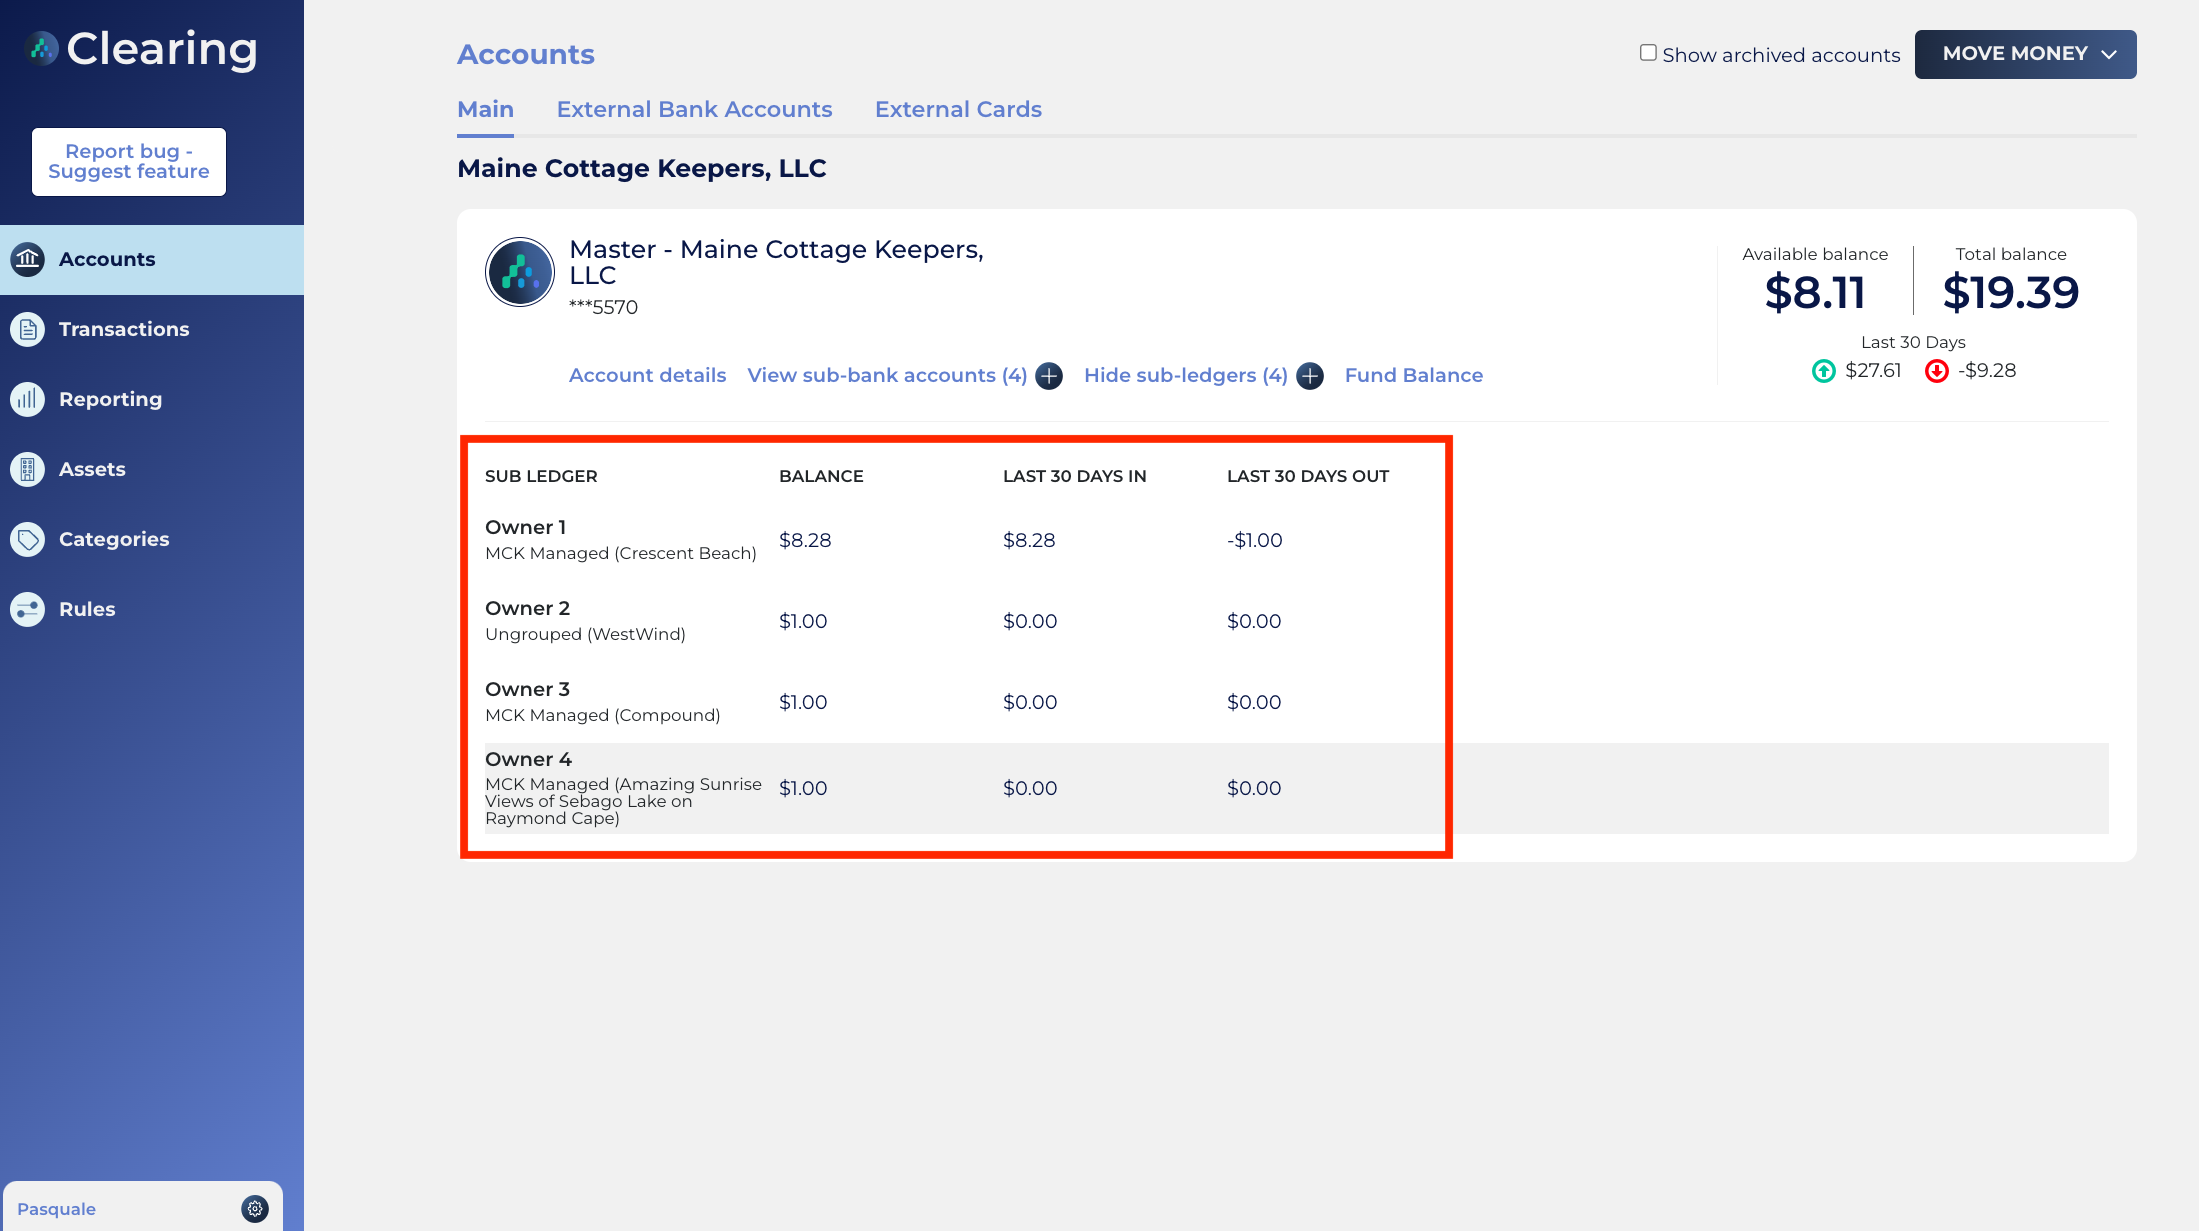
Here you can see the already created Sub-Balances and available balances for each Sub-Balance.
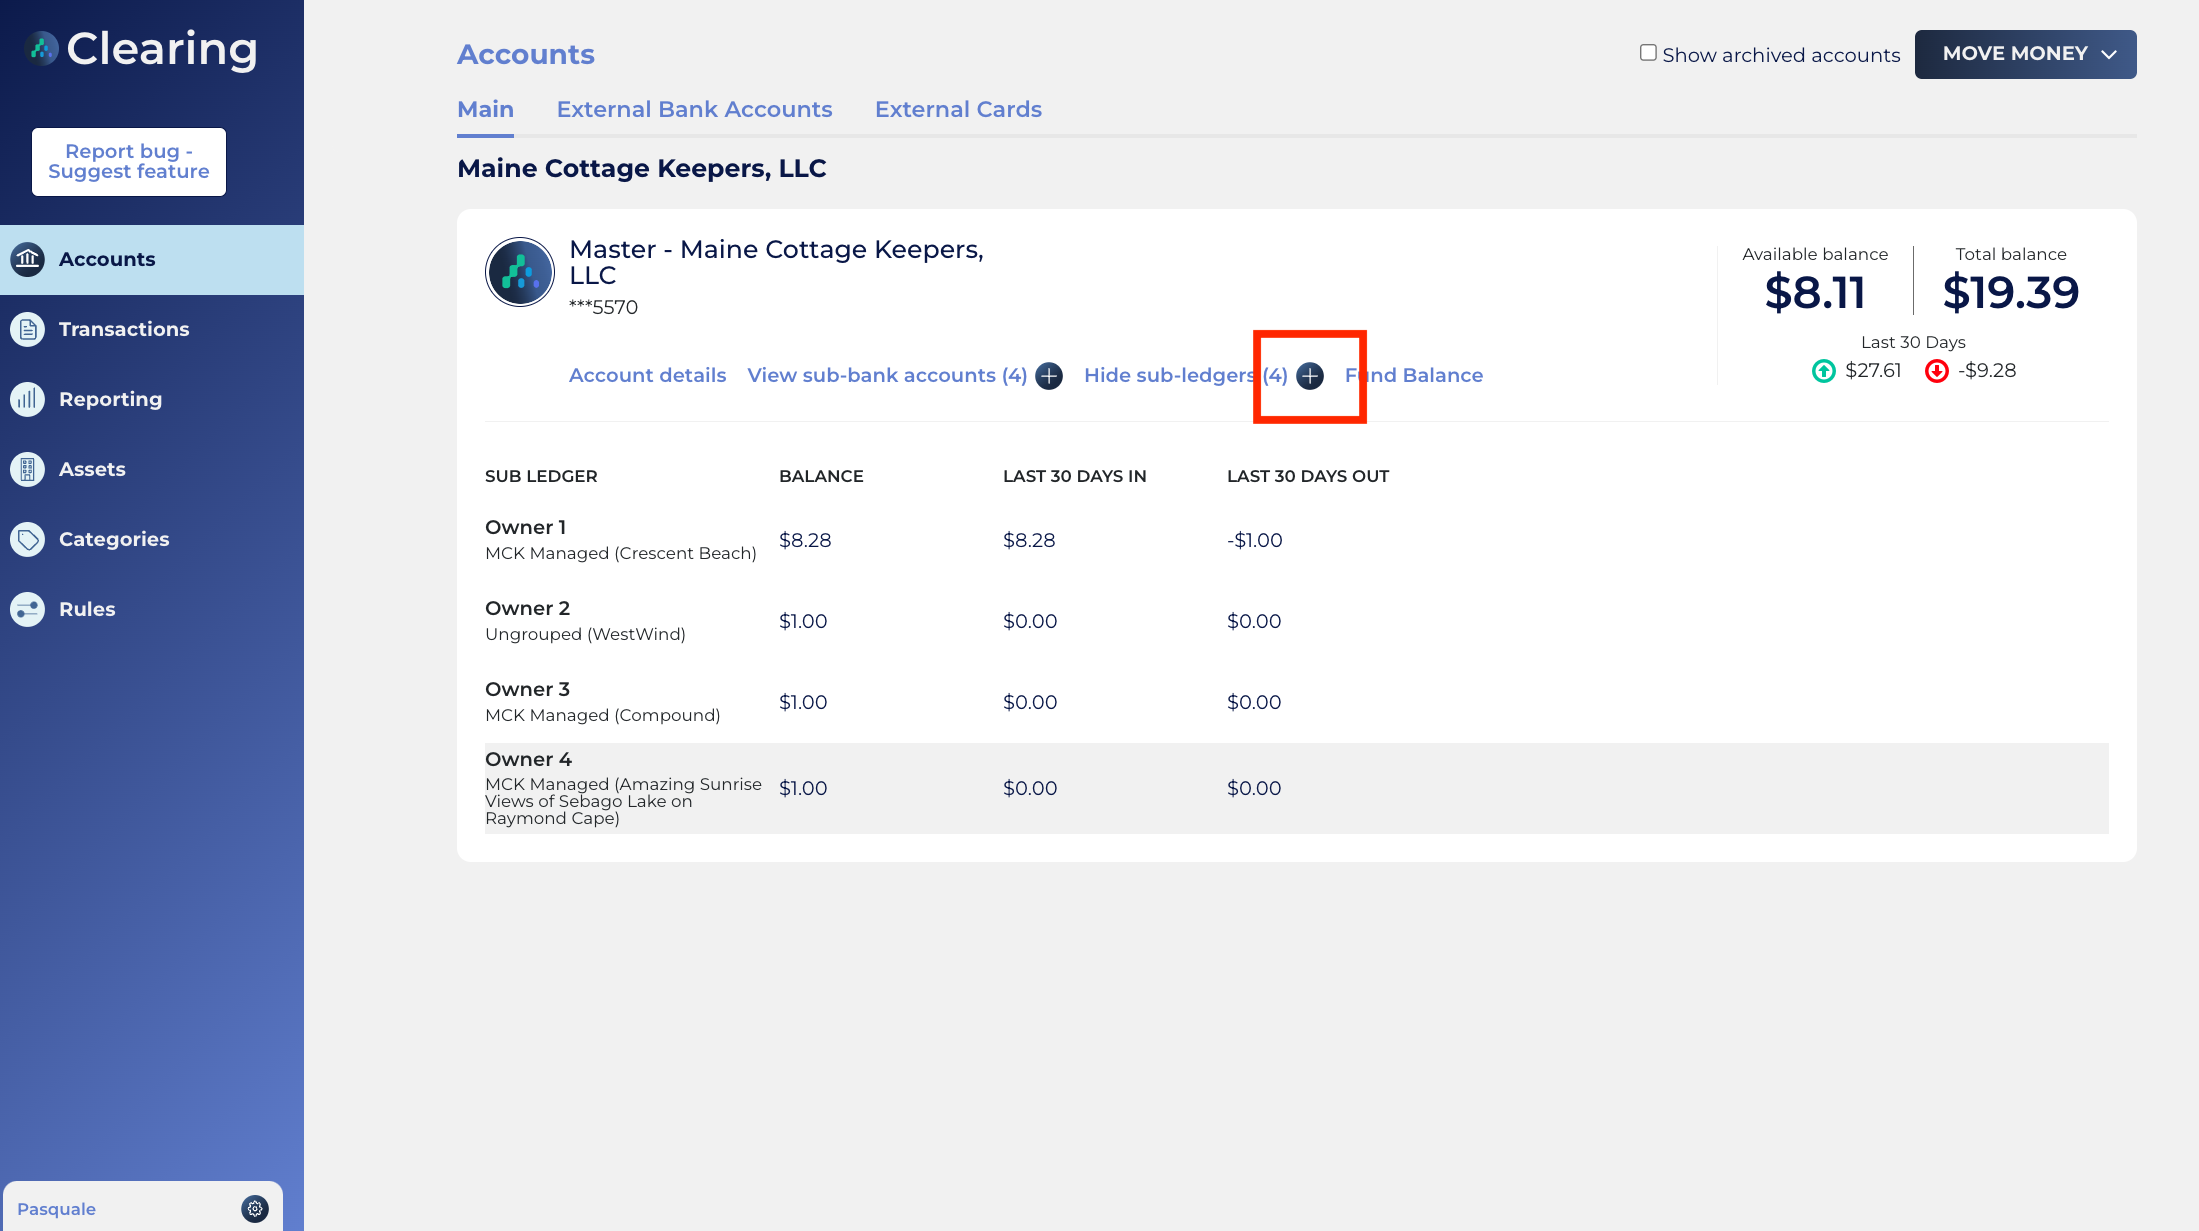
Step 2: Create a New Sub-Balance
Click the “+" sign beside the “View Sub-Balance” to create a new Sub-Balance.
Assign a name to each new Sub-Balance and link each Sub-Balance to the specific property.
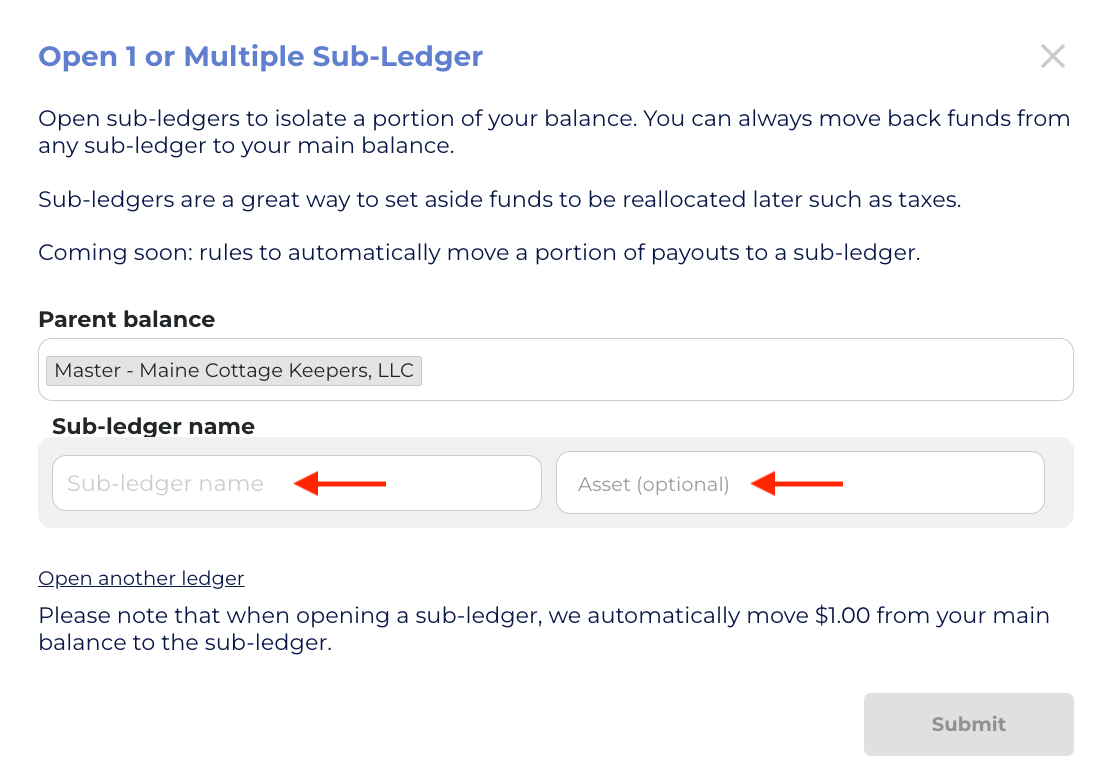
Click on “Open another ledger (Balance)” if you want to create multiple Sub-Balances at once.

Step 3: Transfer Funds
Once the desired Sub-Balances are created, you can easily transfer funds amongst them, and the main balance. Click on “Move Money” located on the main account page and then select the “Ledger (Balance) Transfer” option.

Once selected, you can choose to move funds from a Sub-Balance to the main balance or from the main balance to the Sub-Balance. You can also move money between Sub-Balances here.
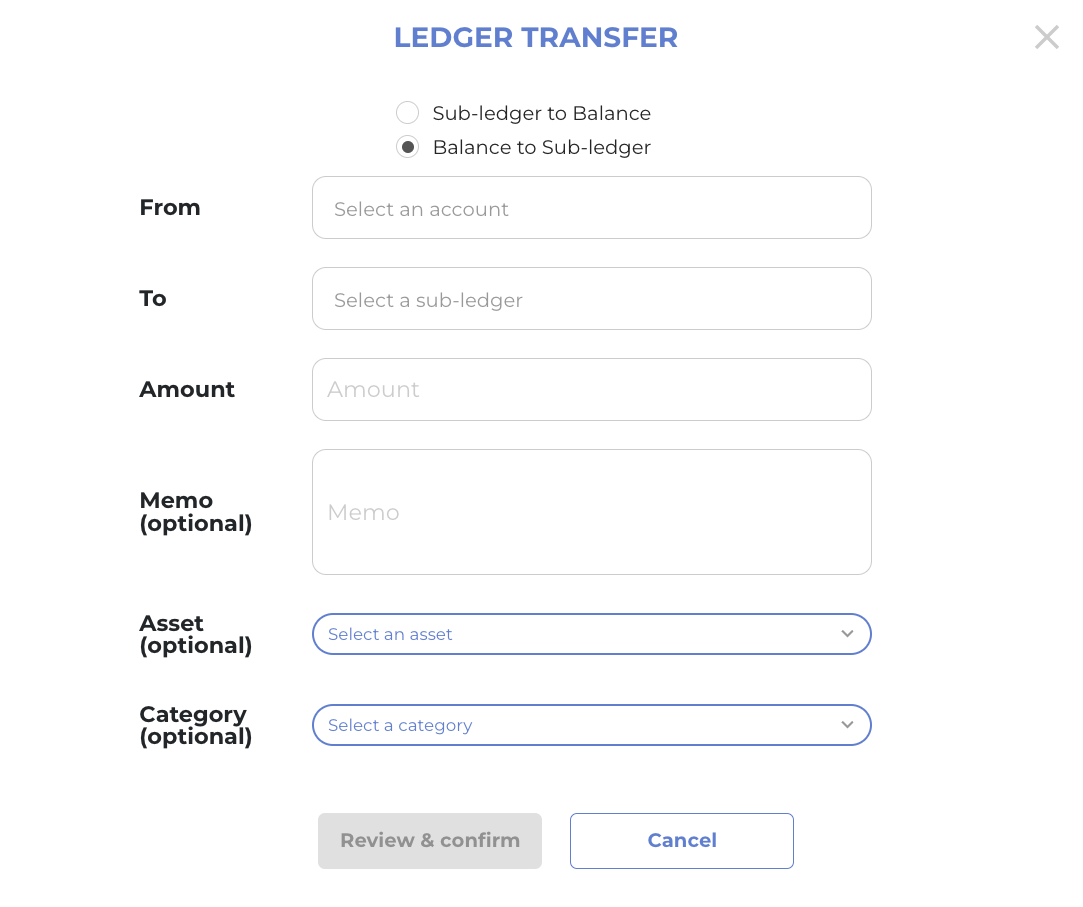
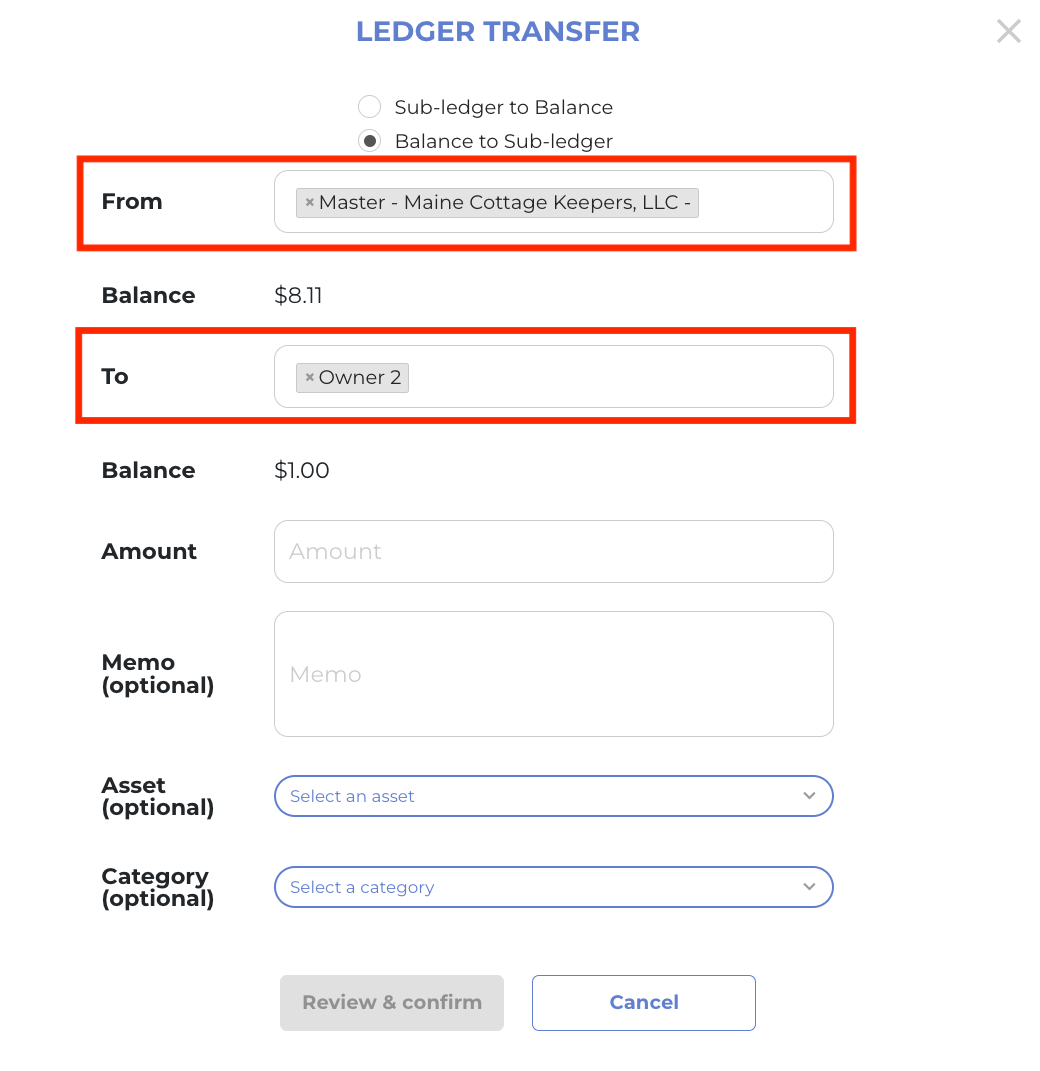
For example, if you want to transfer funds from the main balance to a specific Sub-Balance, click on the particular names of the accounts involved. You can now select the main balance account in “From” section and a specific Sub-Balance account in the “ To” section.
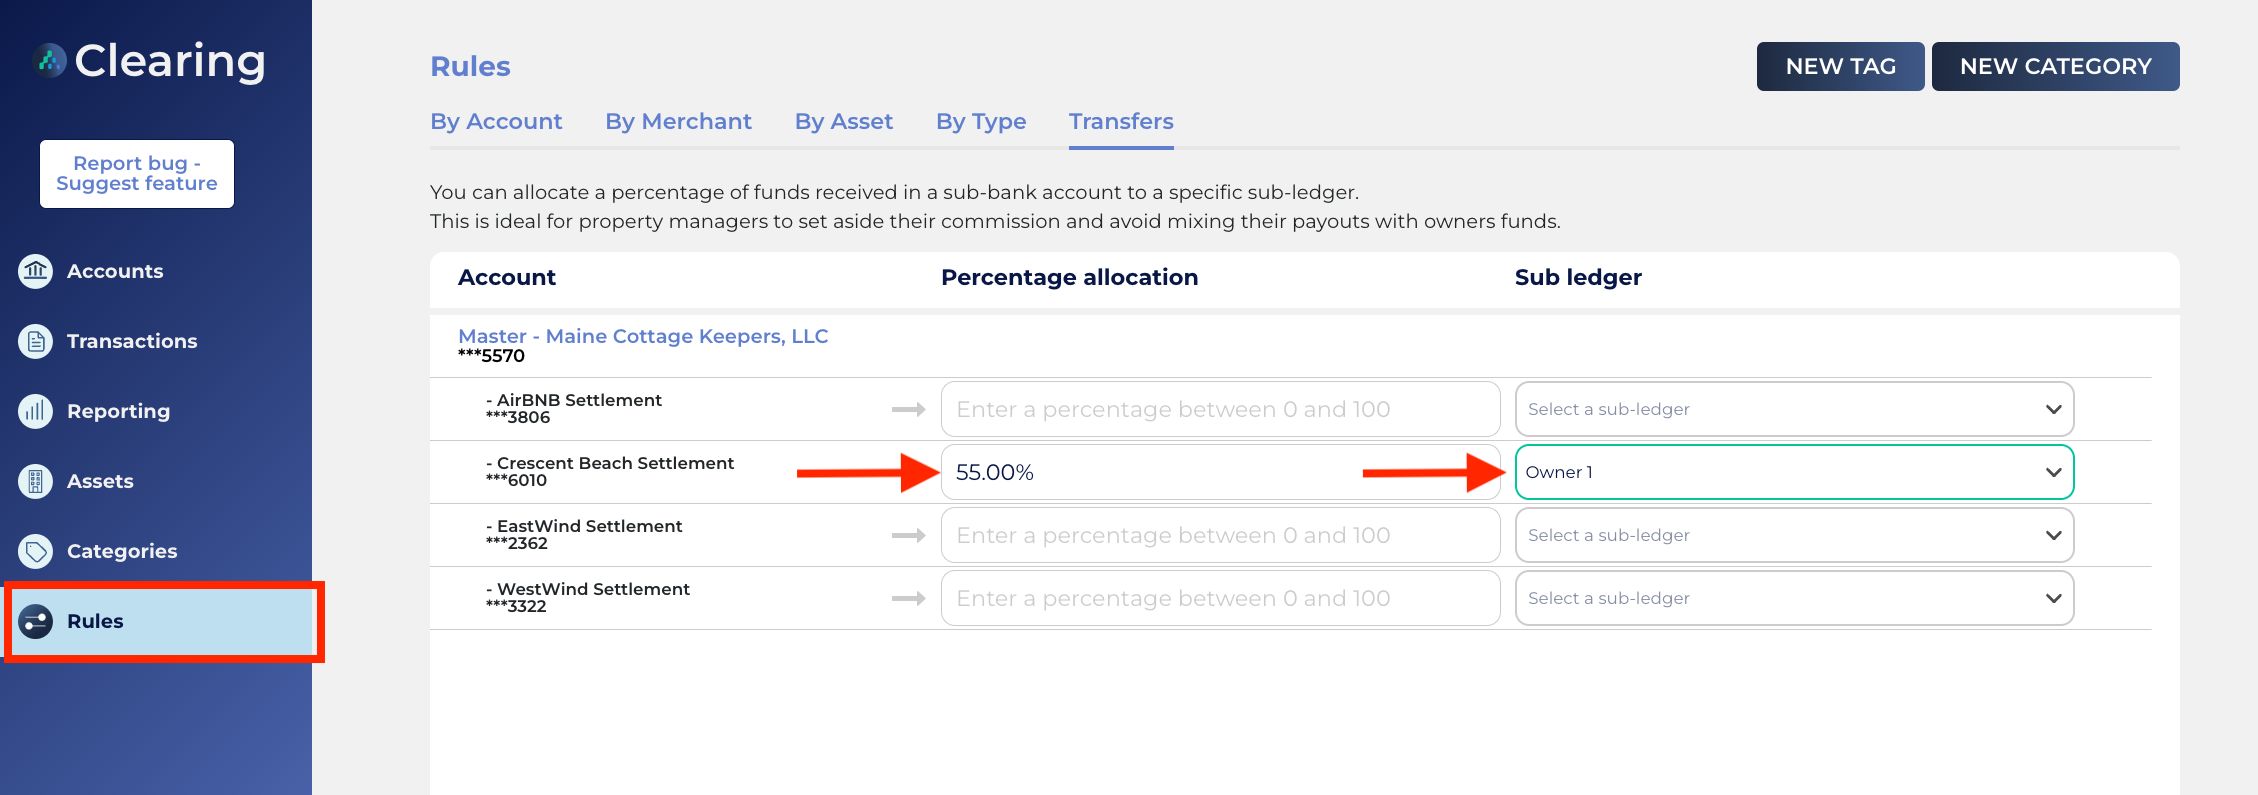
Step 4: Automate the Process
Automate trust accounting by creating rules that automatically transfer funds from zero-balance accounts to specific Sub-Balances. For more information on setting up rules, please refer to the knowledge article dedicated to rules.
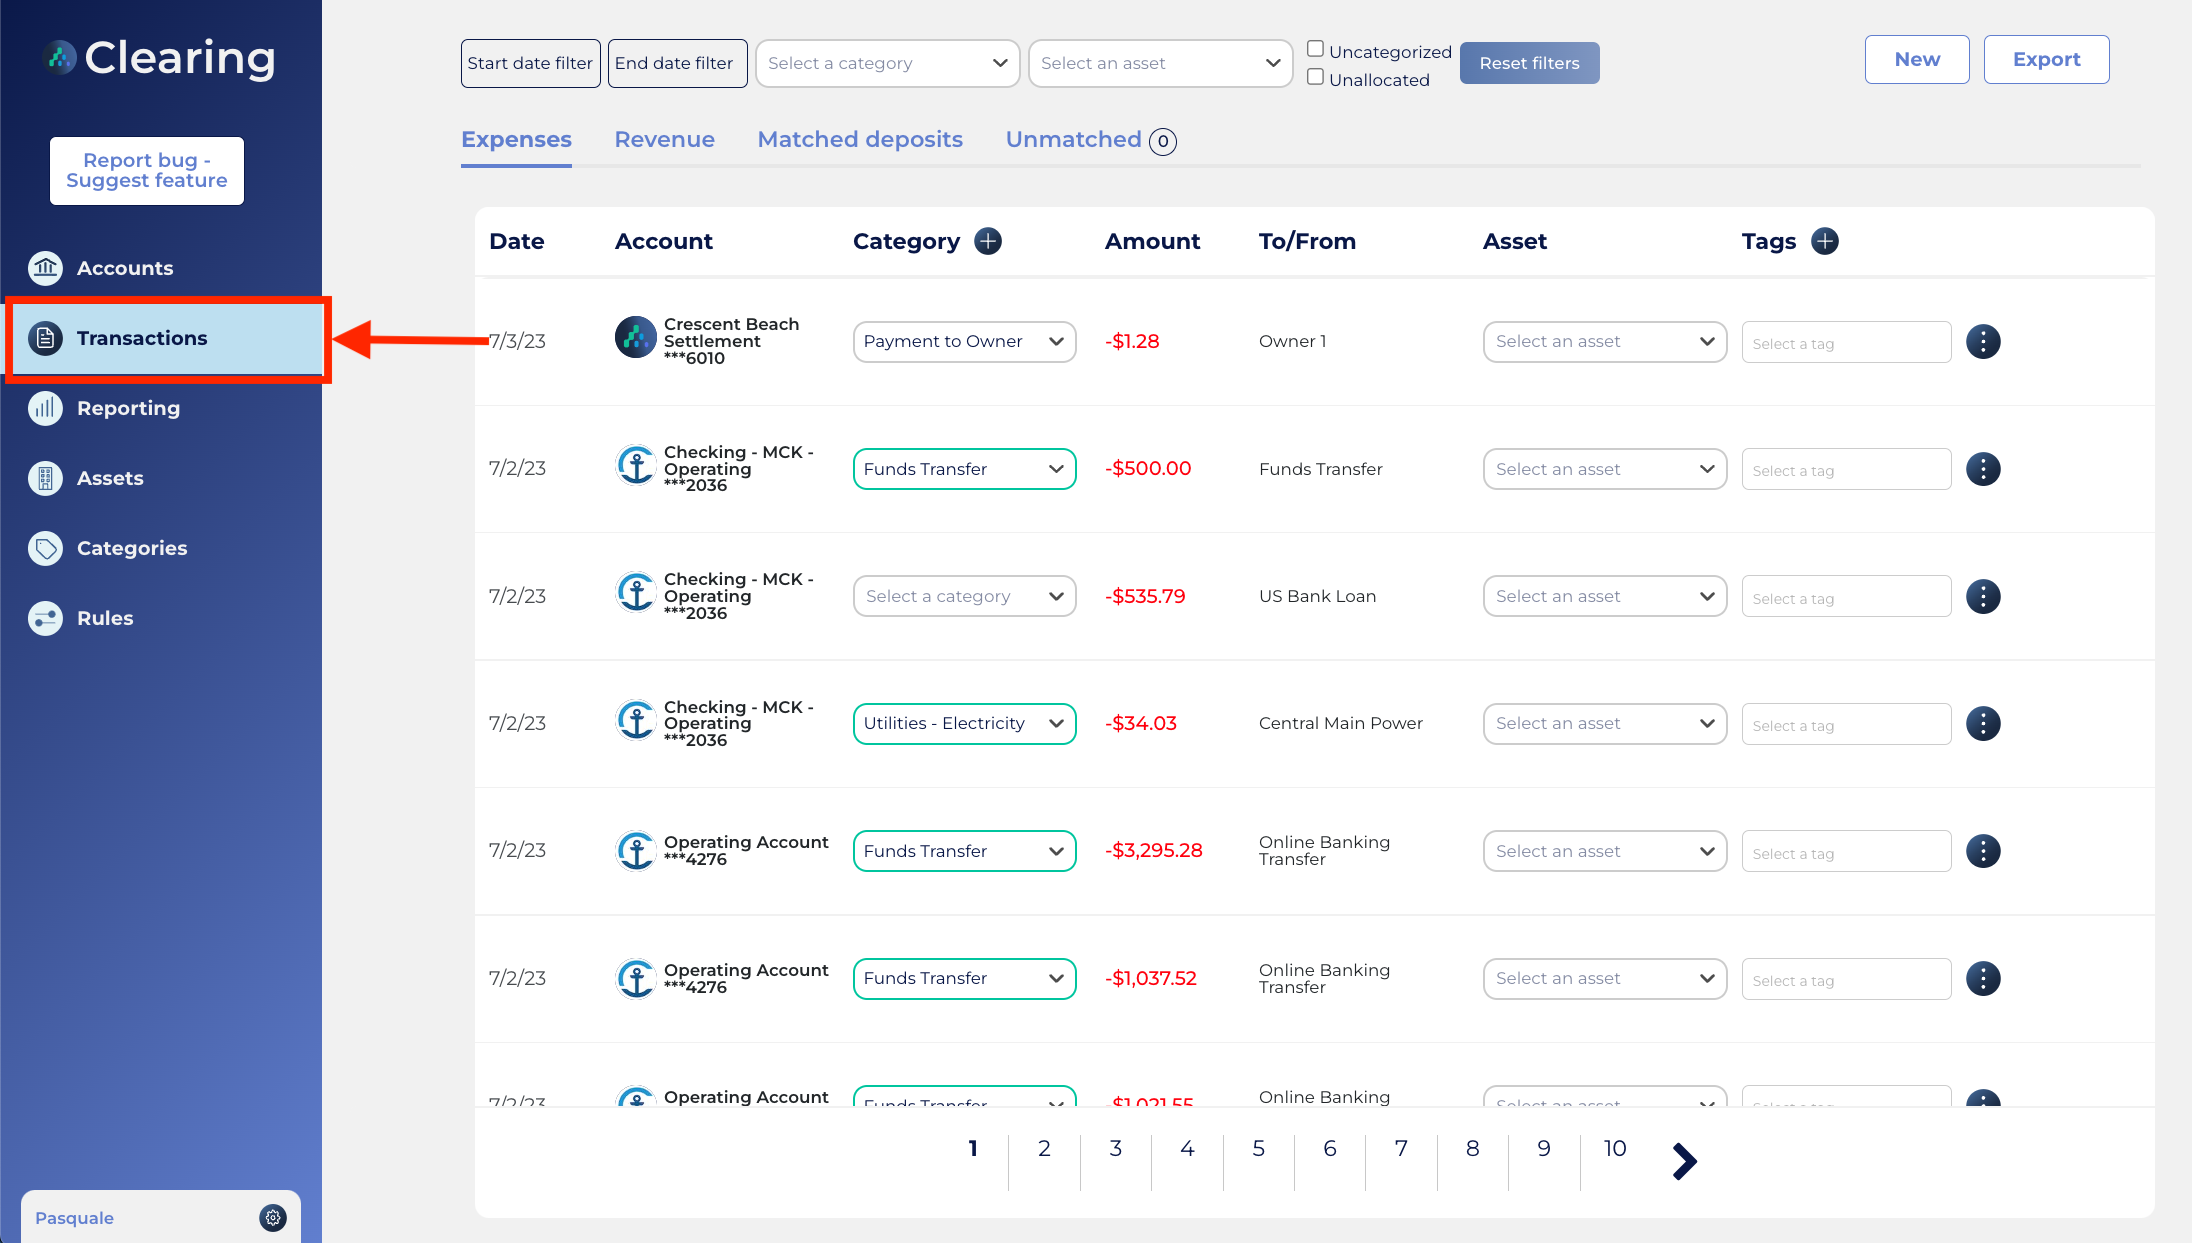
Additionally, you can monitor the inflow and outflow of funds within each Sub-Balance by navigating to the “Transactions’ section.
Enjoy the benefits of Clearing's Sub-Balances feature and upgrade your financial management practices by separating funds, grouping funds for specific properties, and providing owner visibility into your fund management for each of the properties they own.
Ready to unlock the full potential of Clearing' Sub-Balances and revolutionize your fund management?
Request a free live demo to explore this feature in more depth and learn how to utilize Sub-Balances effectively today.
Visit our comprehensive knowledge base to discover the power of Clearing's features and take control of your property finances to revolutionize fund management for your Short-Term Rental business.
Clearing is a Financial Technology Company, not a bank.


.png)
.png)


.png)
.png)
.png)

.png)

.png)

.png)
.png)
.png)
%20(1).png)
%20(1).png)
%20(1).png)
.png)
%20(2).png)
%20(1).png)
%20(1).png)
.png)

.png)
.png)
.png)
%20(1).png)
.png)
.png)
.png)
.png)
.png)
.png)
.png)
%20(1).png)
.png)
.png)
.png)
%20(1).png)
%20(1).png)
%20(1).png)


.jpg)
%20(1).png)
%20(1).png)
%20(2).png)
%20(1).png)

%20(1).png)
%20(1).png)
%20(1).png)


%20(1).png)
%20(1).png)
%20(1).png)
%20(1).png)
%20(1).png)


%20(1).png)
%20(1).png)
%20(1).png)
%20(2).png)
%20(2).png)


%20(2).png)


%20(2).png)
%20(1).png)
.png)


%20(2).png)
%20(2).png)

.jpg)
.png)
.png)
.png)