
How to Upload Receipts to Expense Transactions for Bookkeeping Documentation in Clearing
Discover how to add receipts to expense transactions effortlessly in Clearing. Streamline expense management for your Short-Term Rental business.
September 11, 2023
Olivia
.png)
Efficiently managing expenses and maintaining proper documentation for Short-Term Rental property expenses is a vital aspect of successful property management. Property managers often struggle with the tasks of documenting expenses effectively and providing the necessary documentation for verifying expense transactions. Clearing offers a powerful solution to address these challenges by providing a centralized platform that simplifies the process of uploading receipts to property management expenses. This ensures that every expense is meticulously documented and reduces the risk of errors and disputes.
Clearing, a leading financial management platform for Short-Term Rental property managers, has introduced a receipt upload feature that allows property managers to effortlessly add receipts to expense transactions for bookkeeping documentation. This feature addresses the challenges associated with expense management and streamlines the process of documenting expenses properly for Short-Term Rental property businesses. Clearing is making it easier than ever for property managers to maintain impeccable records and enhance transparency for their Short-Term Rental business.
Simple Steps to Upload Receipts to Expense Transactions in Clearing
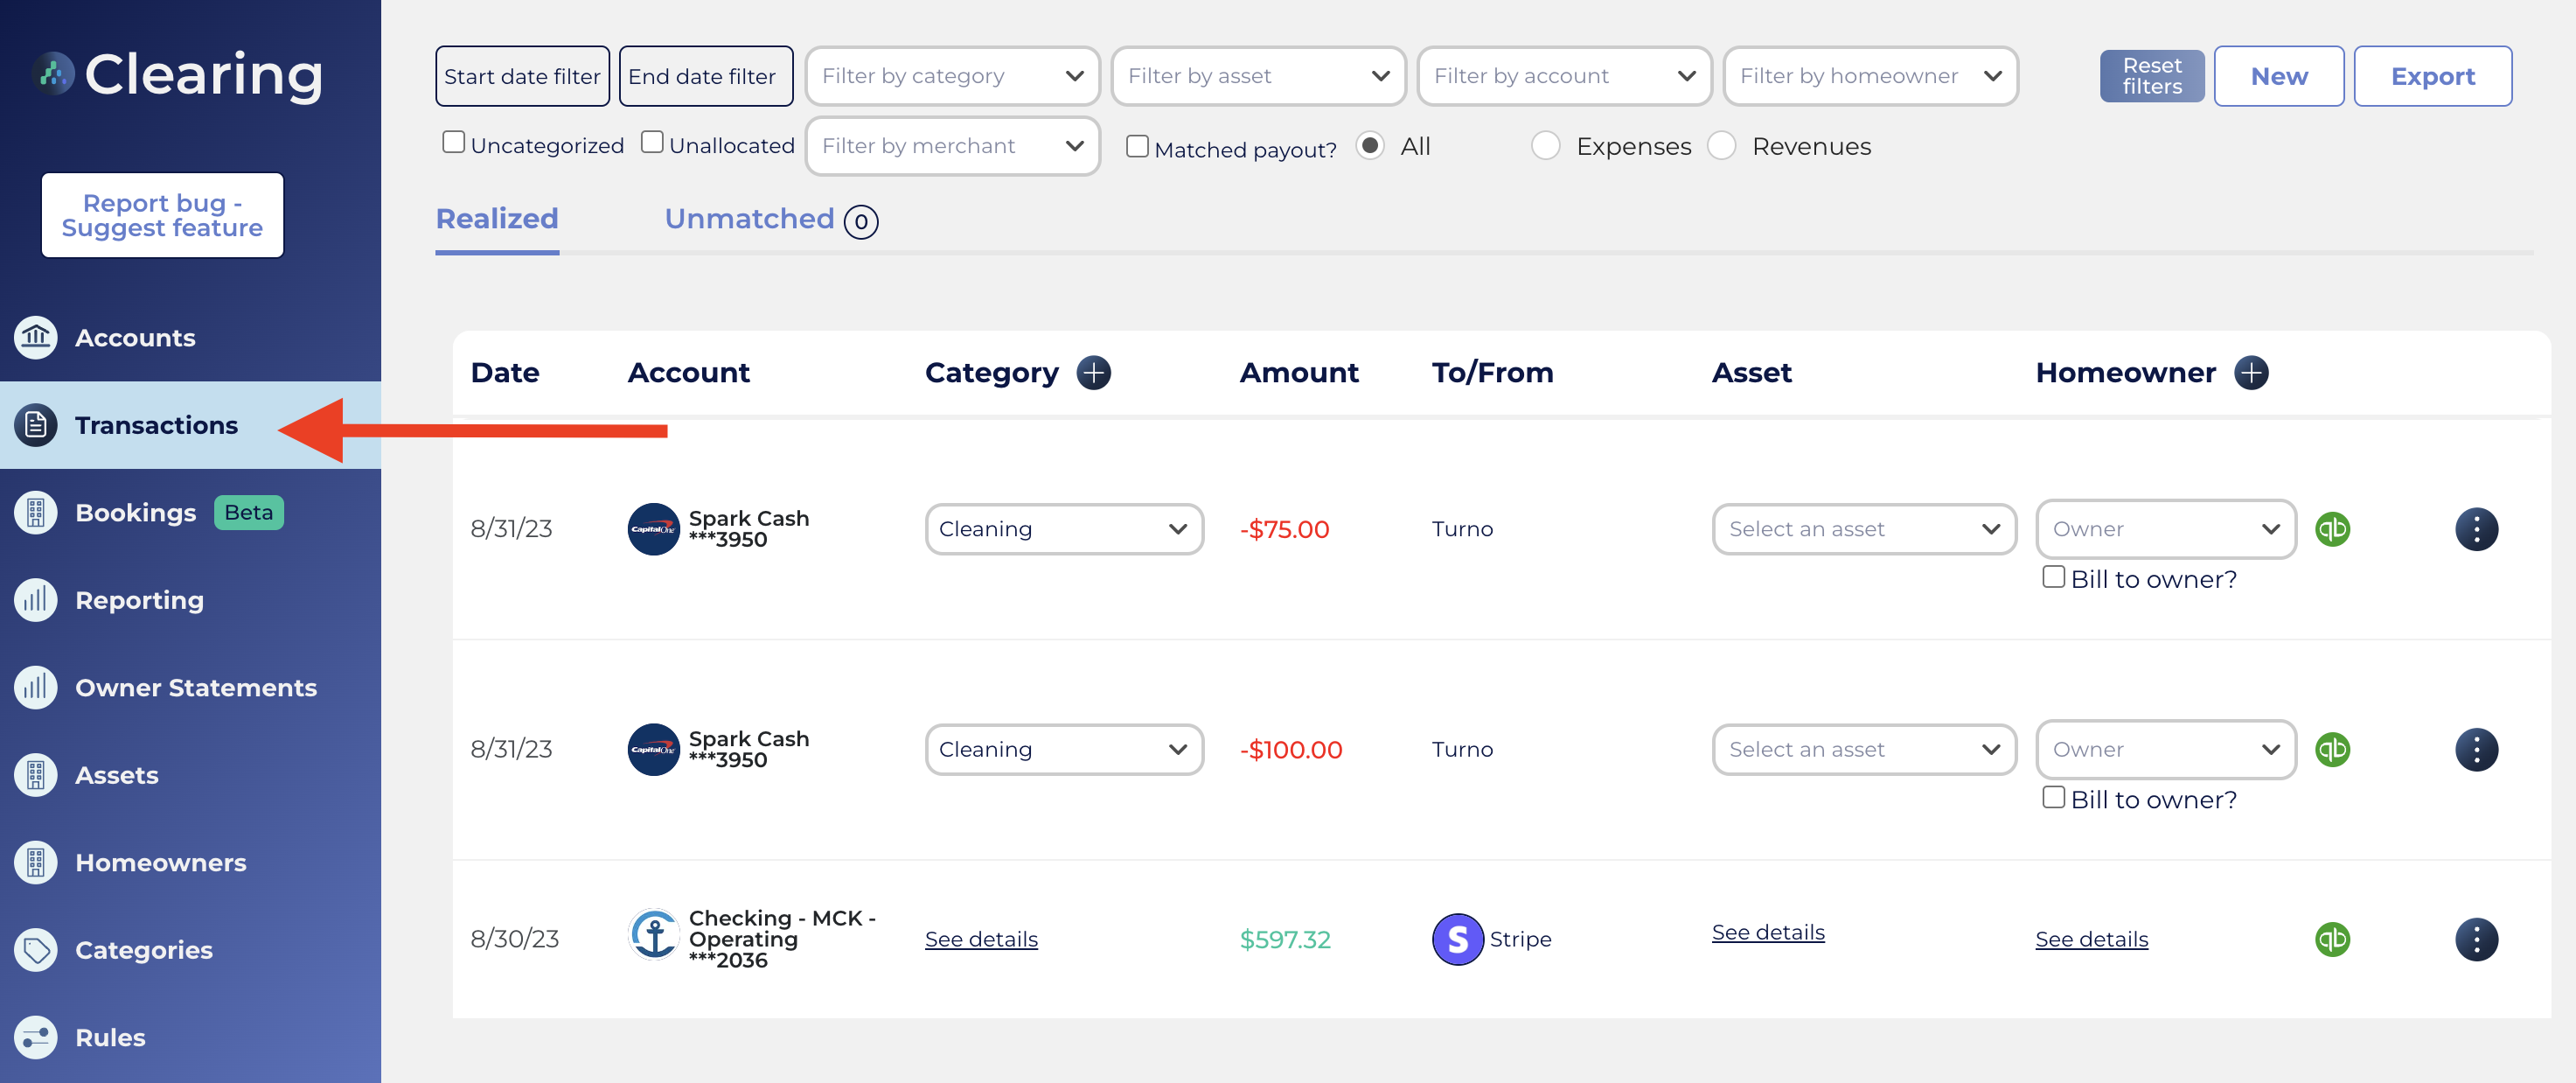
Step 1: Access the Transactions Section in Clearing
Log in to your Clearing account using your credentials and navigate to the “Transactions” section in the side menu. This is where you'll find a detailed overview of all your financial transactions.
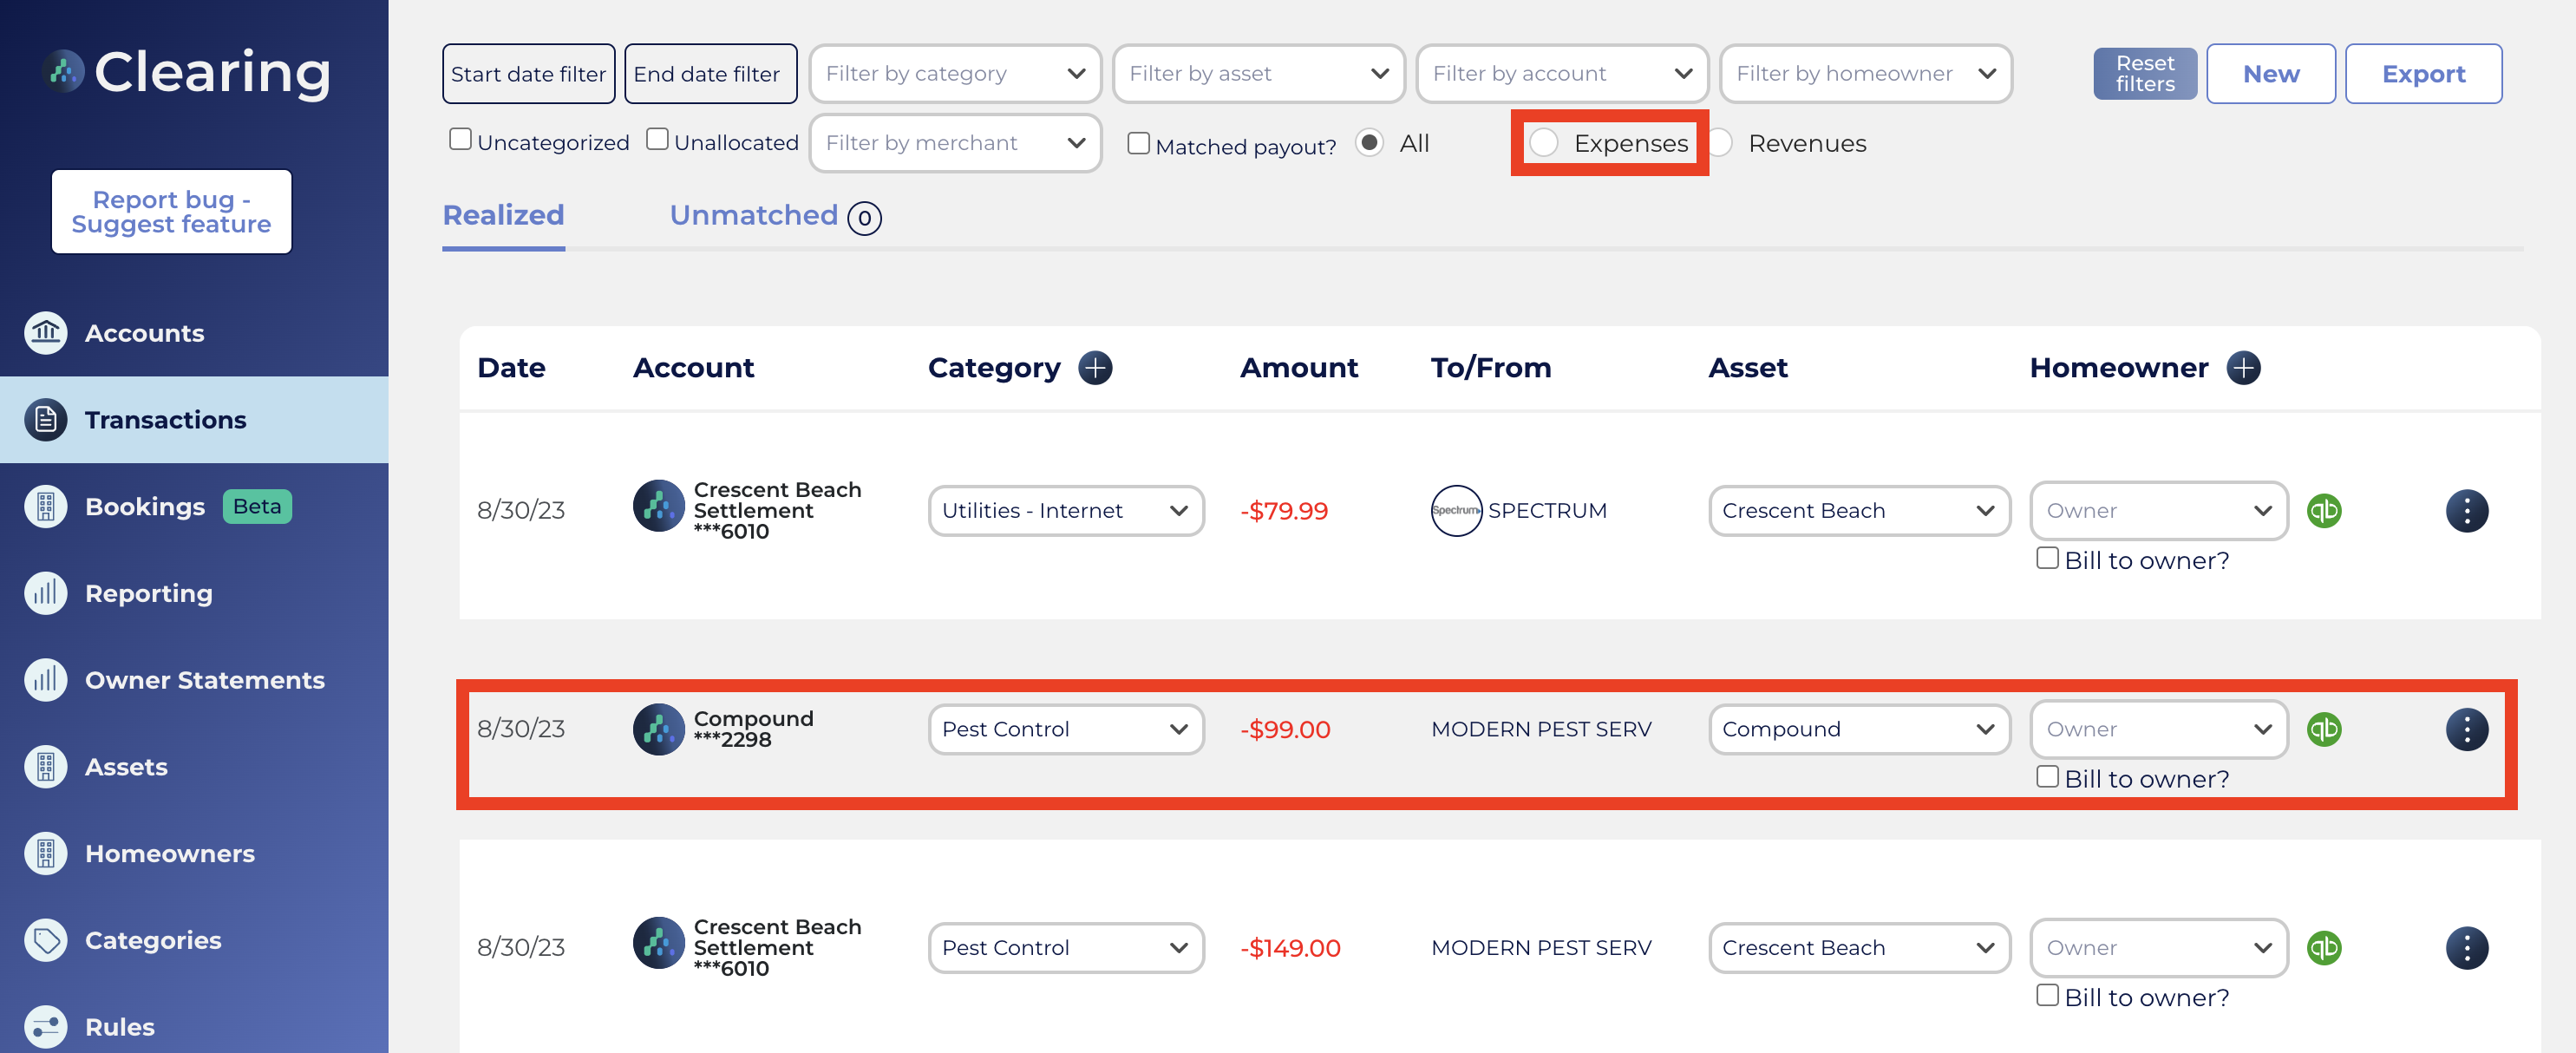
Step 2: Identify the Expense Transaction
Scroll through your transactions until you find the specific expense transaction to which you want to attach a receipt. Alternatively, you can filter for just expenses, through specific date ranges, to make this process easier.
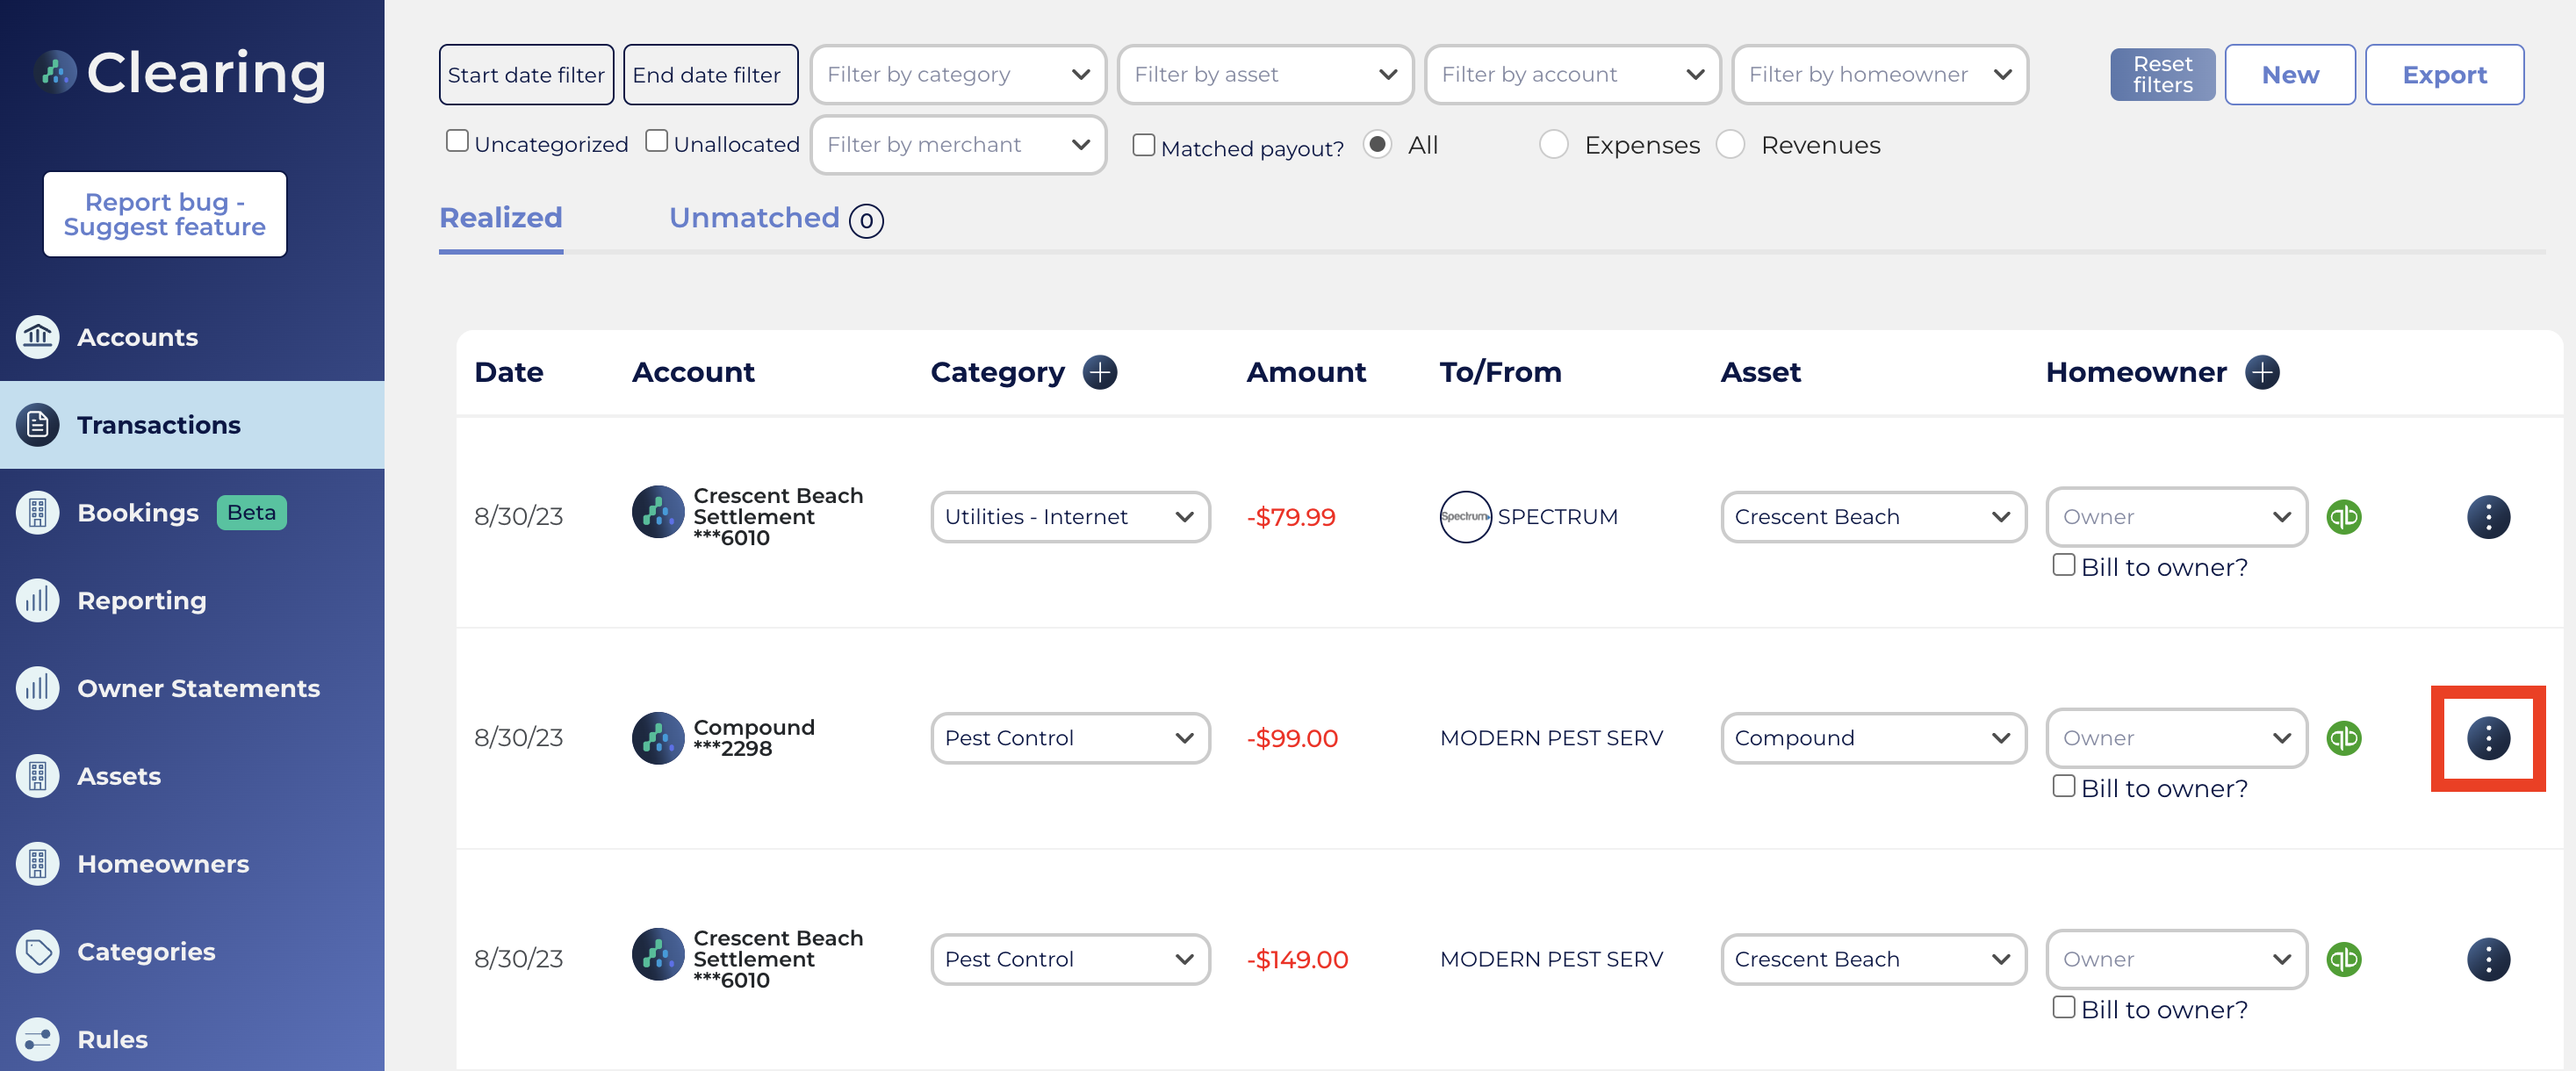
Step 3: Upload Your Receipt
Once you have selected the expense transaction to which you want to attach a receipt, click on the three dots option located inline with the selected transaction.
Clicking on three dots will take you to the "Transaction Details" page, scroll down the page and click on the "Upload” receipt option. Once click on the "Upload” receipt option, browse your device's files and select the receipt you wish to attach.

Take advantage of Clearing’s receipt upload feature and effortlessly add receipts to expense transactions. Streamline your expense management and bookkeeping documentation, maintain impeccable records, and enhance transparency in Short-Term Rental property management financial operations.
Ready to streamline your expense management with Clearing's receipt upload feature?
Request a live demo now and discover how to upload receipts to expense transactions for bookkeeping documentation in Clearing.
Visit our comprehensive knowledge base today to dive deep into Clearing's features and embark on a journey to revolutionize your expense management experience.
Clearing is a Financial Technology Company, not a bank.


.png)
.png)


.png)
.png)
.png)

.png)

.png)

.png)
.png)
.png)
%20(1).png)
%20(1).png)
%20(1).png)
.png)
%20(2).png)
%20(1).png)
%20(1).png)
.png)

.png)
.png)
.png)
%20(1).png)
.png)
.png)
.png)
.png)
.png)
.png)
.png)
%20(1).png)
.png)
.png)
.png)
%20(1).png)
%20(1).png)
%20(1).png)


.jpg)
%20(1).png)
%20(1).png)
%20(2).png)
%20(1).png)

%20(1).png)
%20(1).png)
%20(1).png)


%20(1).png)
%20(1).png)
%20(1).png)
%20(1).png)
%20(1).png)


%20(1).png)
%20(1).png)
%20(1).png)
%20(2).png)
%20(2).png)


%20(2).png)


%20(2).png)
%20(1).png)
.png)


%20(2).png)
%20(2).png)

.jpg)
.png)
.png)